WARNING
Changes may take up to 30 minutes to be reflected live on your site
Managing Tags
When enabled, Verada AI automatically generates AI-powered Product Tags for all products in your catalog. These tags are used in the Product Tag List and Product Tag Explorer widgets.
AI-generated tags can be manually overridden in the Portal. You can rename tags, add or remove products from a tag, or manage tags directly for a product.
To get started, navigate to Merchandising → Product Tags.
Product Tags Overview
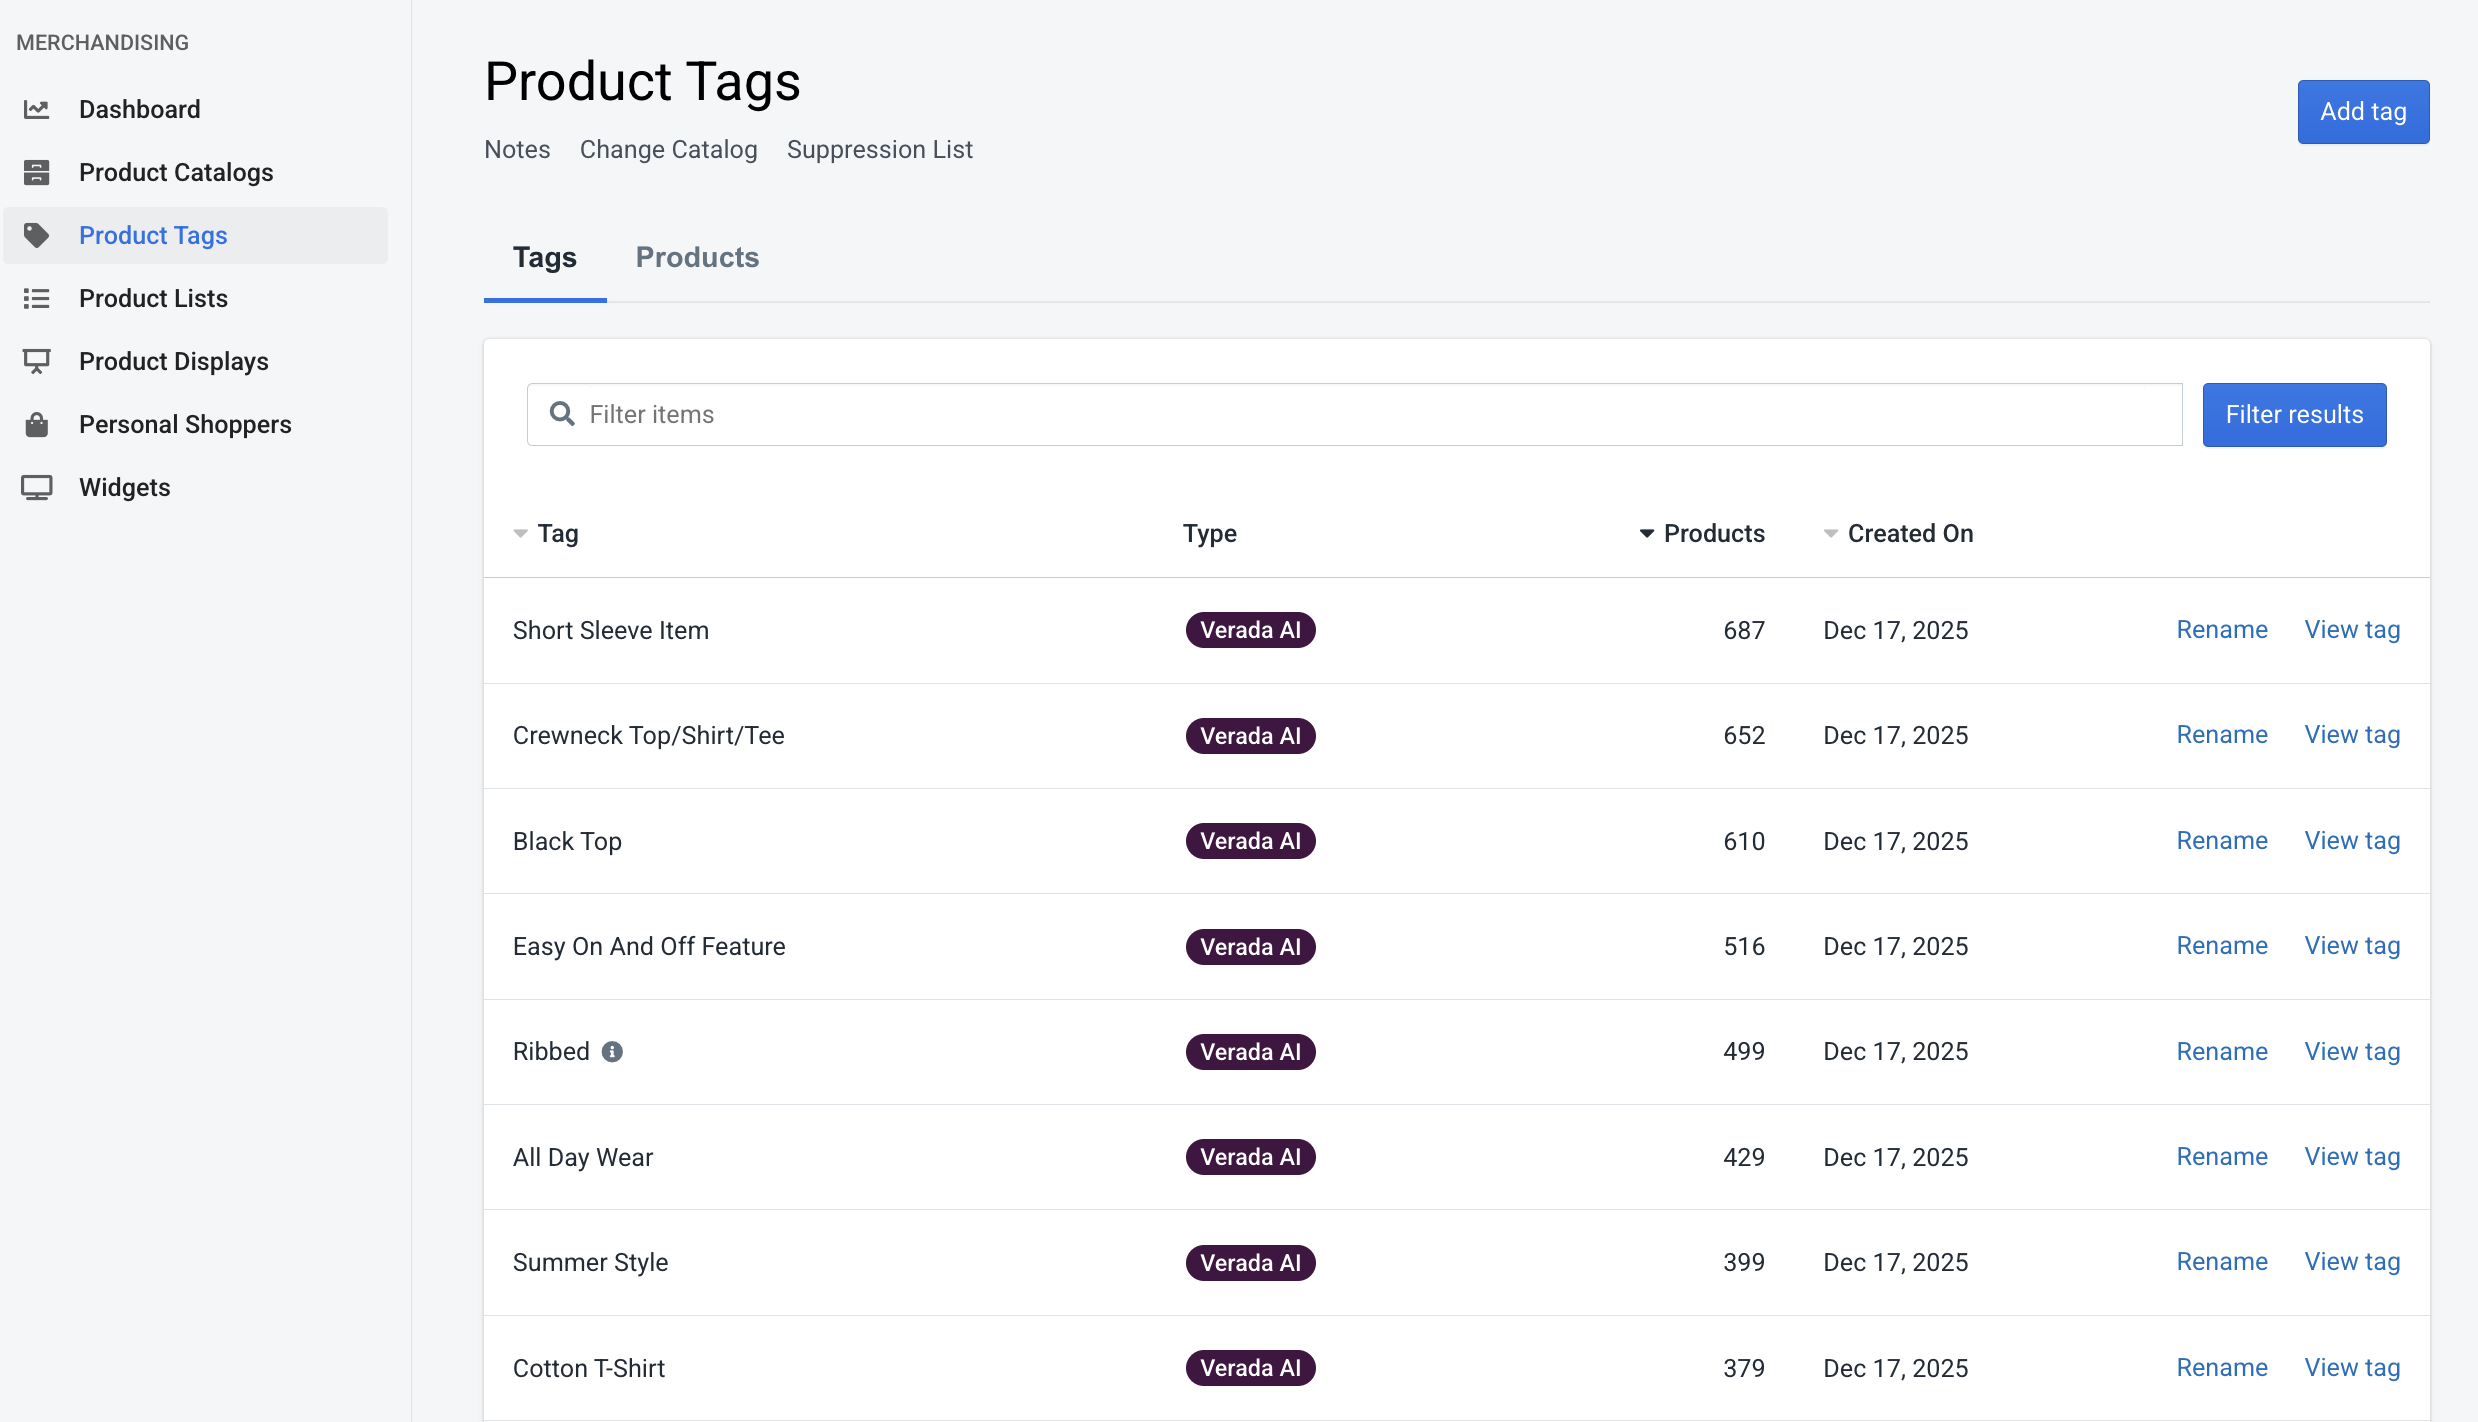
The Product Tags page displays all tags in the selected catalog.
Each tag row includes:
- Tag name
- Tag Type (created manually or via Verada AI)
- Number of products associated with the tag
- Date tag was Created On
- Actions to Rename or View tag
Clicking View tag opens the tag detail page, where you can customize the tag and manage its linked products.
 Product Tags List View
TIP
If you see an info icon next to a tag name, it indicates that the tag has been renamed from its original AI-generated value.
Product List View
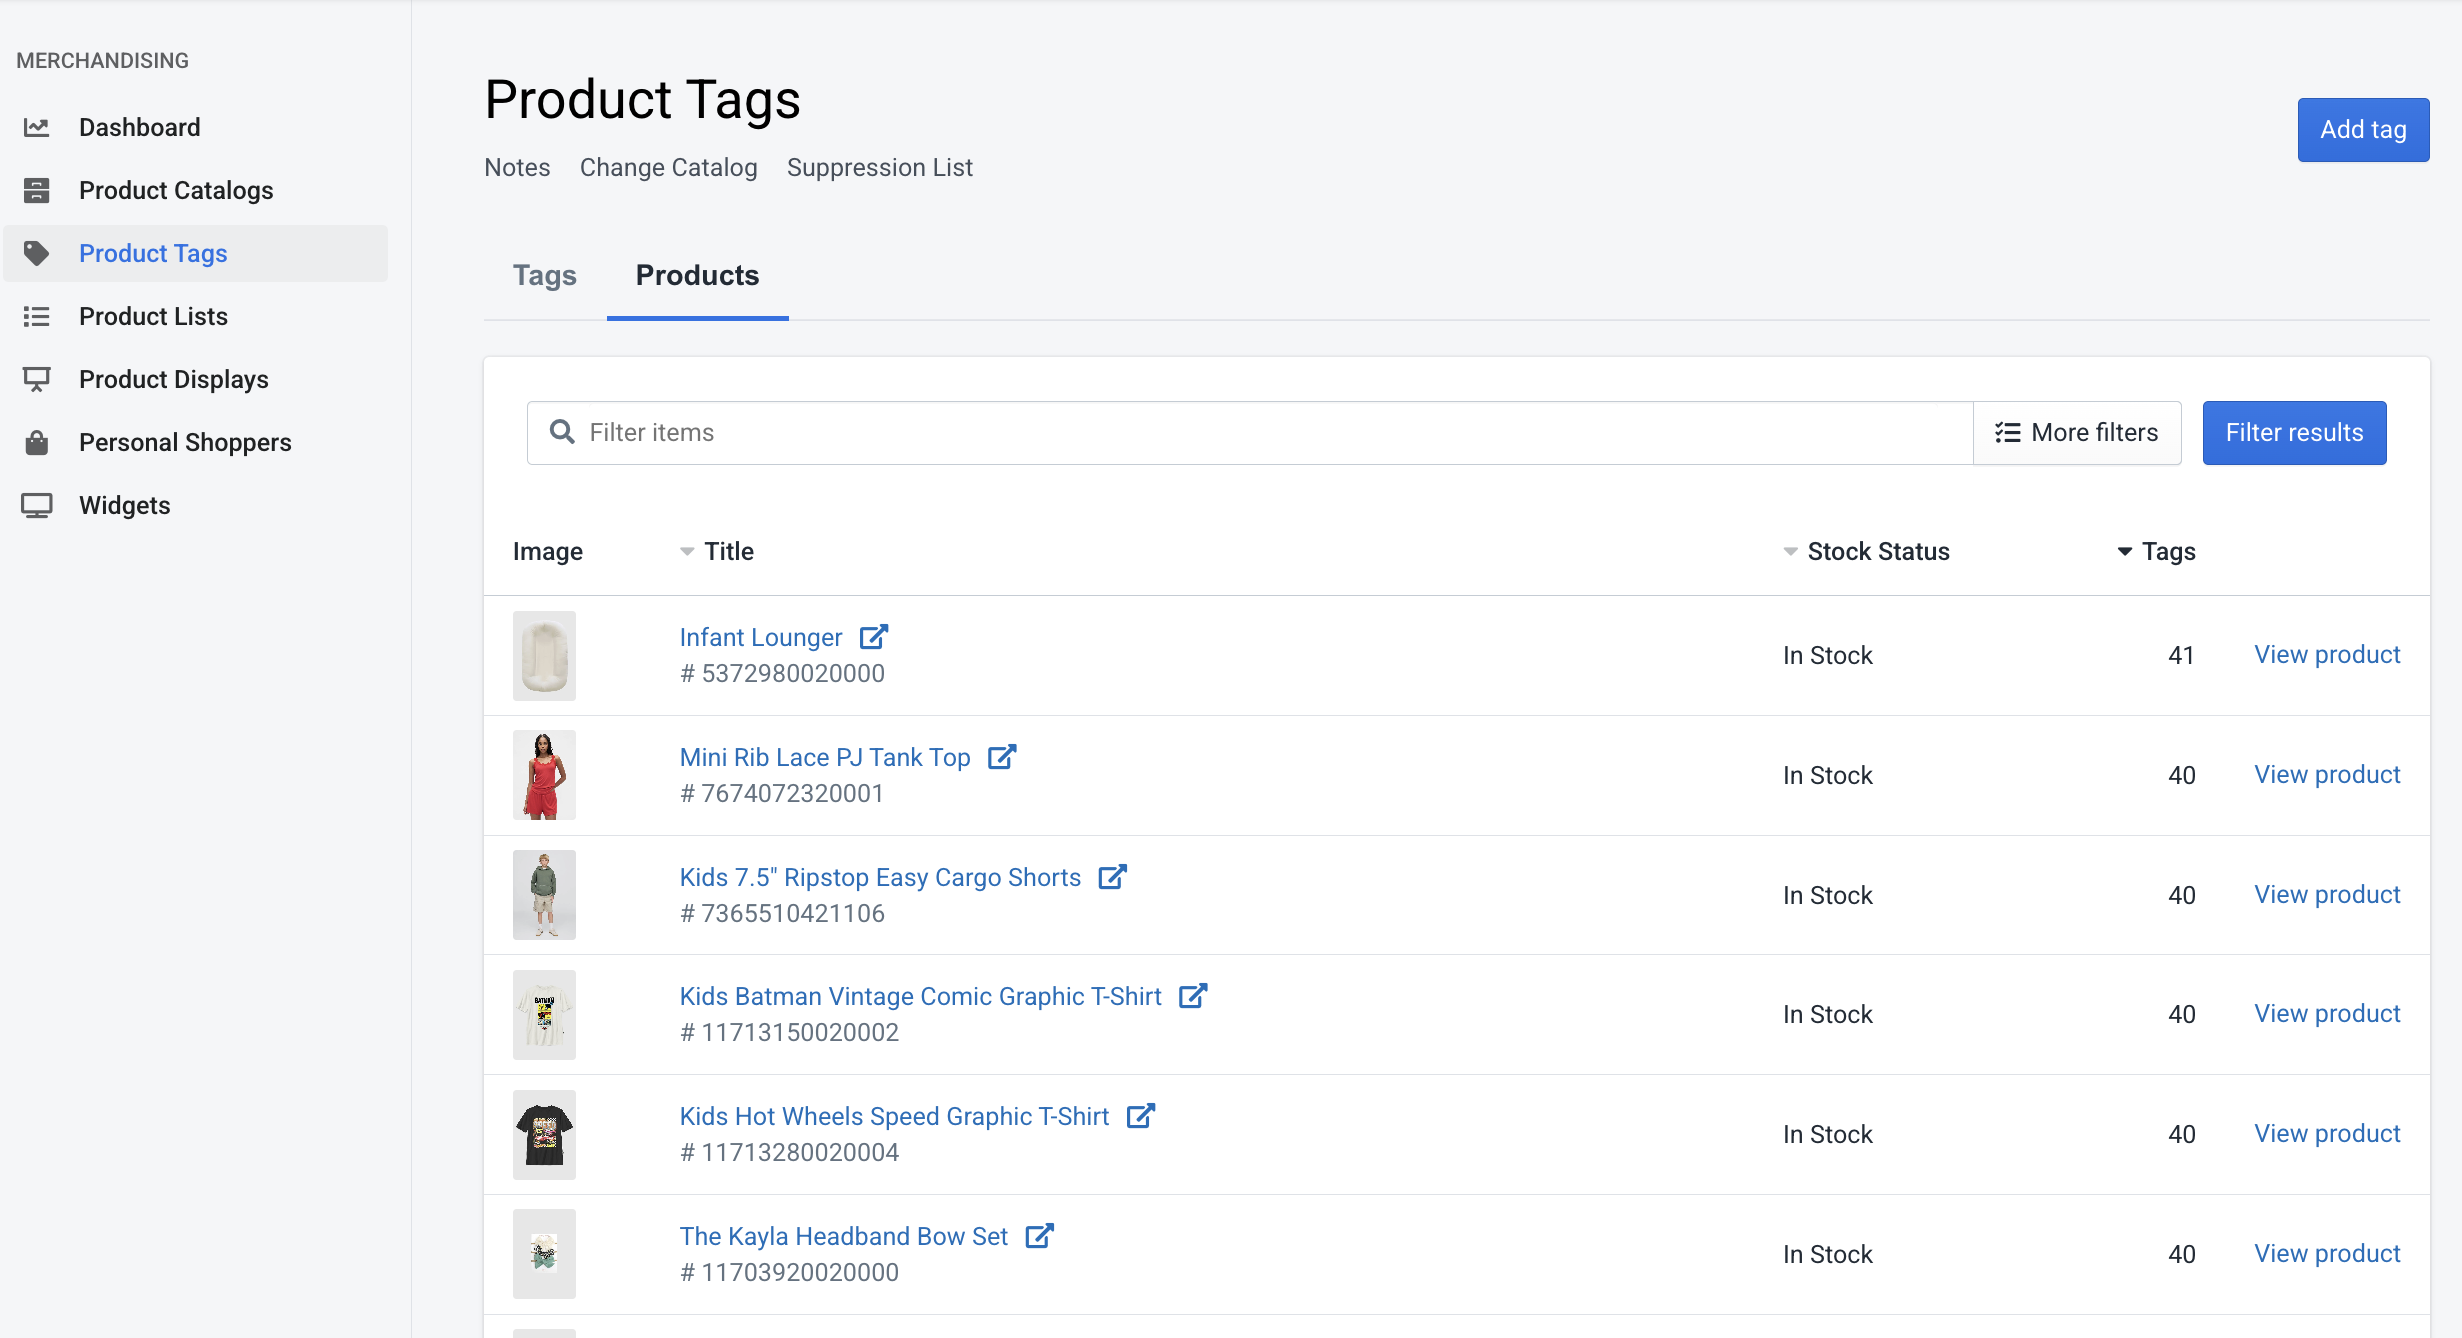
Using the tab selector near the top of the page, you can switch from the tag list to a product-centric view of your catalog.
Each product row includes:
- Product image
- Product title and ID
- Current stock status
- Number of tags linked to the product
- Action to View product
Clicking View product opens the product tag manager, allowing you to customize which tags are applied to that product.
 Product List View
In either view mode, you can:
- Filter tags or products using the search bar
- Create a new tag manually using the Add tag button
Creating / Renaming Tags
Creating or renaming a tag is as easy as assigning a new name to the tag. The system will then use your new tag name in place of the AI generated value.
Two tags cannot have the same value. This limitation applies to both the AI generated tag value and any overriden tag names. Be sure to search for a tag in the list prior to creating a new one to ensure it does not already exist.
Two Ways to Manage Tags
There are two primary ways to customize product tags:
- From the tag’s perspective – manage which products belong to a specific tag
- From the product’s perspective – manage which tags are applied to a specific product
Both approaches update the same data and can be used interchangeably.
Managing Tags from the Tag View
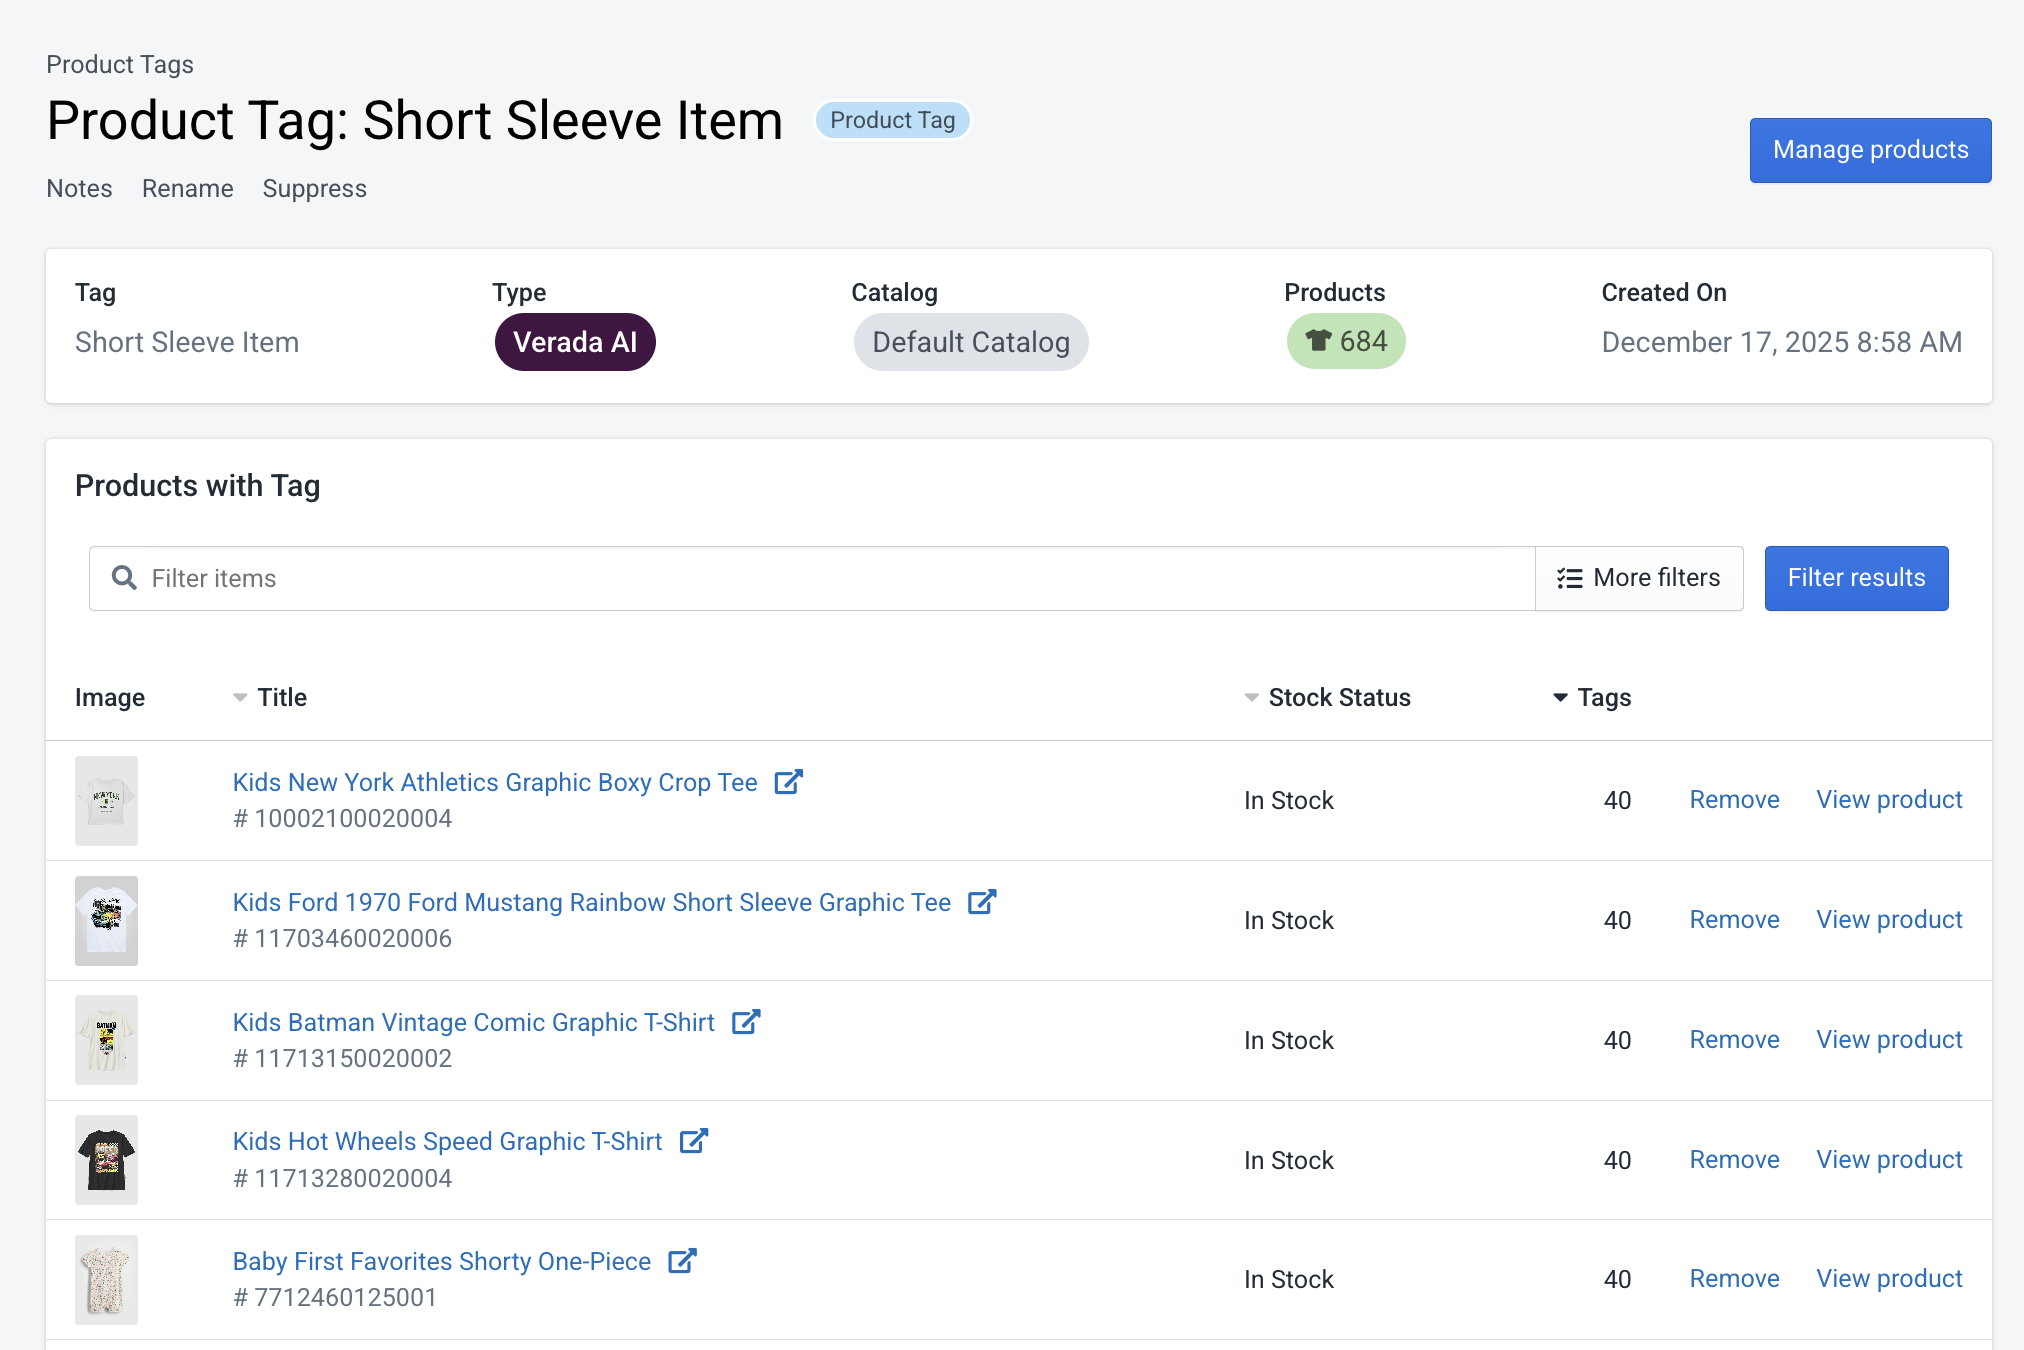
Click View tag on any tag to open the tag detail page.
This page displays:
- The tag name
- The tag type
- The catalog it belongs to
- The total number of products using the tag
- The creation date
- A list of all products currently associated with the tag
From this view, you can:
Rename a Tag
- Click Rename at the top of the page
- Enter a new name and save
This permanently overrides the AI-generated name for the tag. See Creating / Renaming Tags.
Manage Products in a Tag
- Click Manage products in the top-right corner
- A slide-out panel appears showing all products in the catalog
- Use the list to add or remove products from the tag
- Products associated with this tag will be marked with a green check icon
Remove Products from a Tag
- In the Products with Tag table, click Remove next to a product
- This is a shortcut for removing the product from the tag without opening the full product list
Navigate to a Product’s Tag Manager
- Click View product to jump directly to that product’s tag management view
 Tag Detail Page
Managing Tags from the Product View
You can also manage tags directly from an individual product.
From either the Product Tags product list or the tag detail page, click View product to see the product detail page.
This page displays:
- Product details (image, name, ID, catalog, stock status)
- The total number of tags currently linked to the product
- A list of all tags currently linked to the product
From this page, you can:
Manage Tags linked to Product
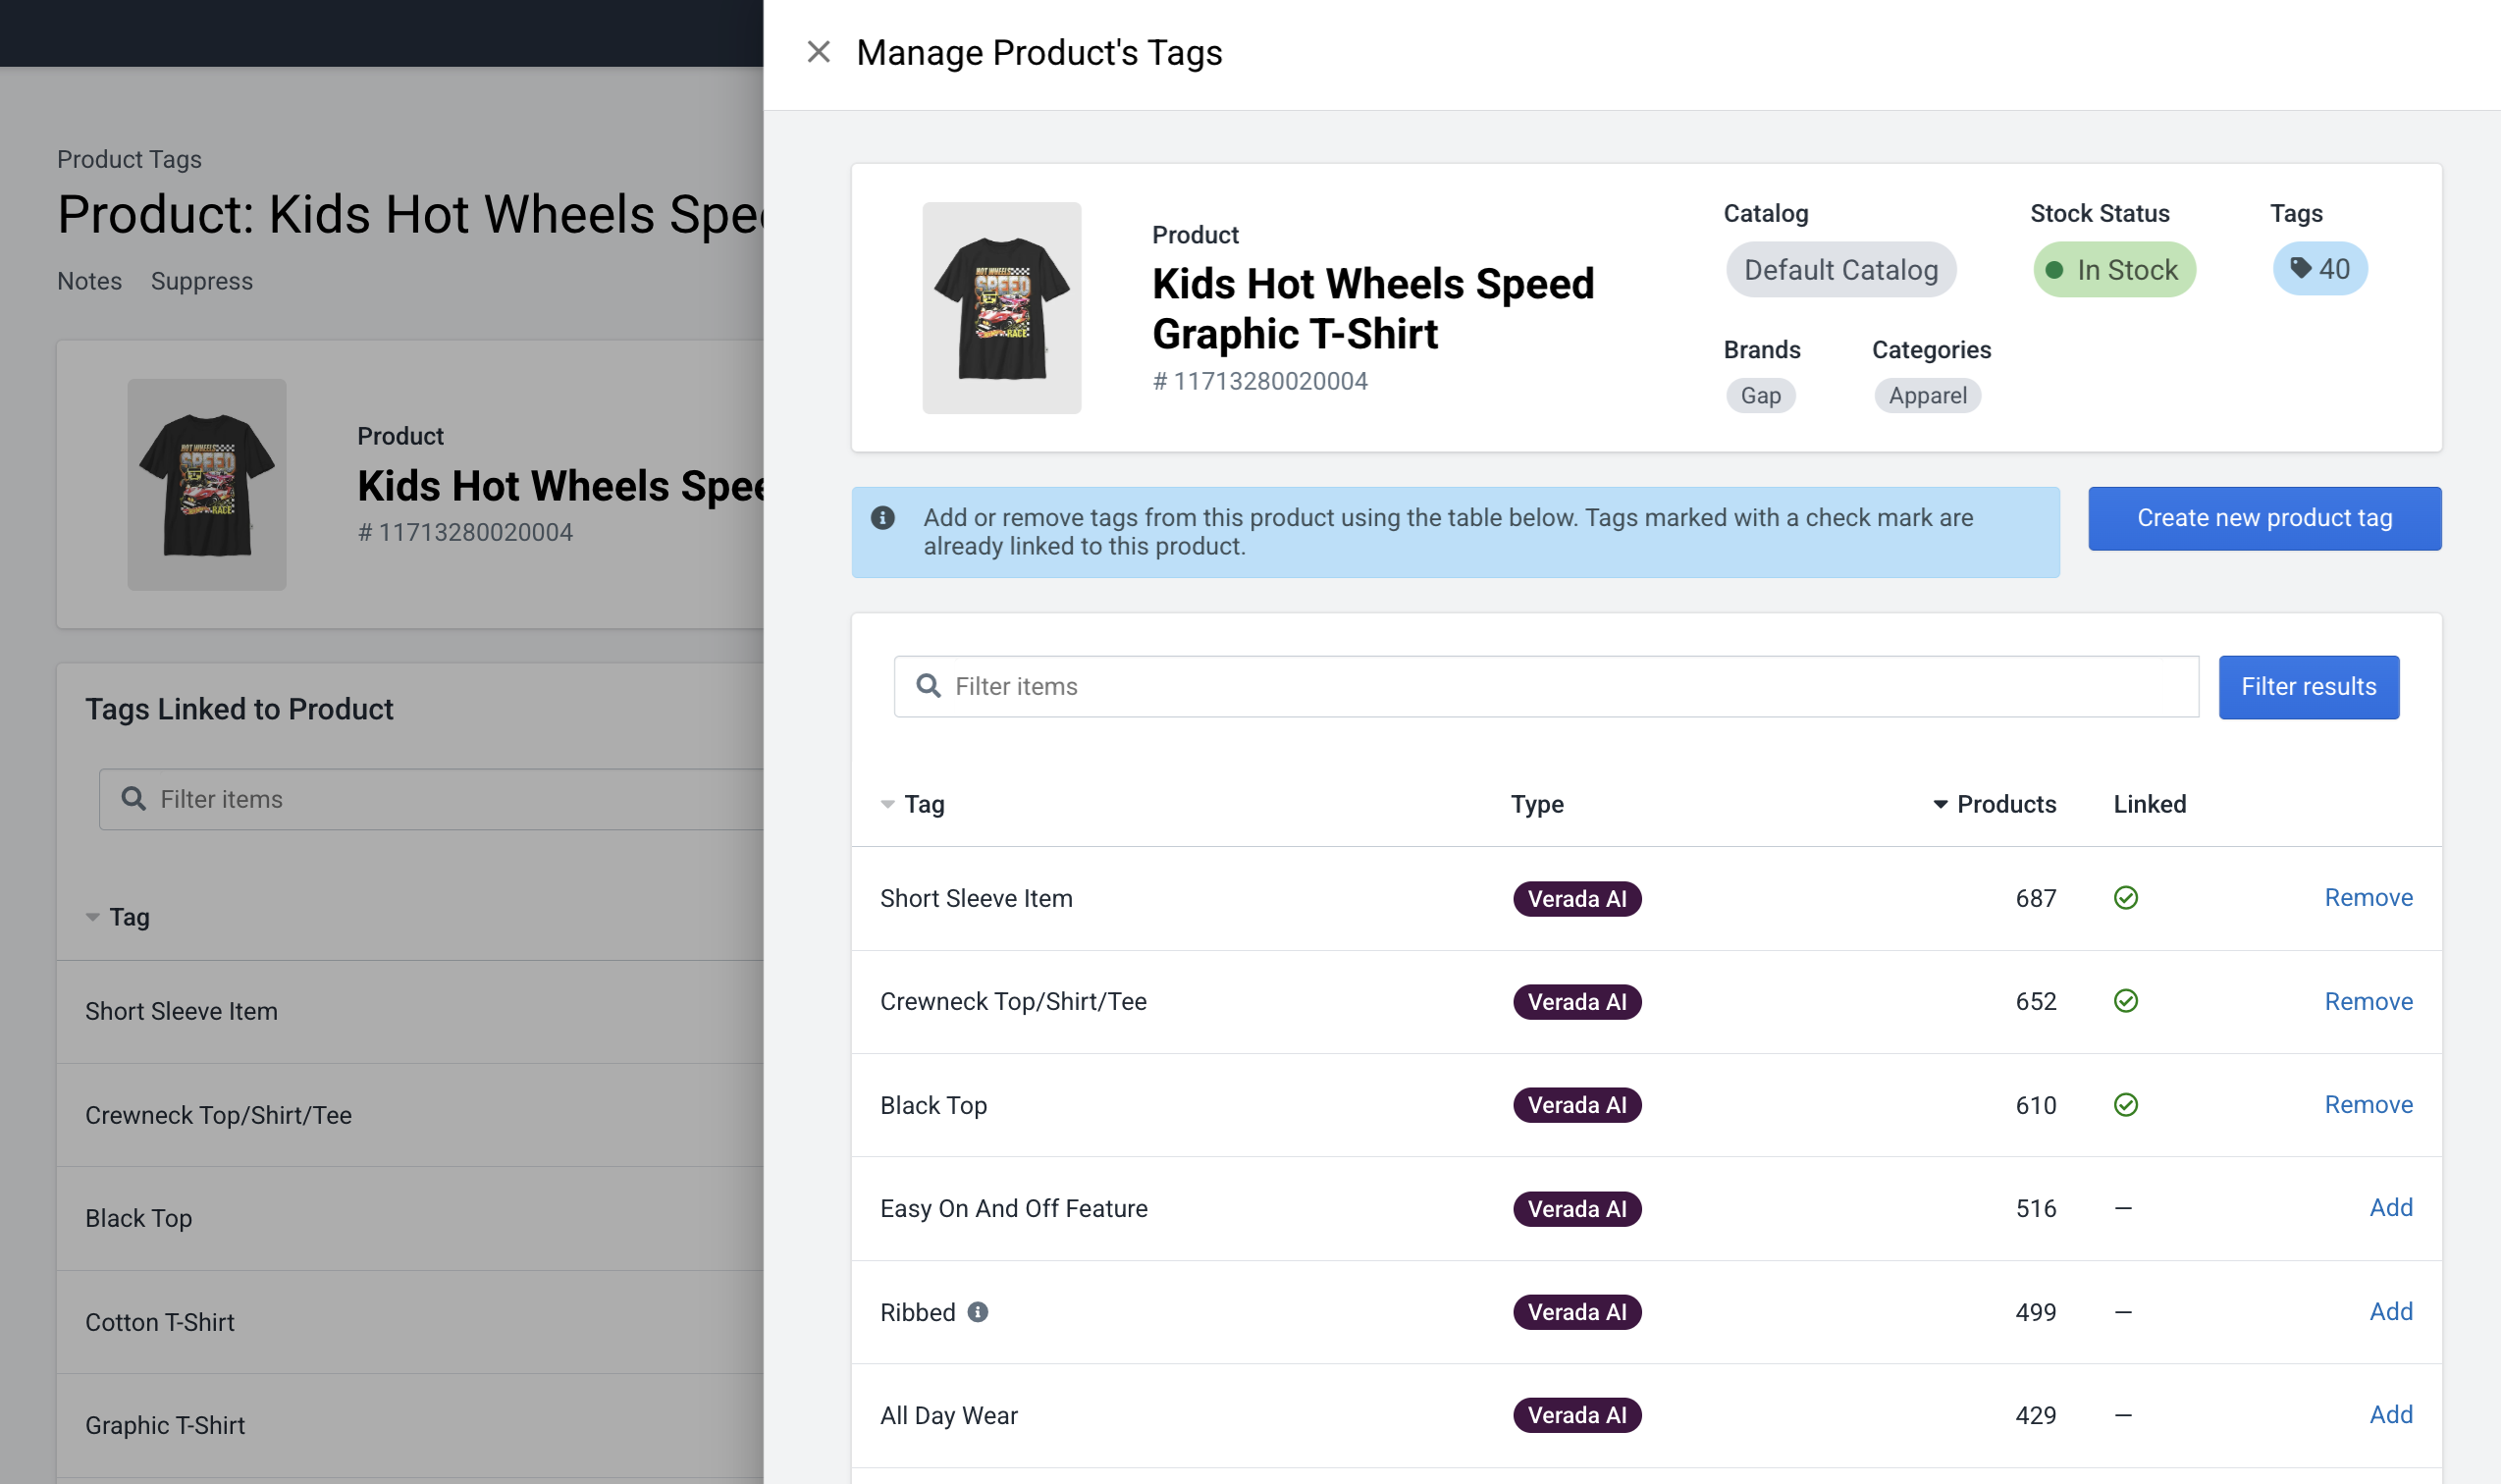
- Click Manage tags to open a slide-out editor
- From here, you will see a list of all tags on your catalog
- Use the list to quickly add or remove tags from the product
- Tags already associated with the product will be marked with a green check
- You can also click Create new product tag to add a new custom tag (which will be automatically linked to this product upon creation)
Remove a Tag from a Product
- Tags currently linked to the product show a Remove action
- Clicking Remove unlinks the tag from this product only
- This is a shortcut for removing the tag from the product without opening the full tag list
 Manage Product's Tags
Tag Bulk Import
Fanplayr provides the ability to manage product tags in bulk by uploading a CSV or text file. To access this feature, click "Upload list" at the top of the Product Tags screen.
1. Prepare Your File
Your import file defines relationships between products and tags. Each row represents a single product–tag connection.
- A product or tag may appear multiple times across rows.
- Each row should ideally represent a unique
Product ID+Tagcombination. - Duplicate rows are allowed and will be handled safely by the system.
Required File Format
Your file must exactly match the following structure (including headers):
Product ID,Tag
1234,Tag 1
5678,Tag 2
9012,Tag 3
You can download a correctly formatted example by clicking "Download sample file" in the upload dialog.
2. Upload Your File
Once your file is ready:
- Select your file using the file picker.
- Choose an upload method (see below).
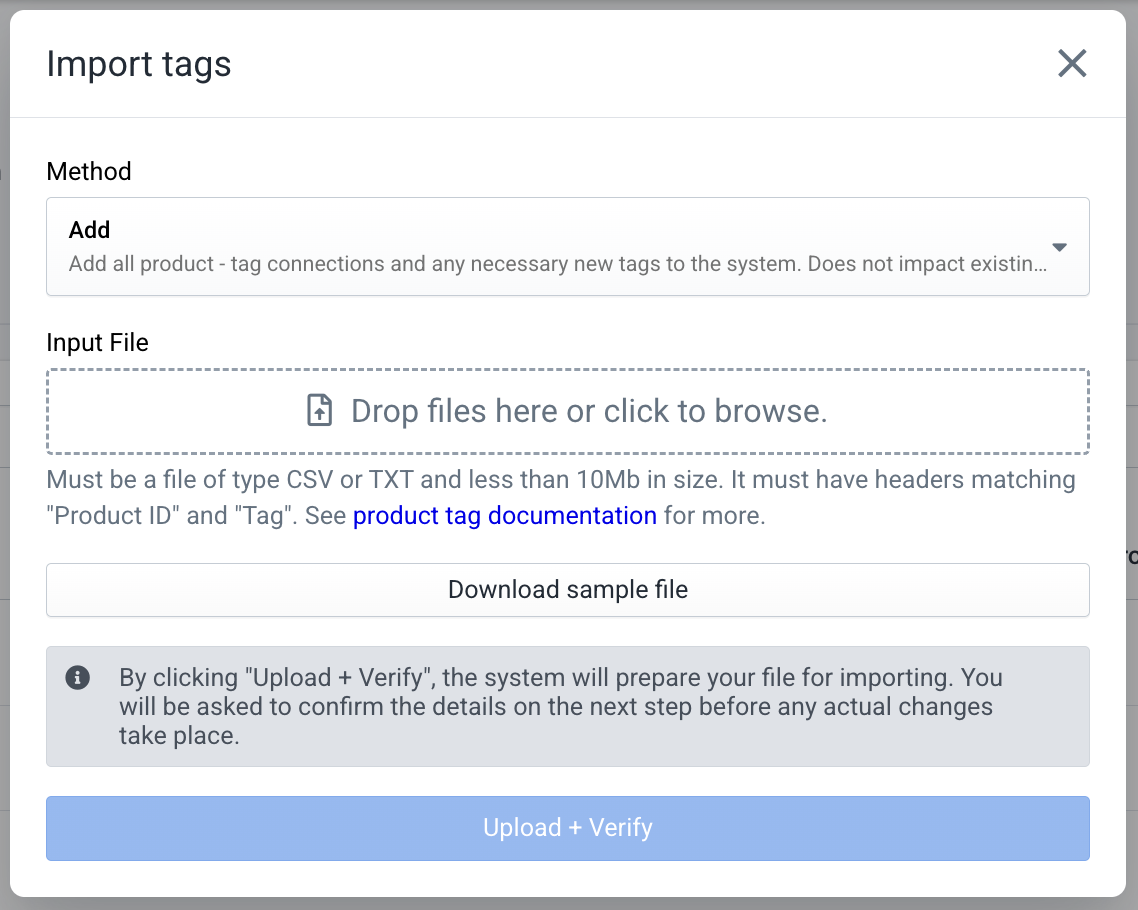 Upload file
Upload Methods
Add
Adds the product–tag connections from your file without modifying any existing manual tags.Replace
Replaces all existing manual product–tag connections with those in your file.- All current manual connections are removed first.
- The final state of your manual connections will exactly match the contents of your file.
Important Notes
- This process only affects manual tags and connections.
- Tags and connections generated by Verada AI are never modified or removed.
- If your file includes existing AI-generated tags or connections, they will remain unchanged.
- Tags themselves are never deleted, even if they end up with no associated products after import.
3. Verify Your Import
After clicking "Verify + Upload", the system will analyze your file and prepare the changes.
- No changes are applied at this stage.
- The system calculates what will be added, updated, or removed.
- A summary of expected changes will be displayed.
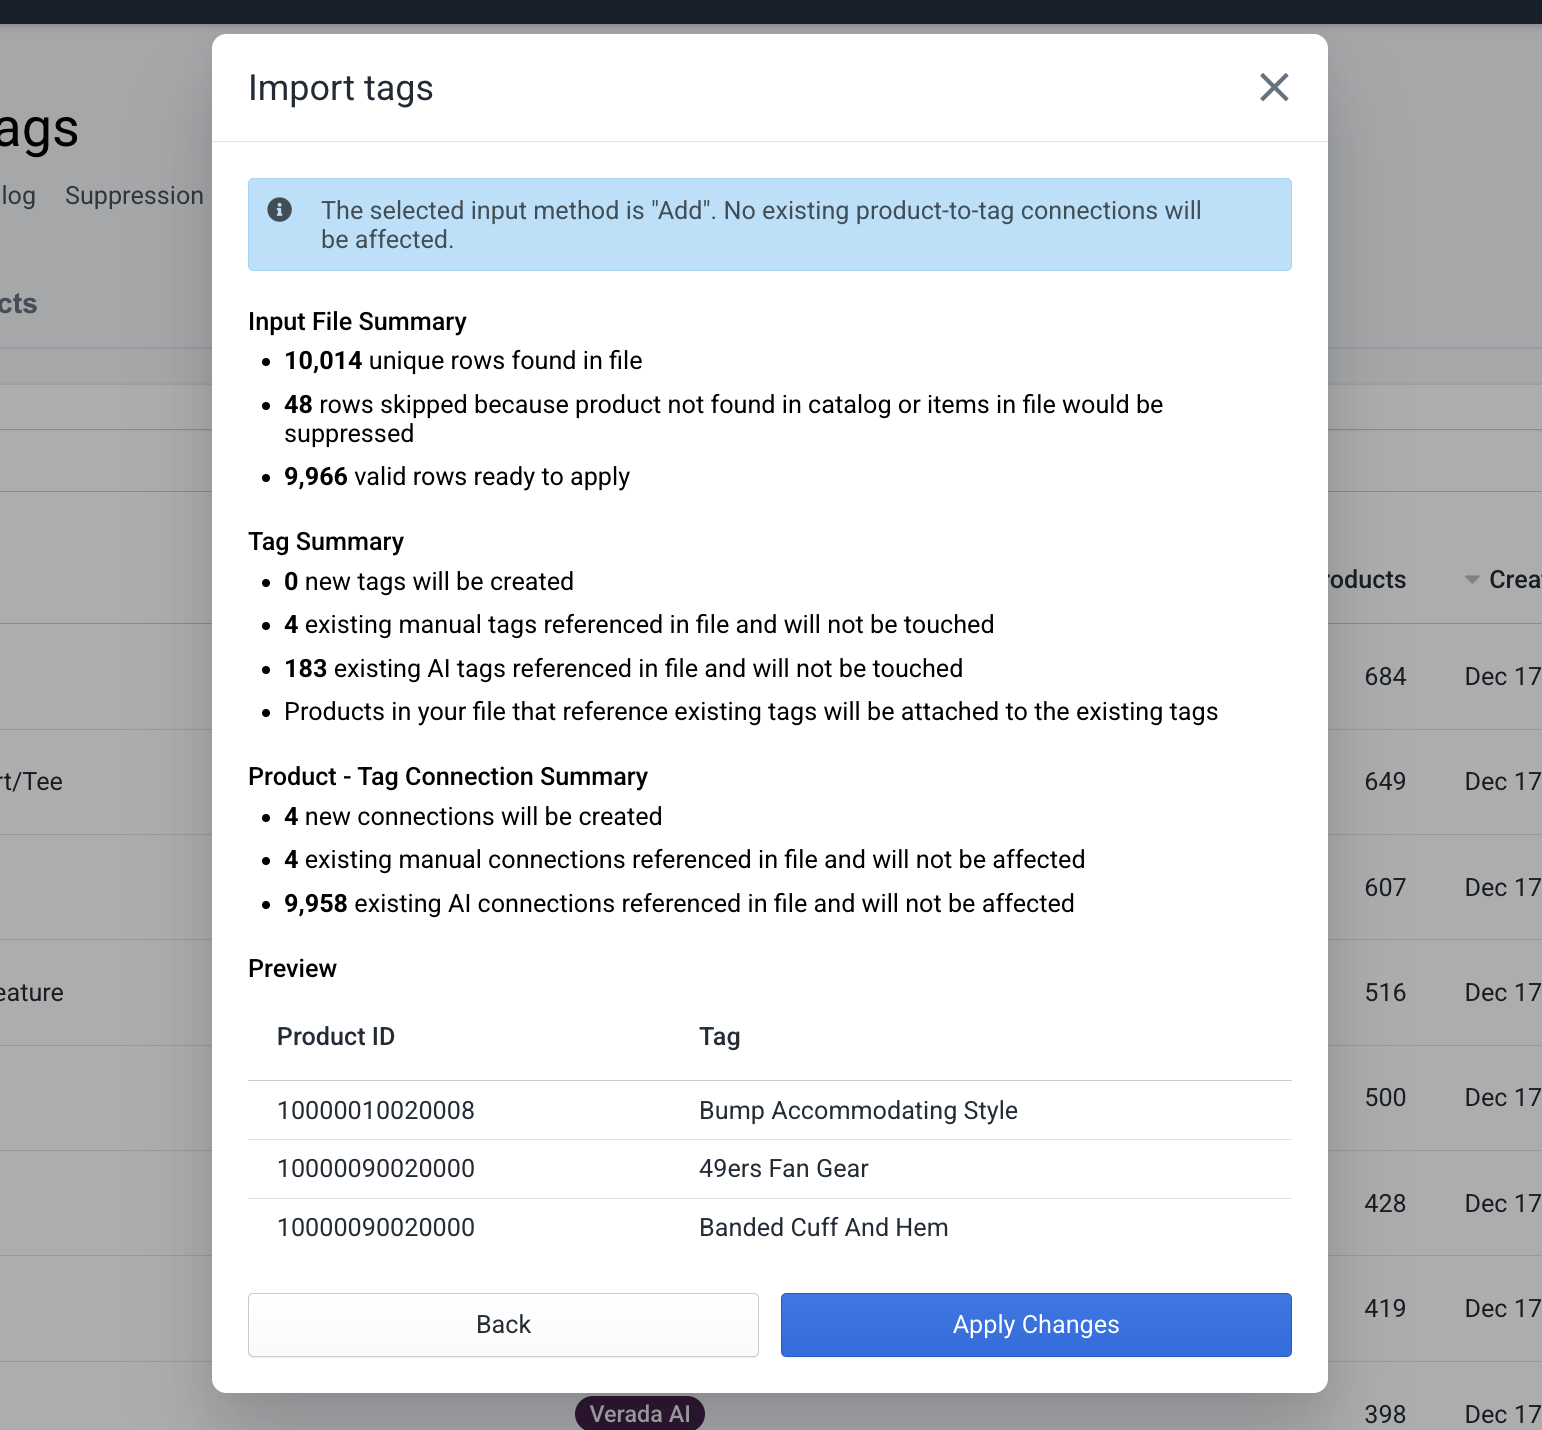 Verify import
4. Apply Changes
If the preview looks correct:
- Click "Apply Changes".
- The system will process the update.
- A confirmation screen will display the actual changes applied.
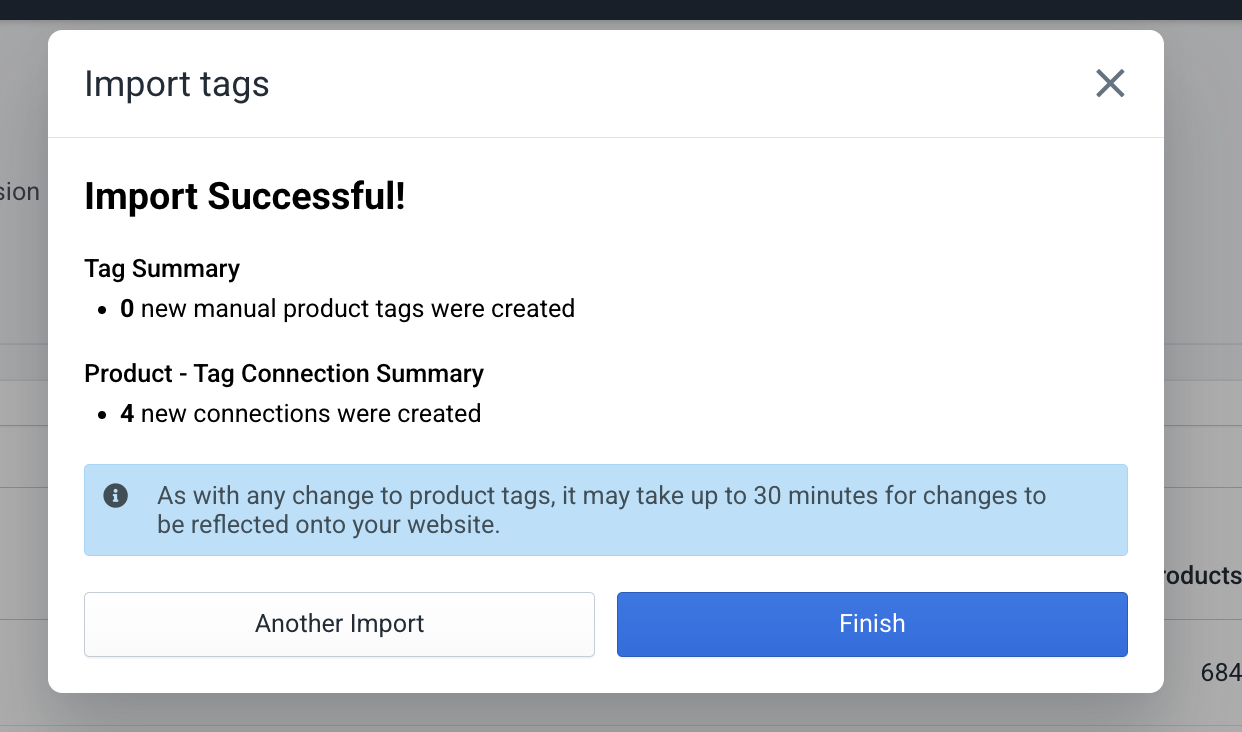 Changed applied
This ensures full visibility and control before any updates are made.
Summary of Supported Actions
Tags
- Create manually
- Rename manually
- Add to suppression list
- View to see all associated products
- Update by adding or removing products
- Bulk Add / Replae
Products
- View to see all linked tags
- Update by adding or removing tags
- Add to suppression list
- Create new tags (auto-applied on creation)
Notes
- Changes may take up to 30 minutes to be reflected live on your site
- All manual changes override AI-generated tag assignments
- Tags are catalog-specific and do not apply across catalogs