Basic AI Tags Tutorial
Follow this tutorial to create a basic AI tags widget. Before you get started check with your account manager that AI Tags are set up for your account and have been generated.
1. Your Store Setup
You will need a URL (page) to display your Tag Explorer, along with a location on the page to embed.
Tag Explorer Page
We suggest adding a page to your site that includes your normal template (menus etc) but no other content.
As an example we will be defining a page at https://mystore.com/tag-explorer.html with a div for embedding like this:
<div id="Product_Tag_Explorer"></div>
Note that the place where you embed the Product Tag Explorer should include your normal page margins and padding, but be allowed to resize as your normal content would. The Product Tag Explorer will take up as much room as required.
Tag List on Product Page
You will also need a place on your product pages to embed the tags. A div with an ID or class would be good:
Example: <div id="Product_Tag_List"></div>
2. Create Product Tag Explorer
Start by navigating to the "Merchandising" section of the portal and click "Widgets" in the left-hand sidebar. You will see a list of widgets (possible empty). From here, click "Add Widget" in the top right corner of the screen.
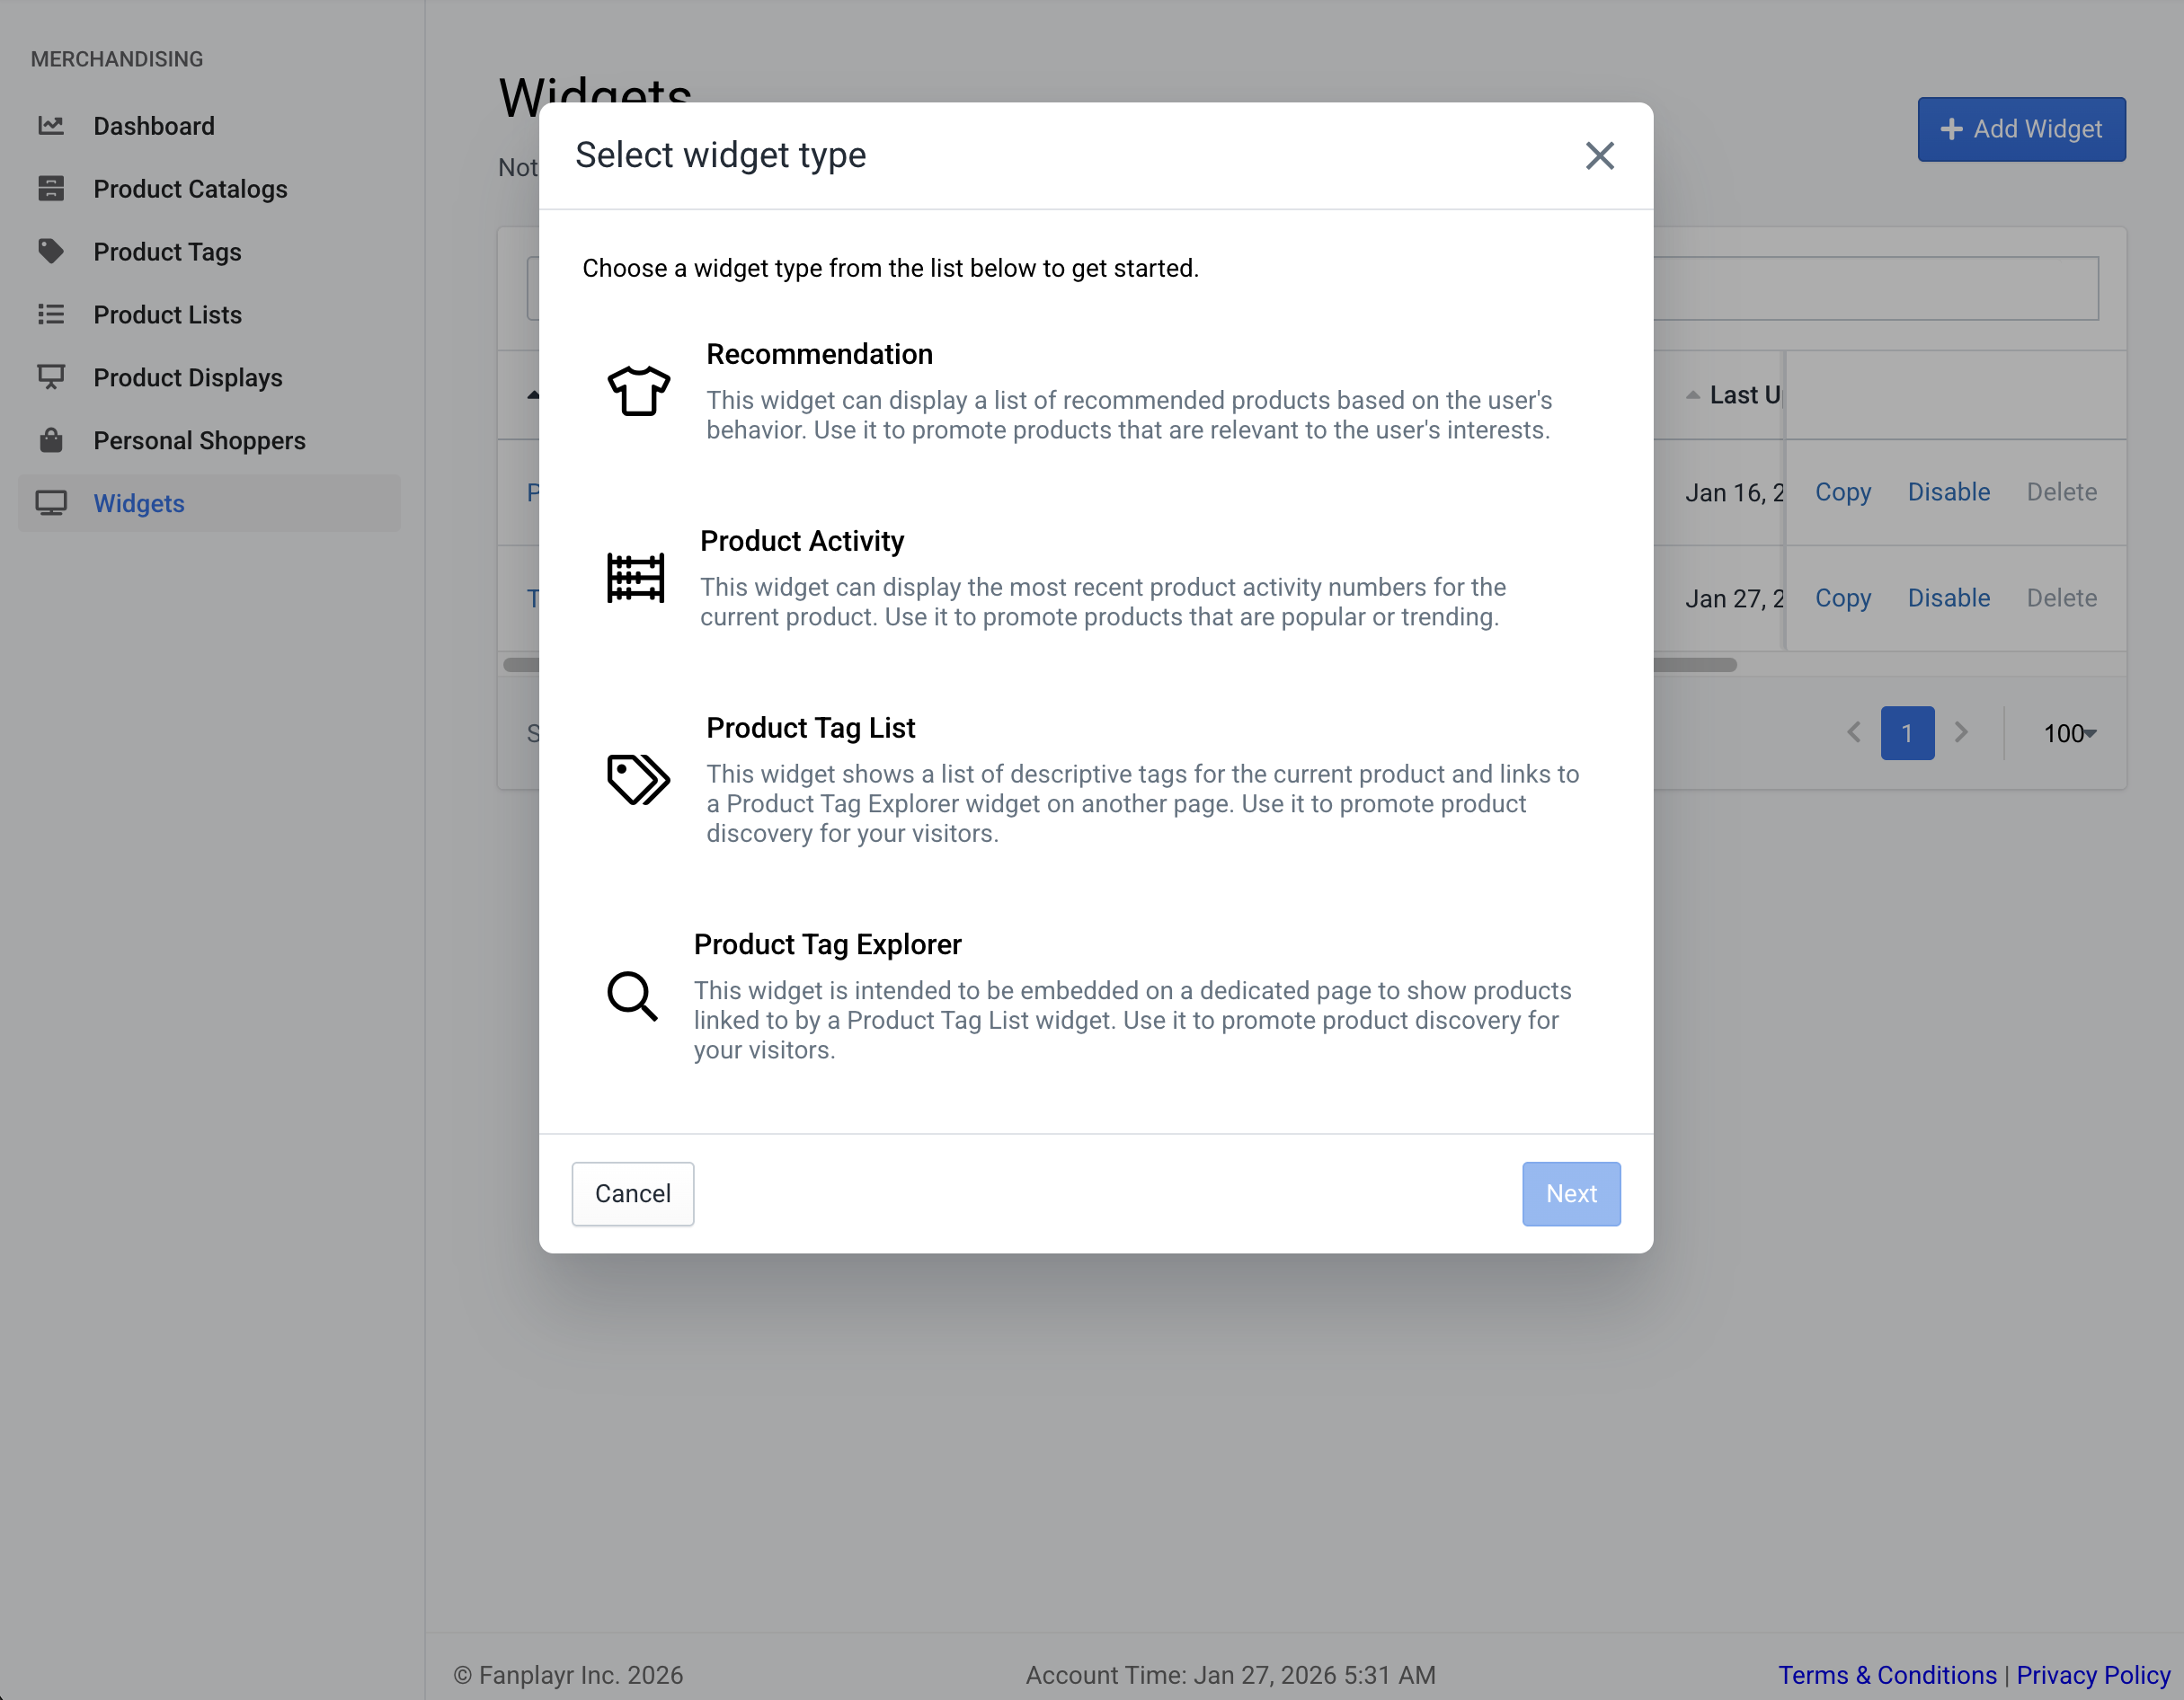 Figure 1: Create a Product Tag Explorer
In the popup that follows, choose the "Product Tag Explorer" option and click "Next".
3. Edit Product Tag Explorer
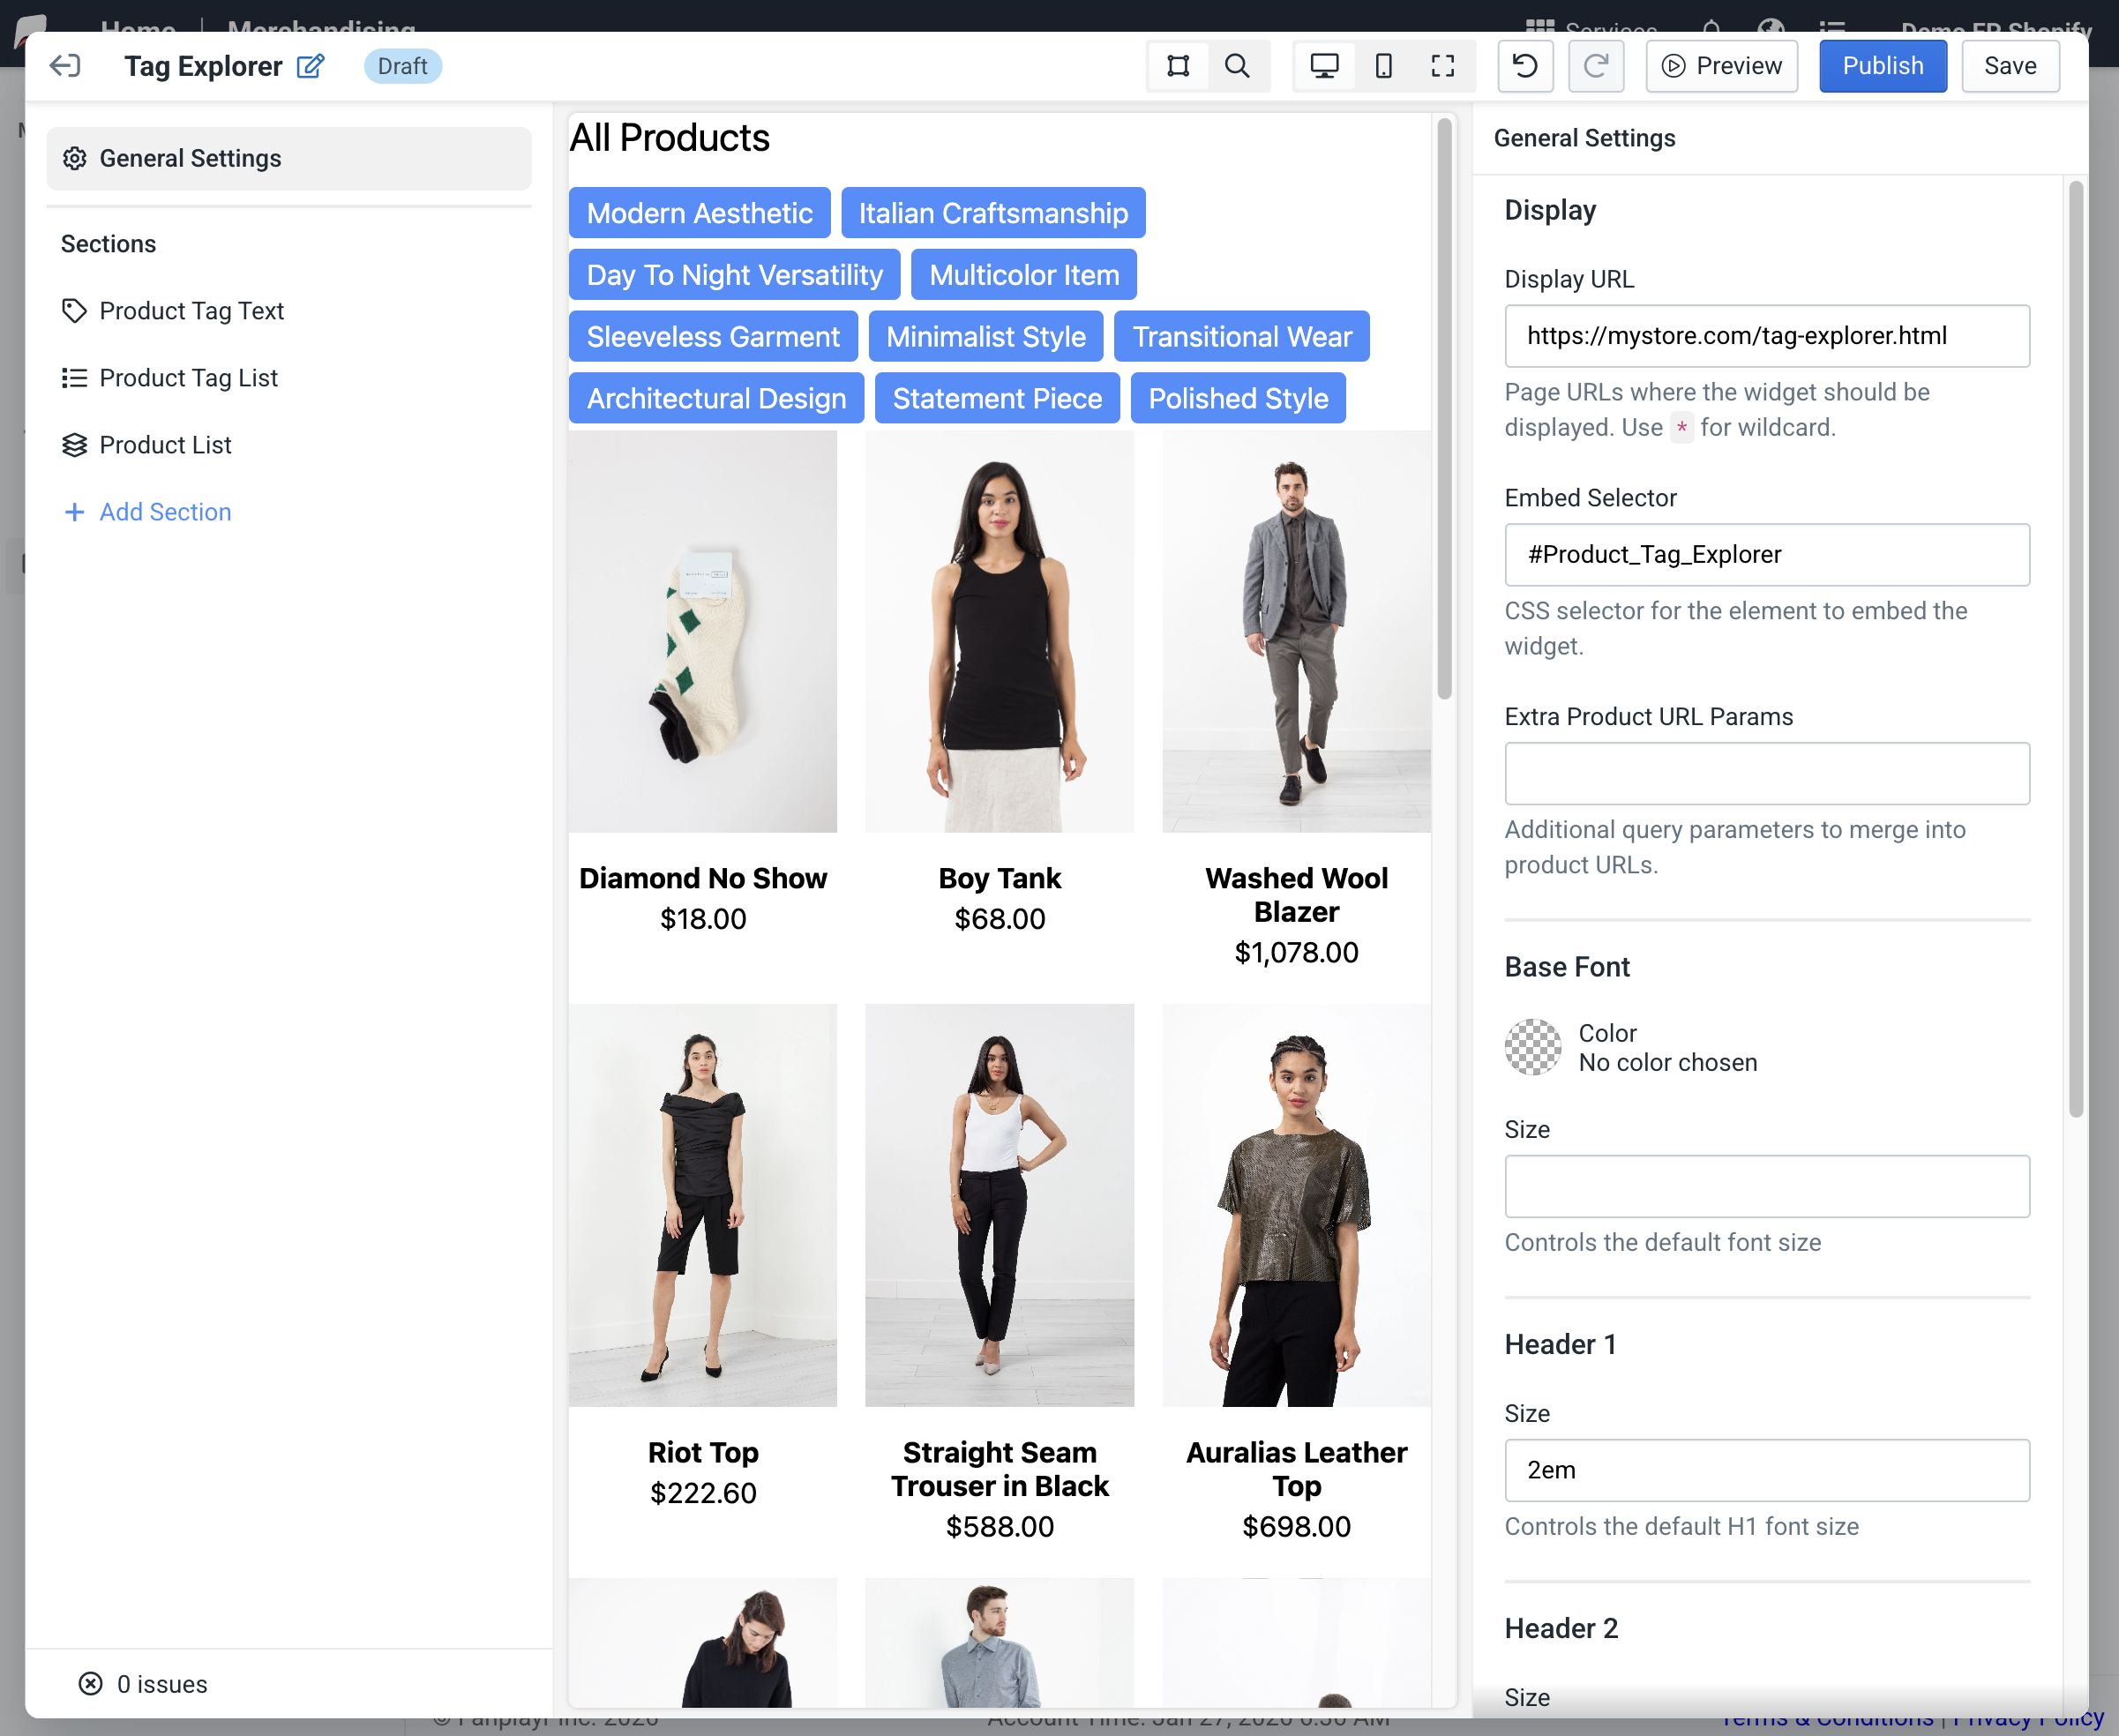 Figure 2: Set the Display URL and Embed Selector
We will only need to update two settings for this tutorial:
Display URL:
https://mystore.com/tag-explorer.htmlEmbed Selector:
#Product_Tag_Explorer
Now Publish your widget.
4. Create a Product Tag List
Navigating to the "Merchandising" section of the portal and click "Widgets" in the left-hand sidebar. You will see a list of widgets (you should see your Product Tag Explorer here). From here, click "Add Widget" in the top right corner of the screen.
In the popup that follows, choose the "Product Tag List" option and click "Next".
5. Edit Product Tag List
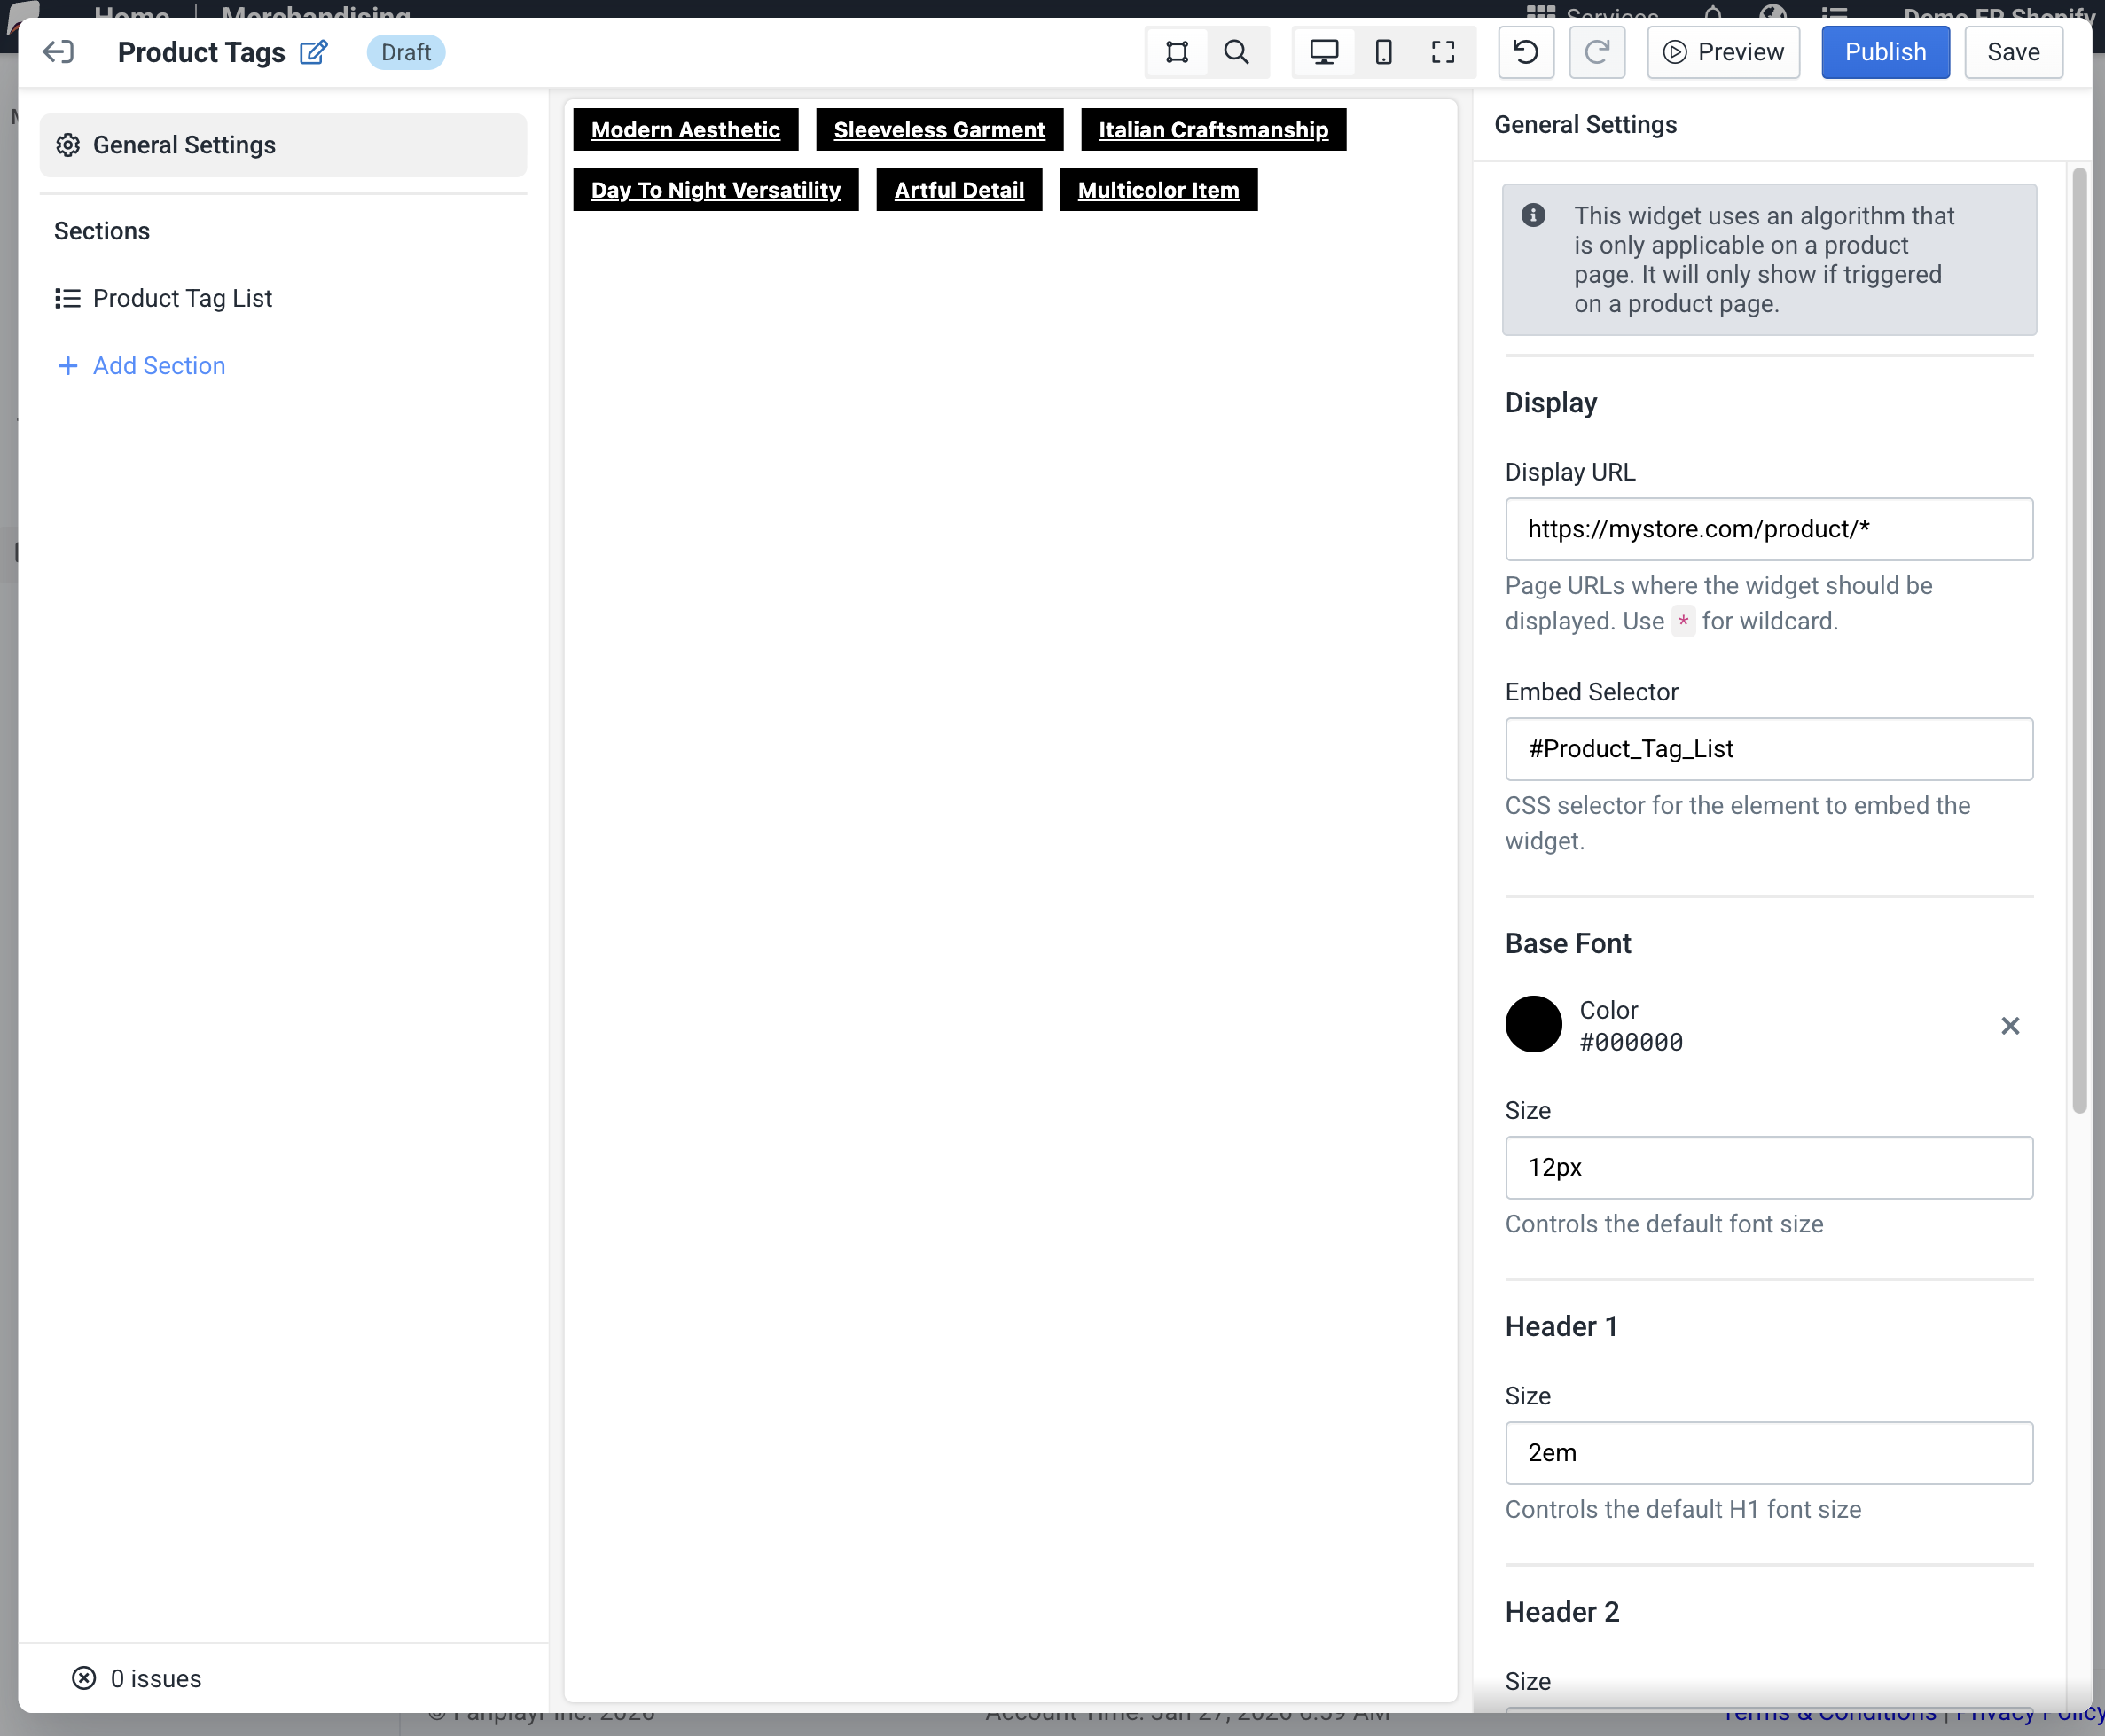 Figure 3: Set the Display URL and Embed Selector
We will only need to update two settings for this tutorial.
- Display URL:
https://mystore.com/product/*
The display URL uses a * because we want the tag list to show on all product pages.
- Embed Selector:
#Product_Tag_List
This is the ID we added to a div we created earlier.
Now Publish your widget.
6. Test
On your site go to any product page. In this example it would be something like:
https://mystore.com/product/big-red-shoes.html
You should now see a Product Tag List on this page.
Click one of the tags and you should be taken to your Product Tag Explorer page:
https://mystore.com/tag-explorer.html?tag=Red&product=big-red-shoes
Note the tag and product have also been added to the URL here. You should see the Product Tag explorer on this page.
Troubleshooting
I dont see the widget on my site
- Ensure Fanplayr's script is running on your site
- Double check your Display URL
- It's possible that there were no tags returned. Make sure the specific product you are viewing has at least one tag attached in the Fanplayr Portal.
My widget looks a little different live than in the editor
- Live widgets inherit some CSS from your page, including most notably the
font-familywhich controls the look of your text. Look into using the Live Preview feature to see how your widget will look on your site before publishing.