Editing
Automations are made from a series of connected nodes. These nodes can be one of three types: trigger, logic connector, or action. These elements are linked via a simple flowchart-like tree that always begins with a single trigger. An Automation must include a trigger and an action. Additionally, every branch created by an element that modifies behavior - like a A/B splitter - must end with an action.
General Editing
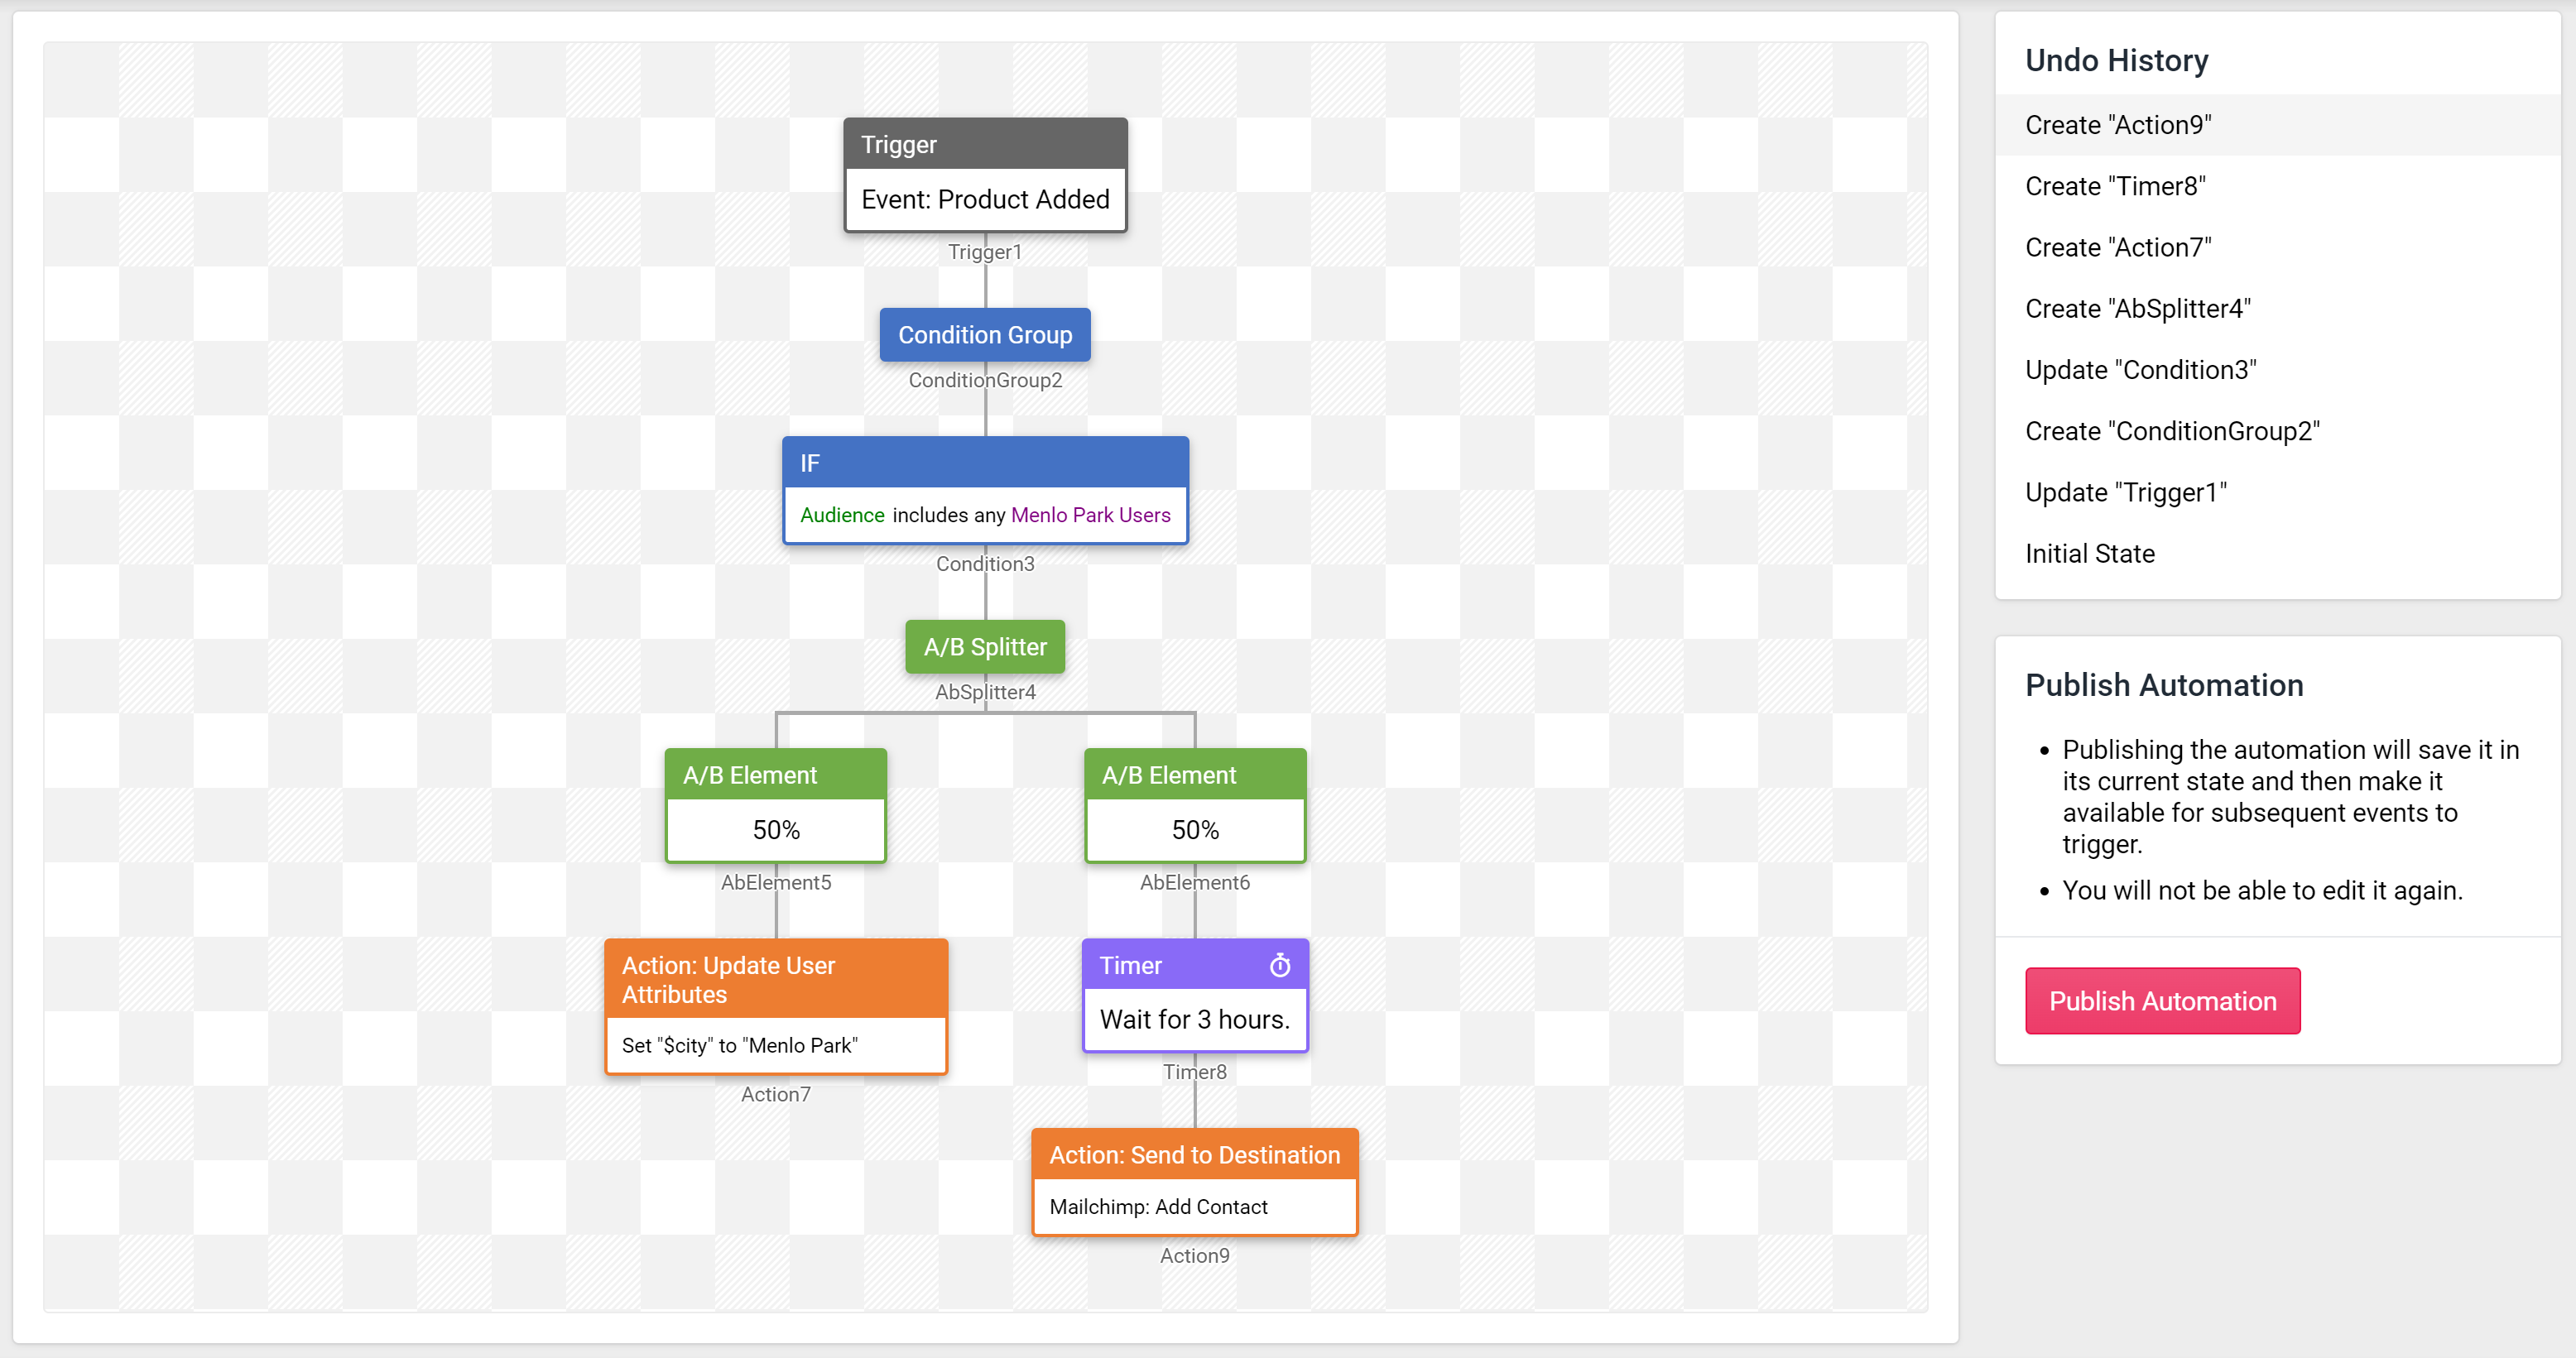
Figure 1: Editor
- Each node in the flow has a name automatically generated. This name can be edited to help uniquely identify similar nodes, but it is common to leave the name as default.
- Actions can be chained to trigger multiple actions in the same branch. Still, the end node of a branch must be an action.
- The flow UI can be rotated 90 degrees to a left-right orientation by clicking "Rotate layout" at the top of the screen.
Triggers
- The flow UI can be rotated 90 degrees to a left-right orientation by clicking "Rotate layout" at the top of the screen.
Automations can be triggered in one of two ways: Event or Schedule. The trigger settings are always defined in the first node in the Automation.
Only one trigger can be used with a single Automation, but multiple Automations can be active at once with any assortment of triggers.
Event
Select one or more events that will trigger the Automation. If Fanplayr 360 receives any event with the selected event name, the Automation logic will be evaluated. By default, an event trigger node will cause the Automation to start on any event. Only one instance of the Automation is triggered for the user that triggered the Automation.
Schedule
Choose a schedule and frequency to run the Automation. In addition, you must define a set of starting filters as part of the trigger node. This is because a scheduled Automation is evaluated on all users. This is the fundamental difference between scheduled Automations and event-based Automations. In this case, an instance of the Automation will be triggered for all users that fall into the trigger's filters.
As part of the schedule, you can choose a start and end date. If selected, the Automation will not be evaluated before the start date or after the end date.
Logical Nodes
Automations can include logical nodes that can filter the data running through the Automation or split the Automation logic into multiple paths.
A/B Splitter
This element branches the Automation into different branches depending on the defined percentages.
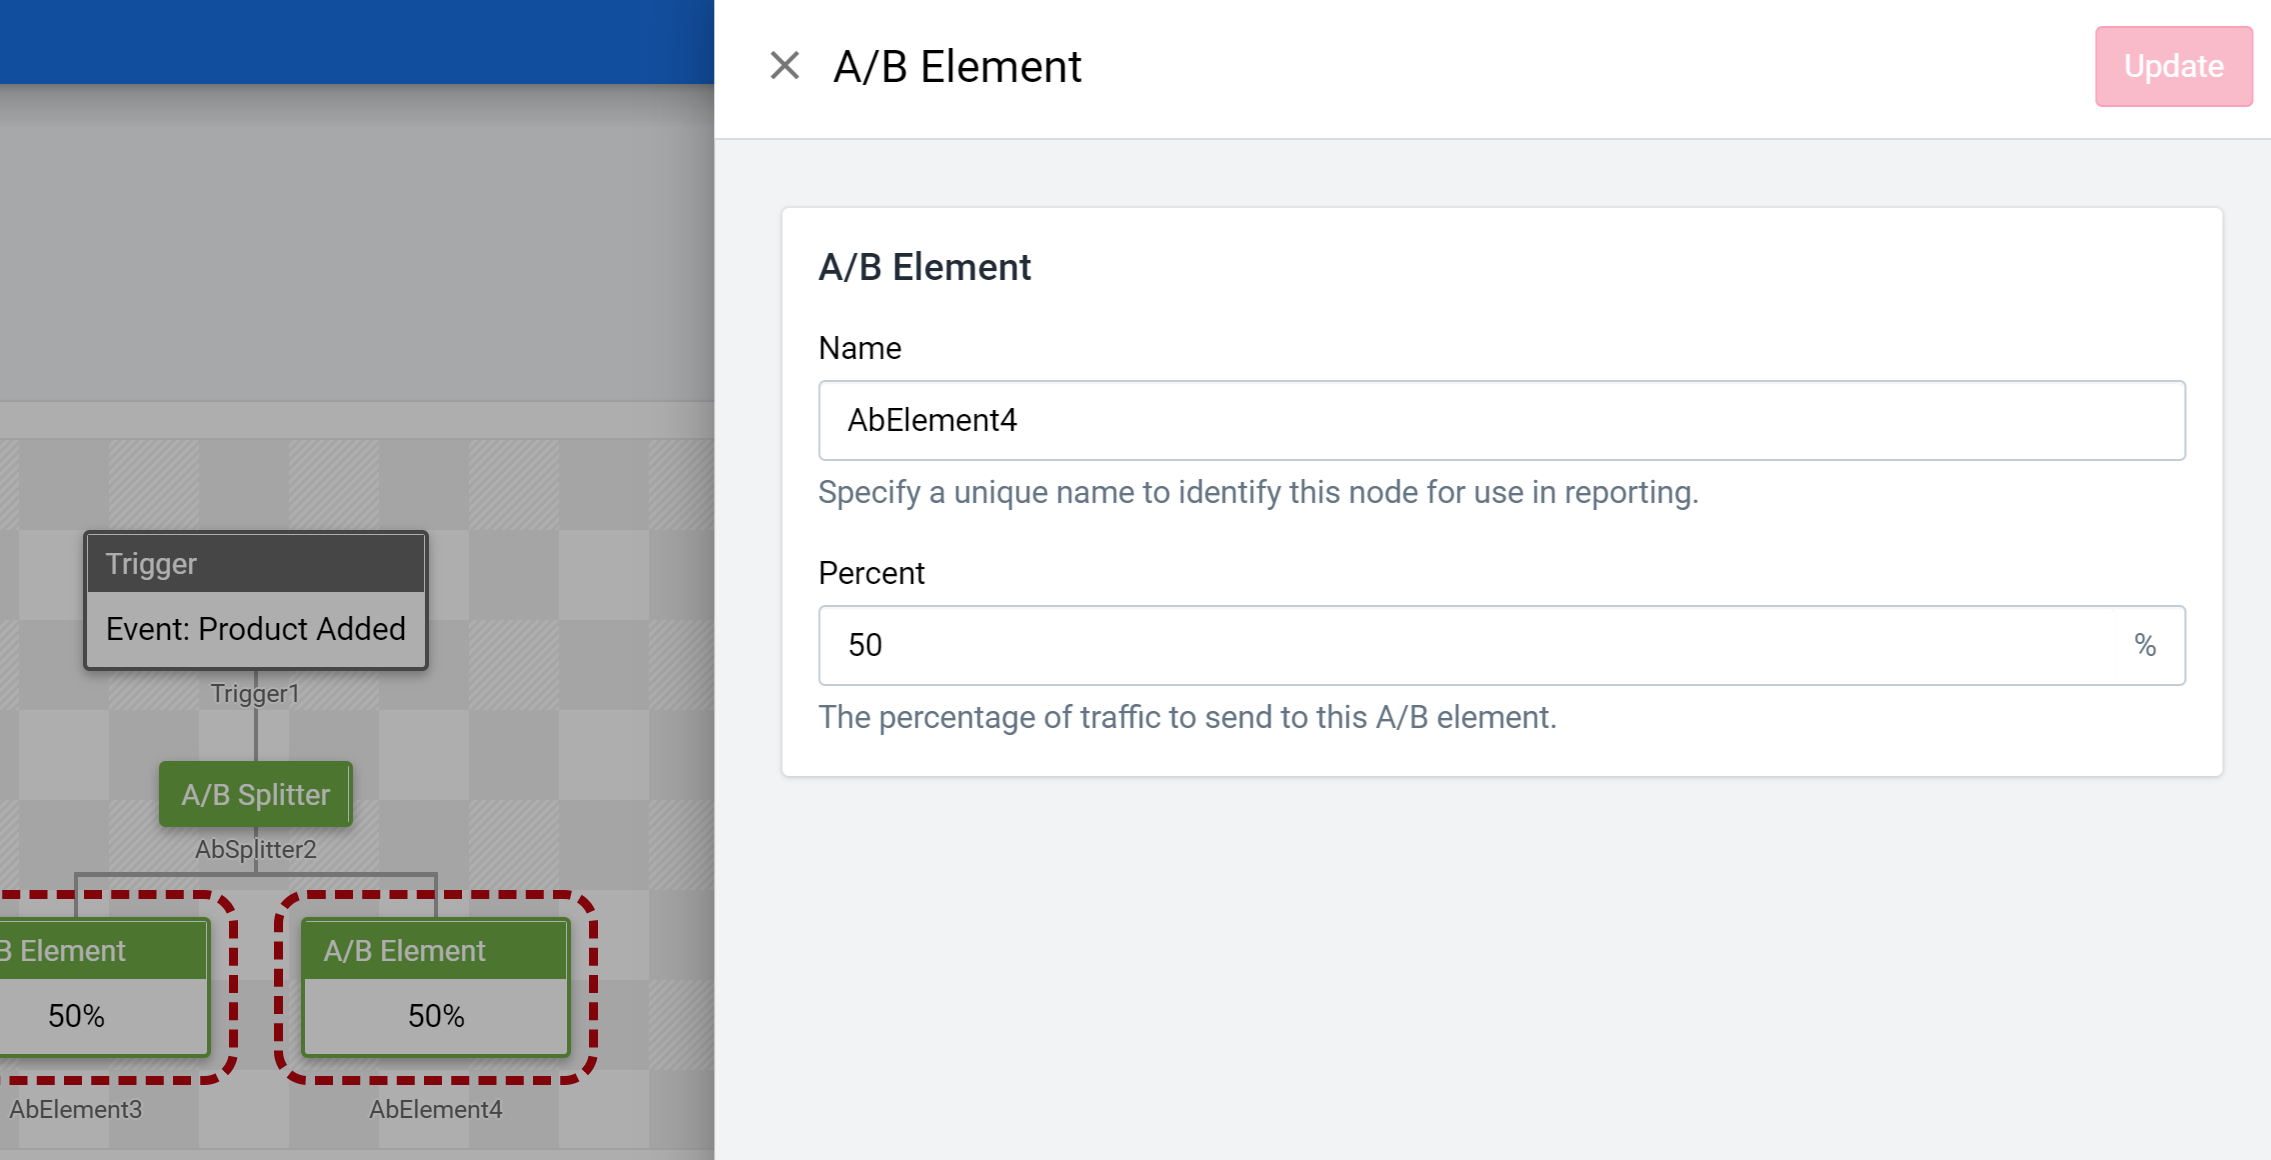
Figure 2: A/B Splitter
By default, creating an A/B Splitter will split the Automation flow into two branches, each evaluated 50% of the time. Once a splitter is created, you can click the "A/B Splitter" node to add another A/B Element to further branch the Automation. Of course, the sum of the defined percentages must add to 100%.
When this Automation is triggered at runtime, the system will select a branch to follow based on the percentages set. Any actions that lie along the paths not chosen will not be run.
Condition Group + Condition(s)
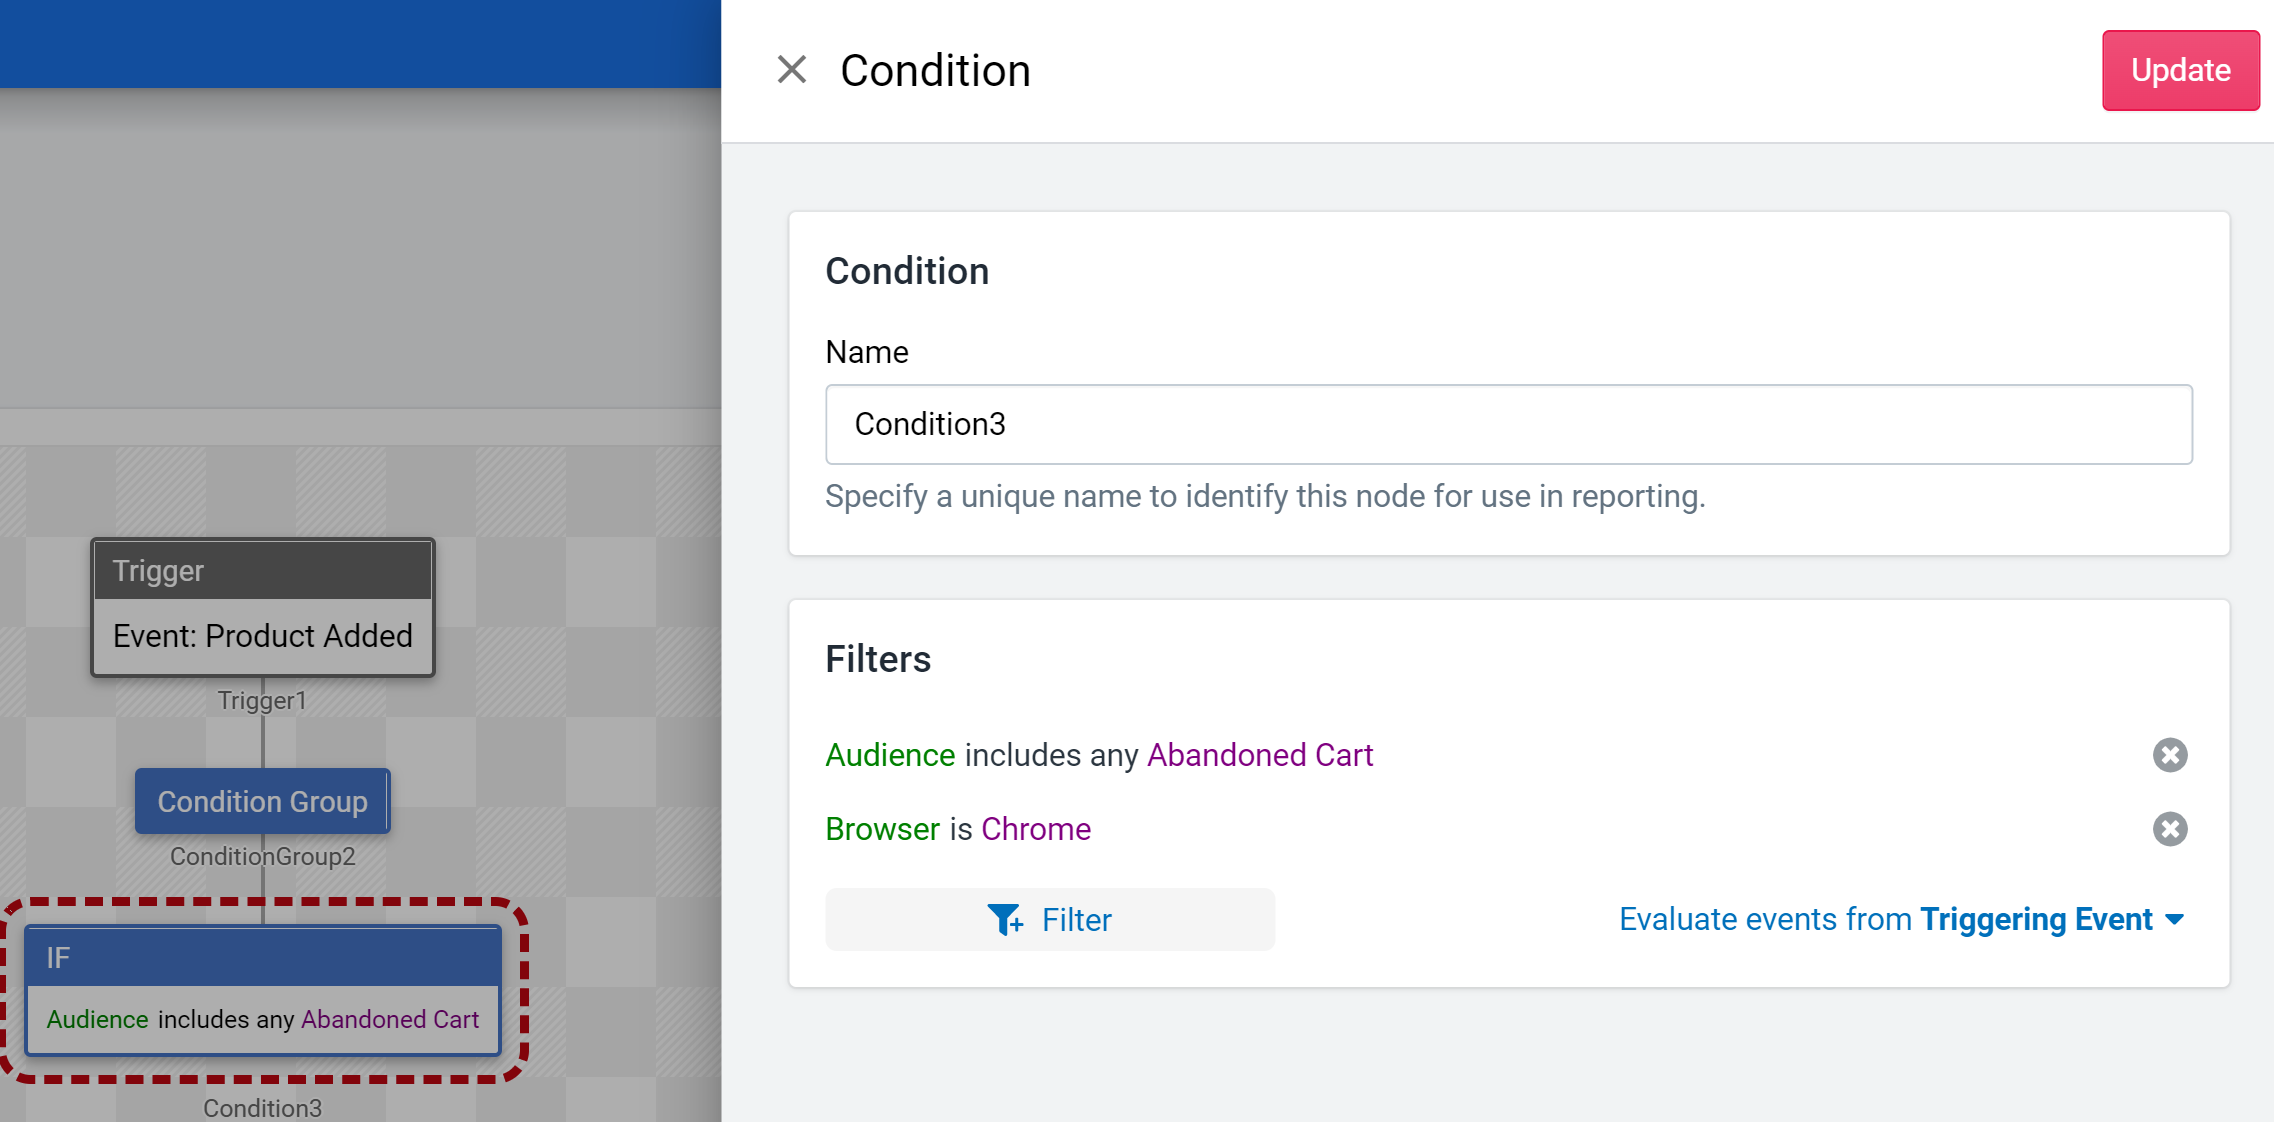
Figure 3: Conditions
A condition group can be added to the Automation to ensure that a specific condition is met prior to continuing down the branch. Multiple conditions can be added to one condition group to split the flow into multiple branches. Also, multiple filters can be added to a single condition (Figure 3) that all have to be met before the entire condition is considered fulfilled.
If multiple condition nodes exist (multiple branches), the logic is evaluated left-to-right via an IF-ELSE logic. The left-most condition will be evaluated first. If the condition evaluates to true, then the Automation will continue down that path only. If it is false, then the system will evaluate the next condition. This repeats until all the condition nodes are interpreted.
The filter editing component has additional date period options in the bottom-right that are unique to Automations, including allowing you to only apply the selected filters to events that have entered the system since the previous Automation step or since the start of the Automation. See the Filters documentation for more information about how filters are used in Automations.
Timer
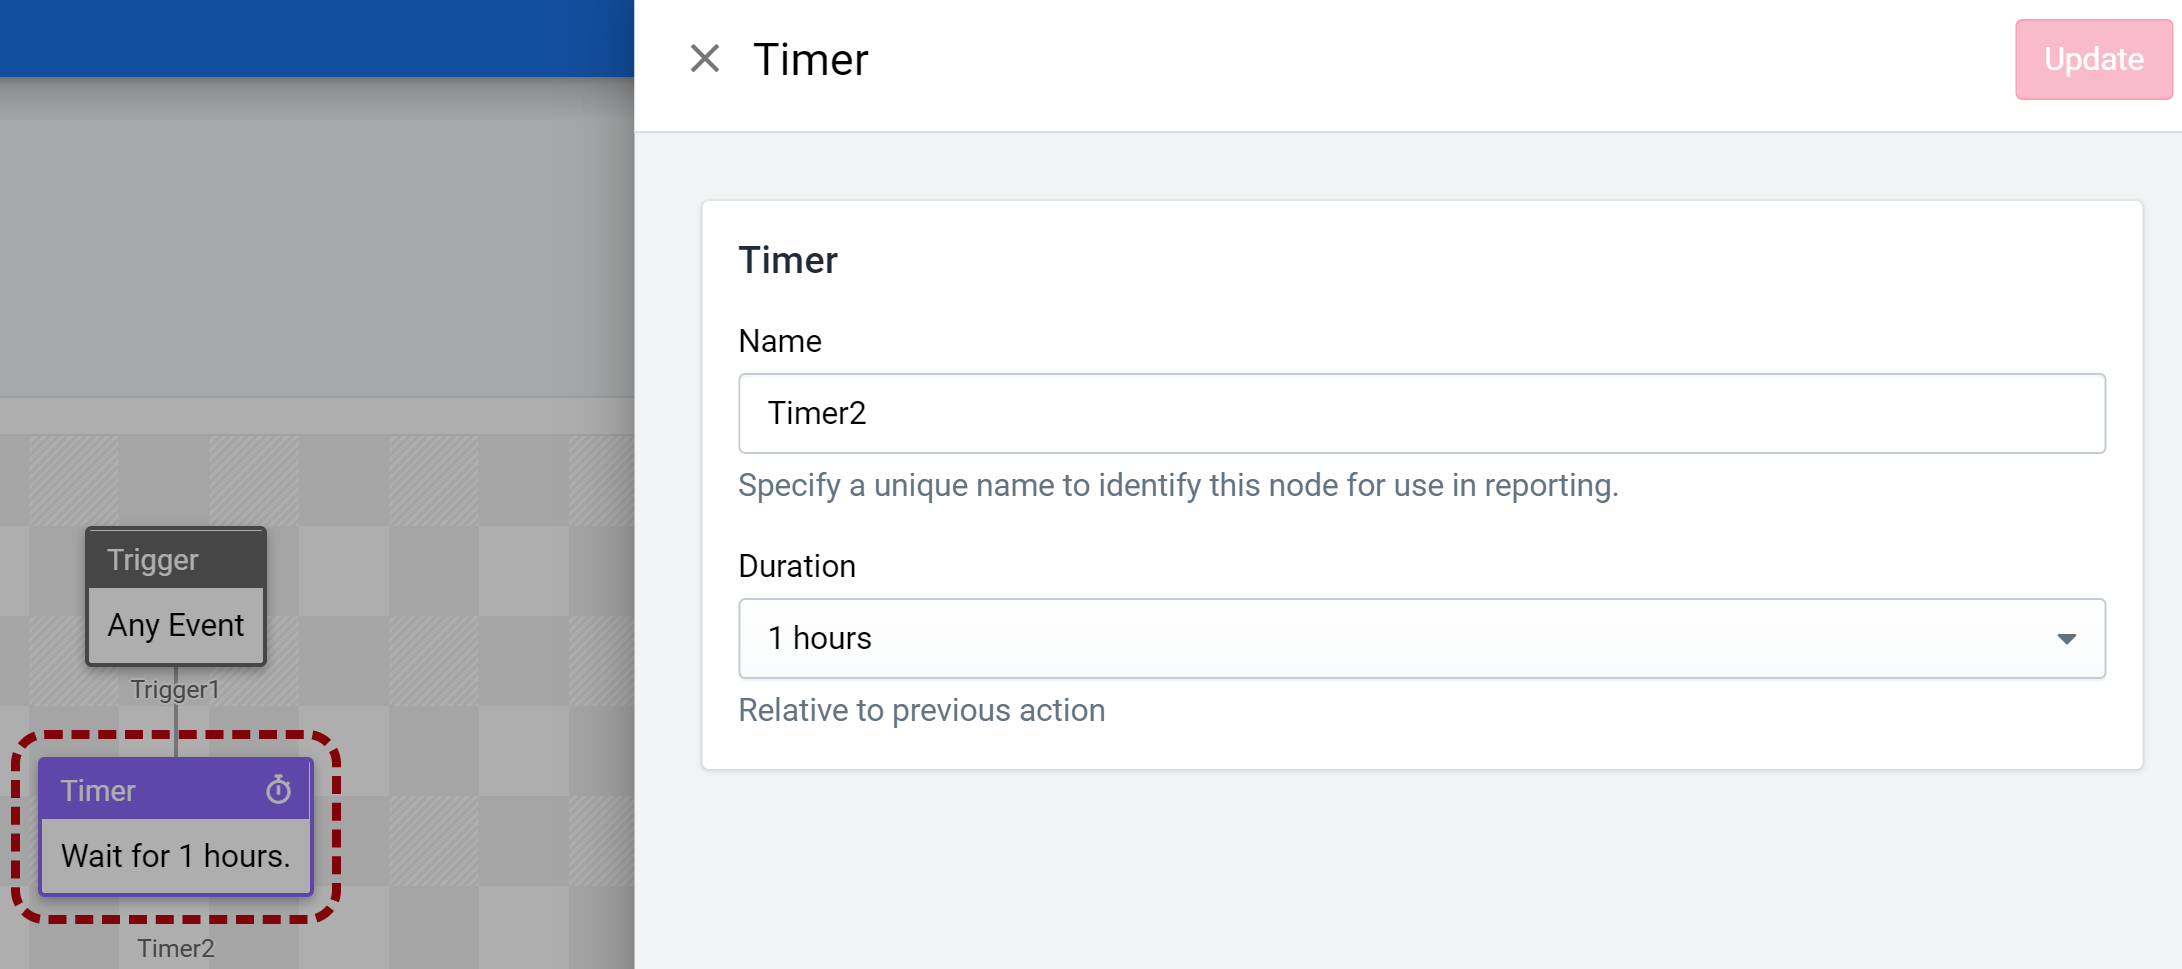
Figure 4: Timer
You can use a timer node to add an arbitrary delay to the logic of your Automation. For example, you may want to wait a few hours after a user abandons a cart before sending them a follow-up message. This is the perfect use case for a timer node.
Use of timer nodes can lead to situation with duplicate Automation instances. For example, you could schedule an Automation to run hourly that contains a 6 hour timer node. Scroll to the Settings documentation to learn how to manage this situation.
Actions
When a Automation is triggered and any conditions or other logical nodes are evaluated, the actions along the path with run. The following actions are currently supported:
- Send to Destination
- Update User Attributes
Send to Destination
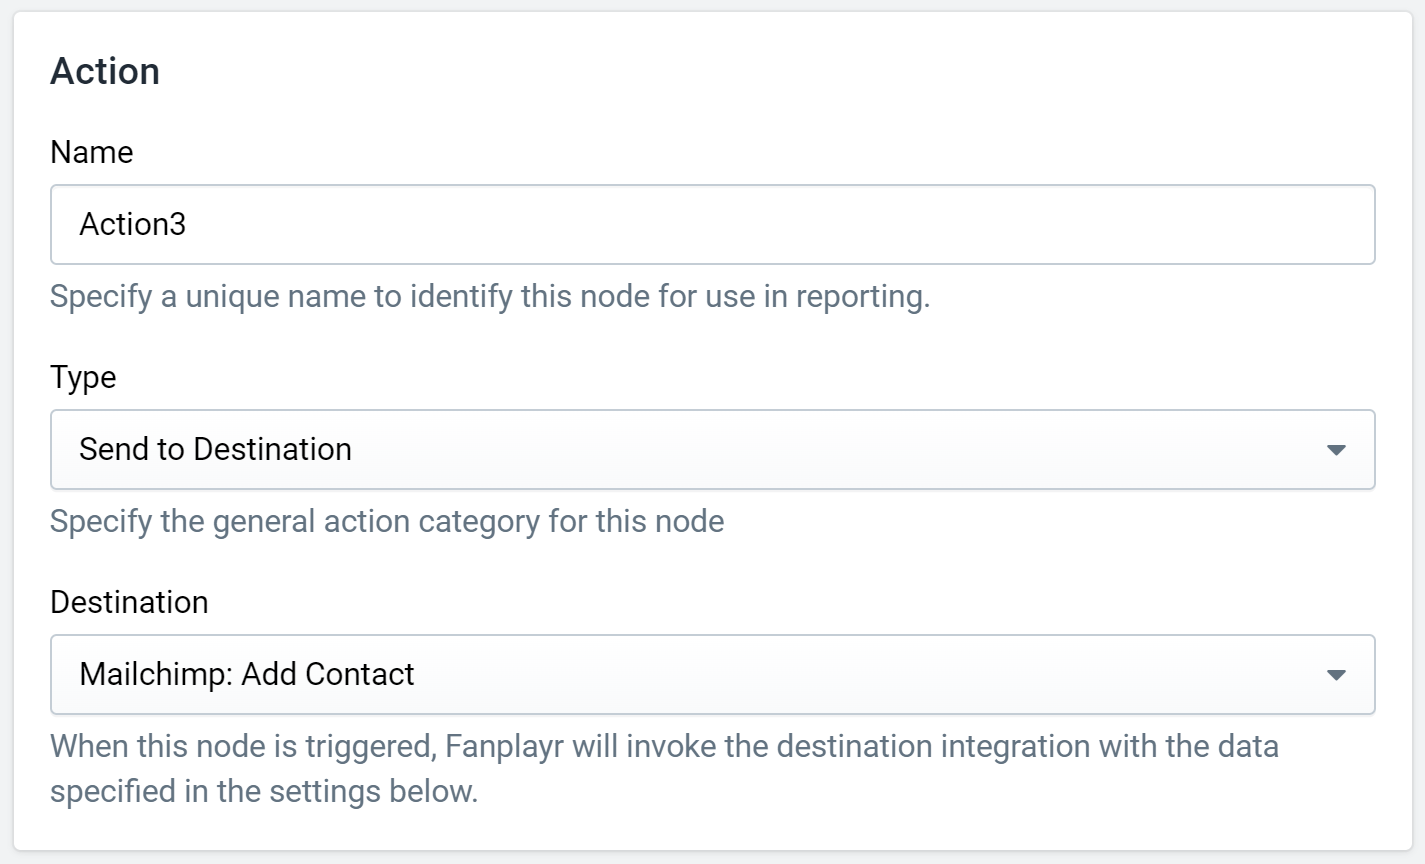
Figure 5: Send to Destination
The "Send to Destination" action can accept one of the supported Destinations to receive data during the Automation. If this action is invoked, Fanplayr will call on the selected Destination integration with the applicable user data.
Depending on the Destination selected, you may be able to provide custom overrides to the Destination's settings. The exact settings may vary greatly depending on the integration and Destination. To learn more, review the Editing Destinations documentation.
Whenever the Destination settings defined here differ from the Destination's defaults, a button is available to "Reset to Destination Default Settings" so that you can ensure the Destination settings defined on the Automation reflect any changes made to the defaults. This is available even for published Automations.
INFO
The state of the selected Destination is saved onto the Automation at the time of creation with overrides applied. This means that changes to the underlying Destination settings will not propagate to referenced Automations, besides changes to the connection settings. More info is available here.
Update User Attributes
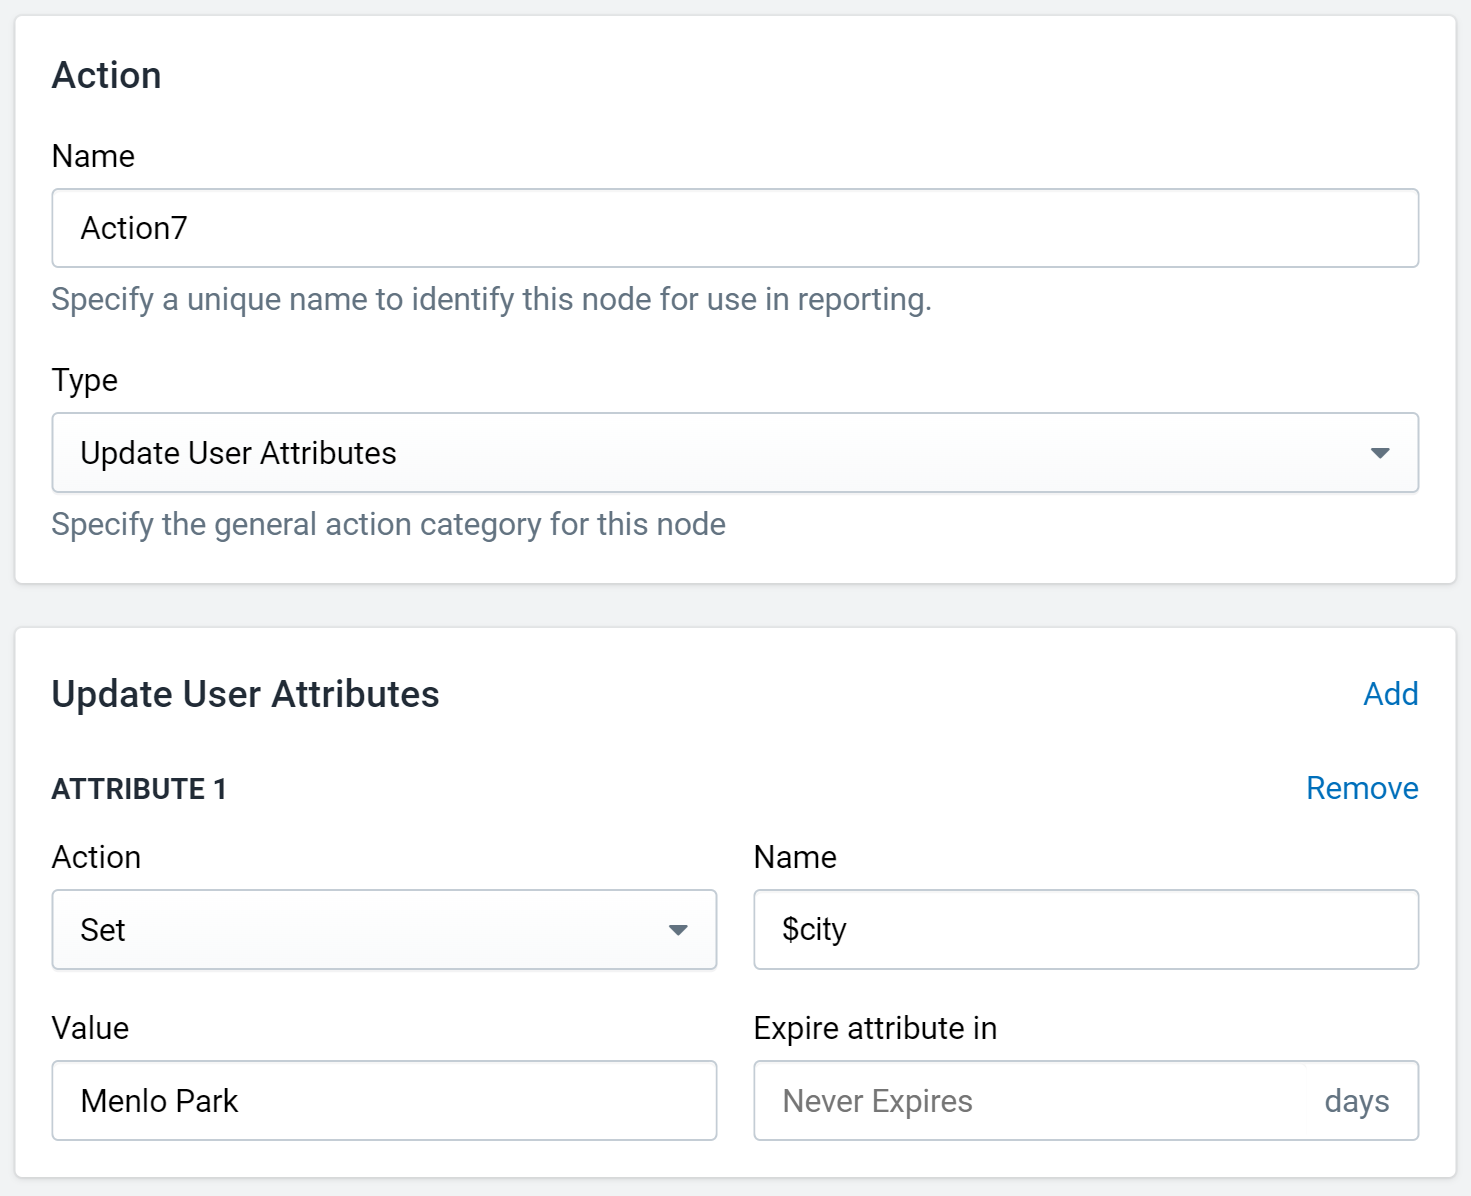
Figure 6: Update User Attributes
The "Update User Attributes" action gives you the ability to update the current user's data during the Automation evaluation. This is functionality identical to the user data API documented here. The following actions are available: set, remove, increment, or set if the attribute does not already exist. You are able to update as many user attributes as you want.
Settings
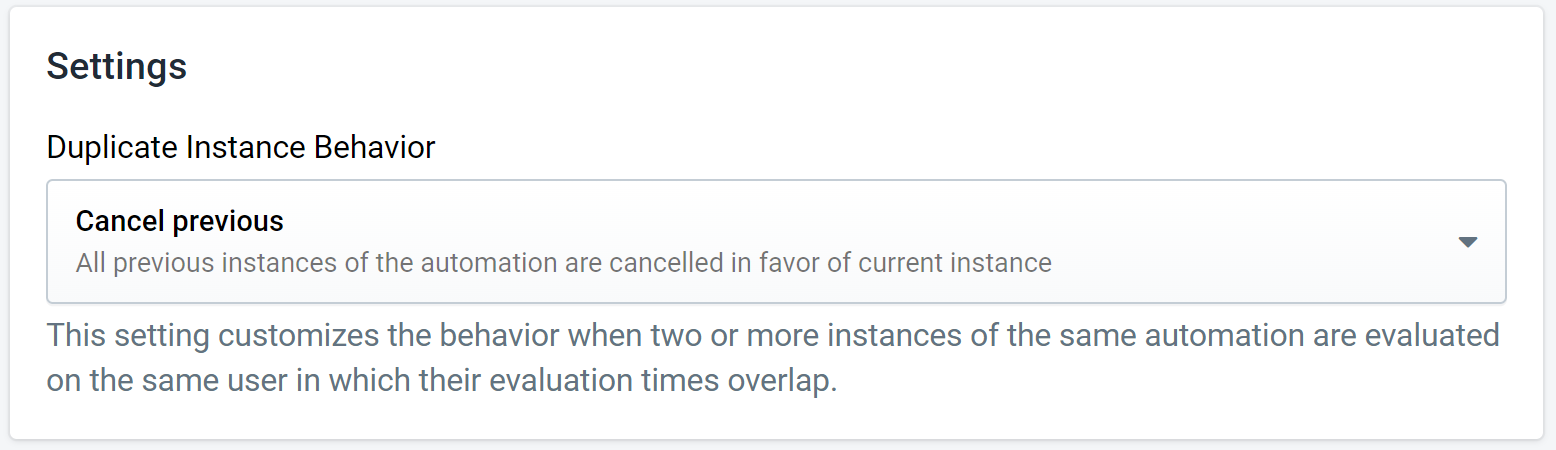
Figure 7: Settings
General Automation settings can be found at the bottom of the editor (Figure 7), and they control the behavior of the Automation as a whole. There is currently only one setting.
Duplicate Instance Behavior
This setting governs the behavior of the Automation when two or more instances of the Automation are evaluated at once. This could be due to a timer node delaying an Automation's evaluation or multiple events triggering the Automation at the same time.
- Cancel previous: All previous instances of the Automation are cancelled in favor of the current instance (default).
- Cancel current: Any instances triggered while one is already active will be canceled.
- Run all: All instances will be evaluated.