Testing JavaScript Tags
This guide will walk you through the process of testing JavaScript tags on your website using a Chrome browser extension before implementing them in production.
Overview
Testing JavaScript tags before deployment is crucial to ensure they work correctly and don't interfere with your website's functionality. This method allows you to safely test tags in your browser without making changes to your live website.
Prerequisites
- Google Chrome browser
- Administrative access to install Chrome extensions
- The JavaScript tag code you want to test
Interactive Guide
Follow this interactive guide to learn how to install the User JavaScript and CSS browser extension.
Visit the extension page: https://chromewebstore.google.com/detail/user-javascript-and-css/nbhcbdghjpllgmfilhnhkllmkecfmpld
Click "Get Started" in the interactive guide below to be follow along.
Step-by-Step Guide
Follow this step-by-step guide for more detailed instructions on installing and using the User JavaScript and CSS extension.
Step 1: Install the User JavaScript and CSS Extension
Open Google Chrome and navigate to the Chrome Web Store.
Go to: https://chromewebstore.google.com/detail/user-javascript-and-css/nbhcbdghjpllgmfilhnhkllmkecfmpld
Click the "Add to Chrome" button.
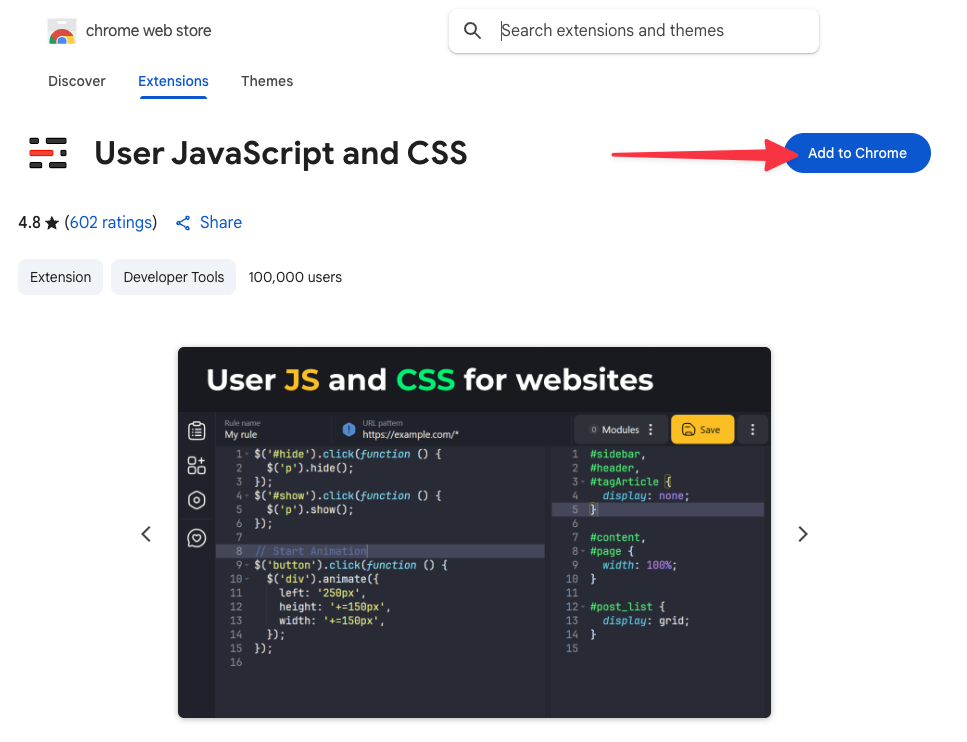 Clicking the "Add to Chrome" button
When prompted, click "Add extension" to confirm the installation.
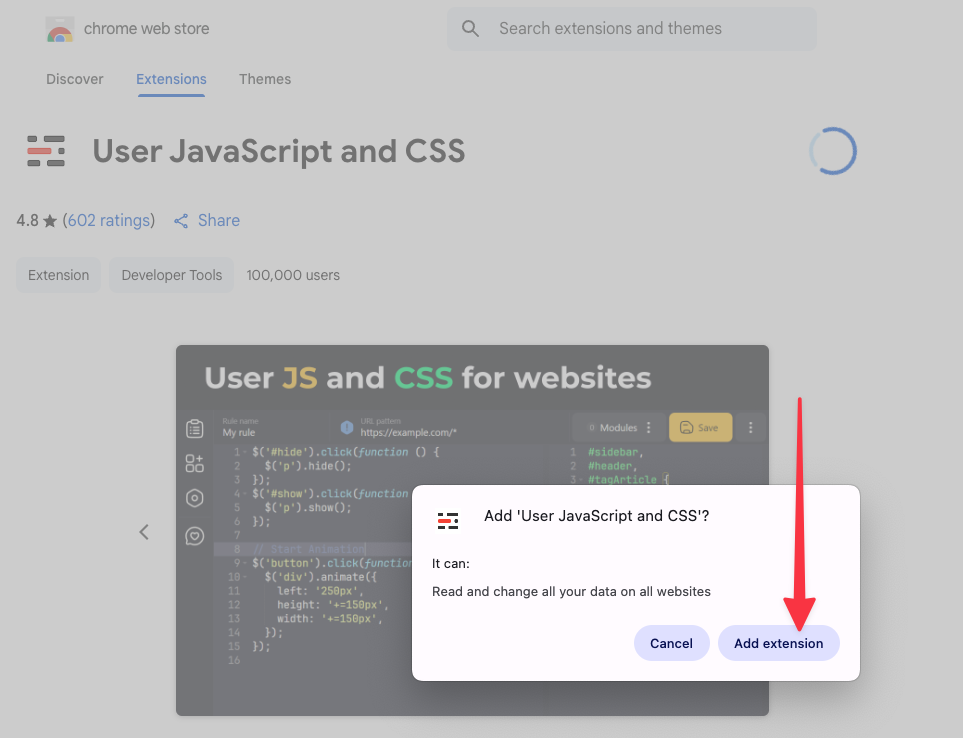 Clicking the "Add extension" button
The extension icon should now appear in your Chrome toolbar (you may need to click the puzzle piece icon to see it).
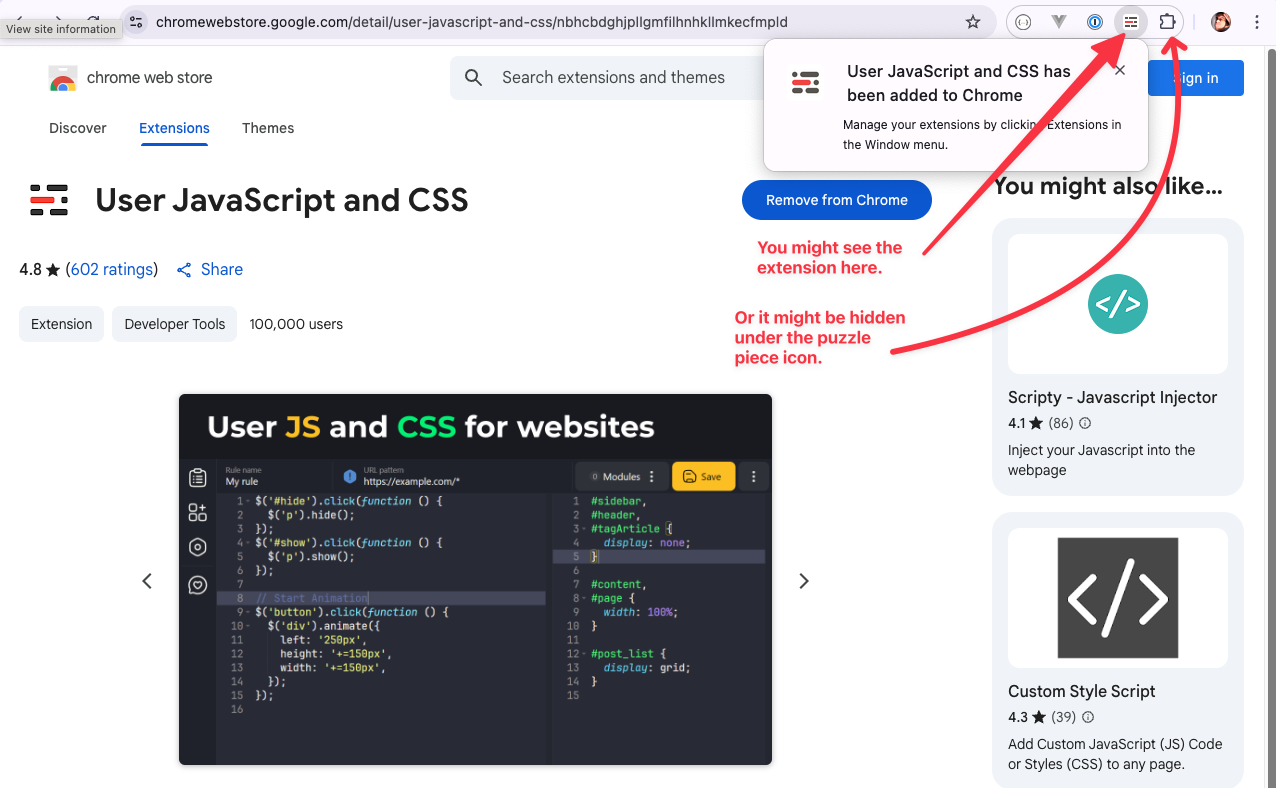 Locating the extension in the Chrome toolbar
Right-click the extension icon, or find it under the puzzle piece icon, then click the "Manage extension" button to open the extension settings.
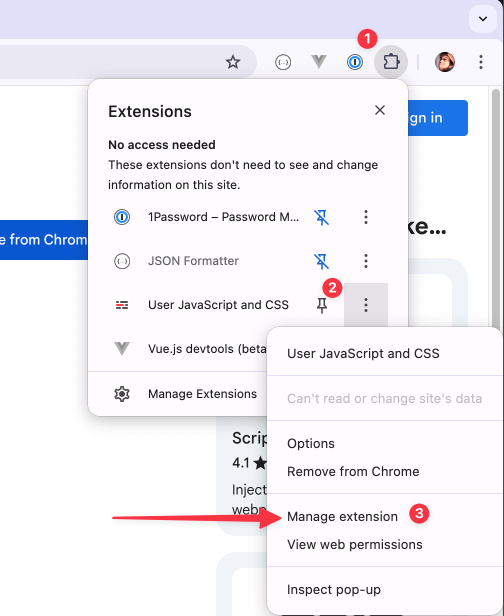 Clicking the "Manage extension" action in the Chrome toolbar.
In the extension settings, ensure that the "Allow user scripts" setting is turned ON. You may need to scroll down the settings page to find this. (You can close this settings tab after completing this step.)
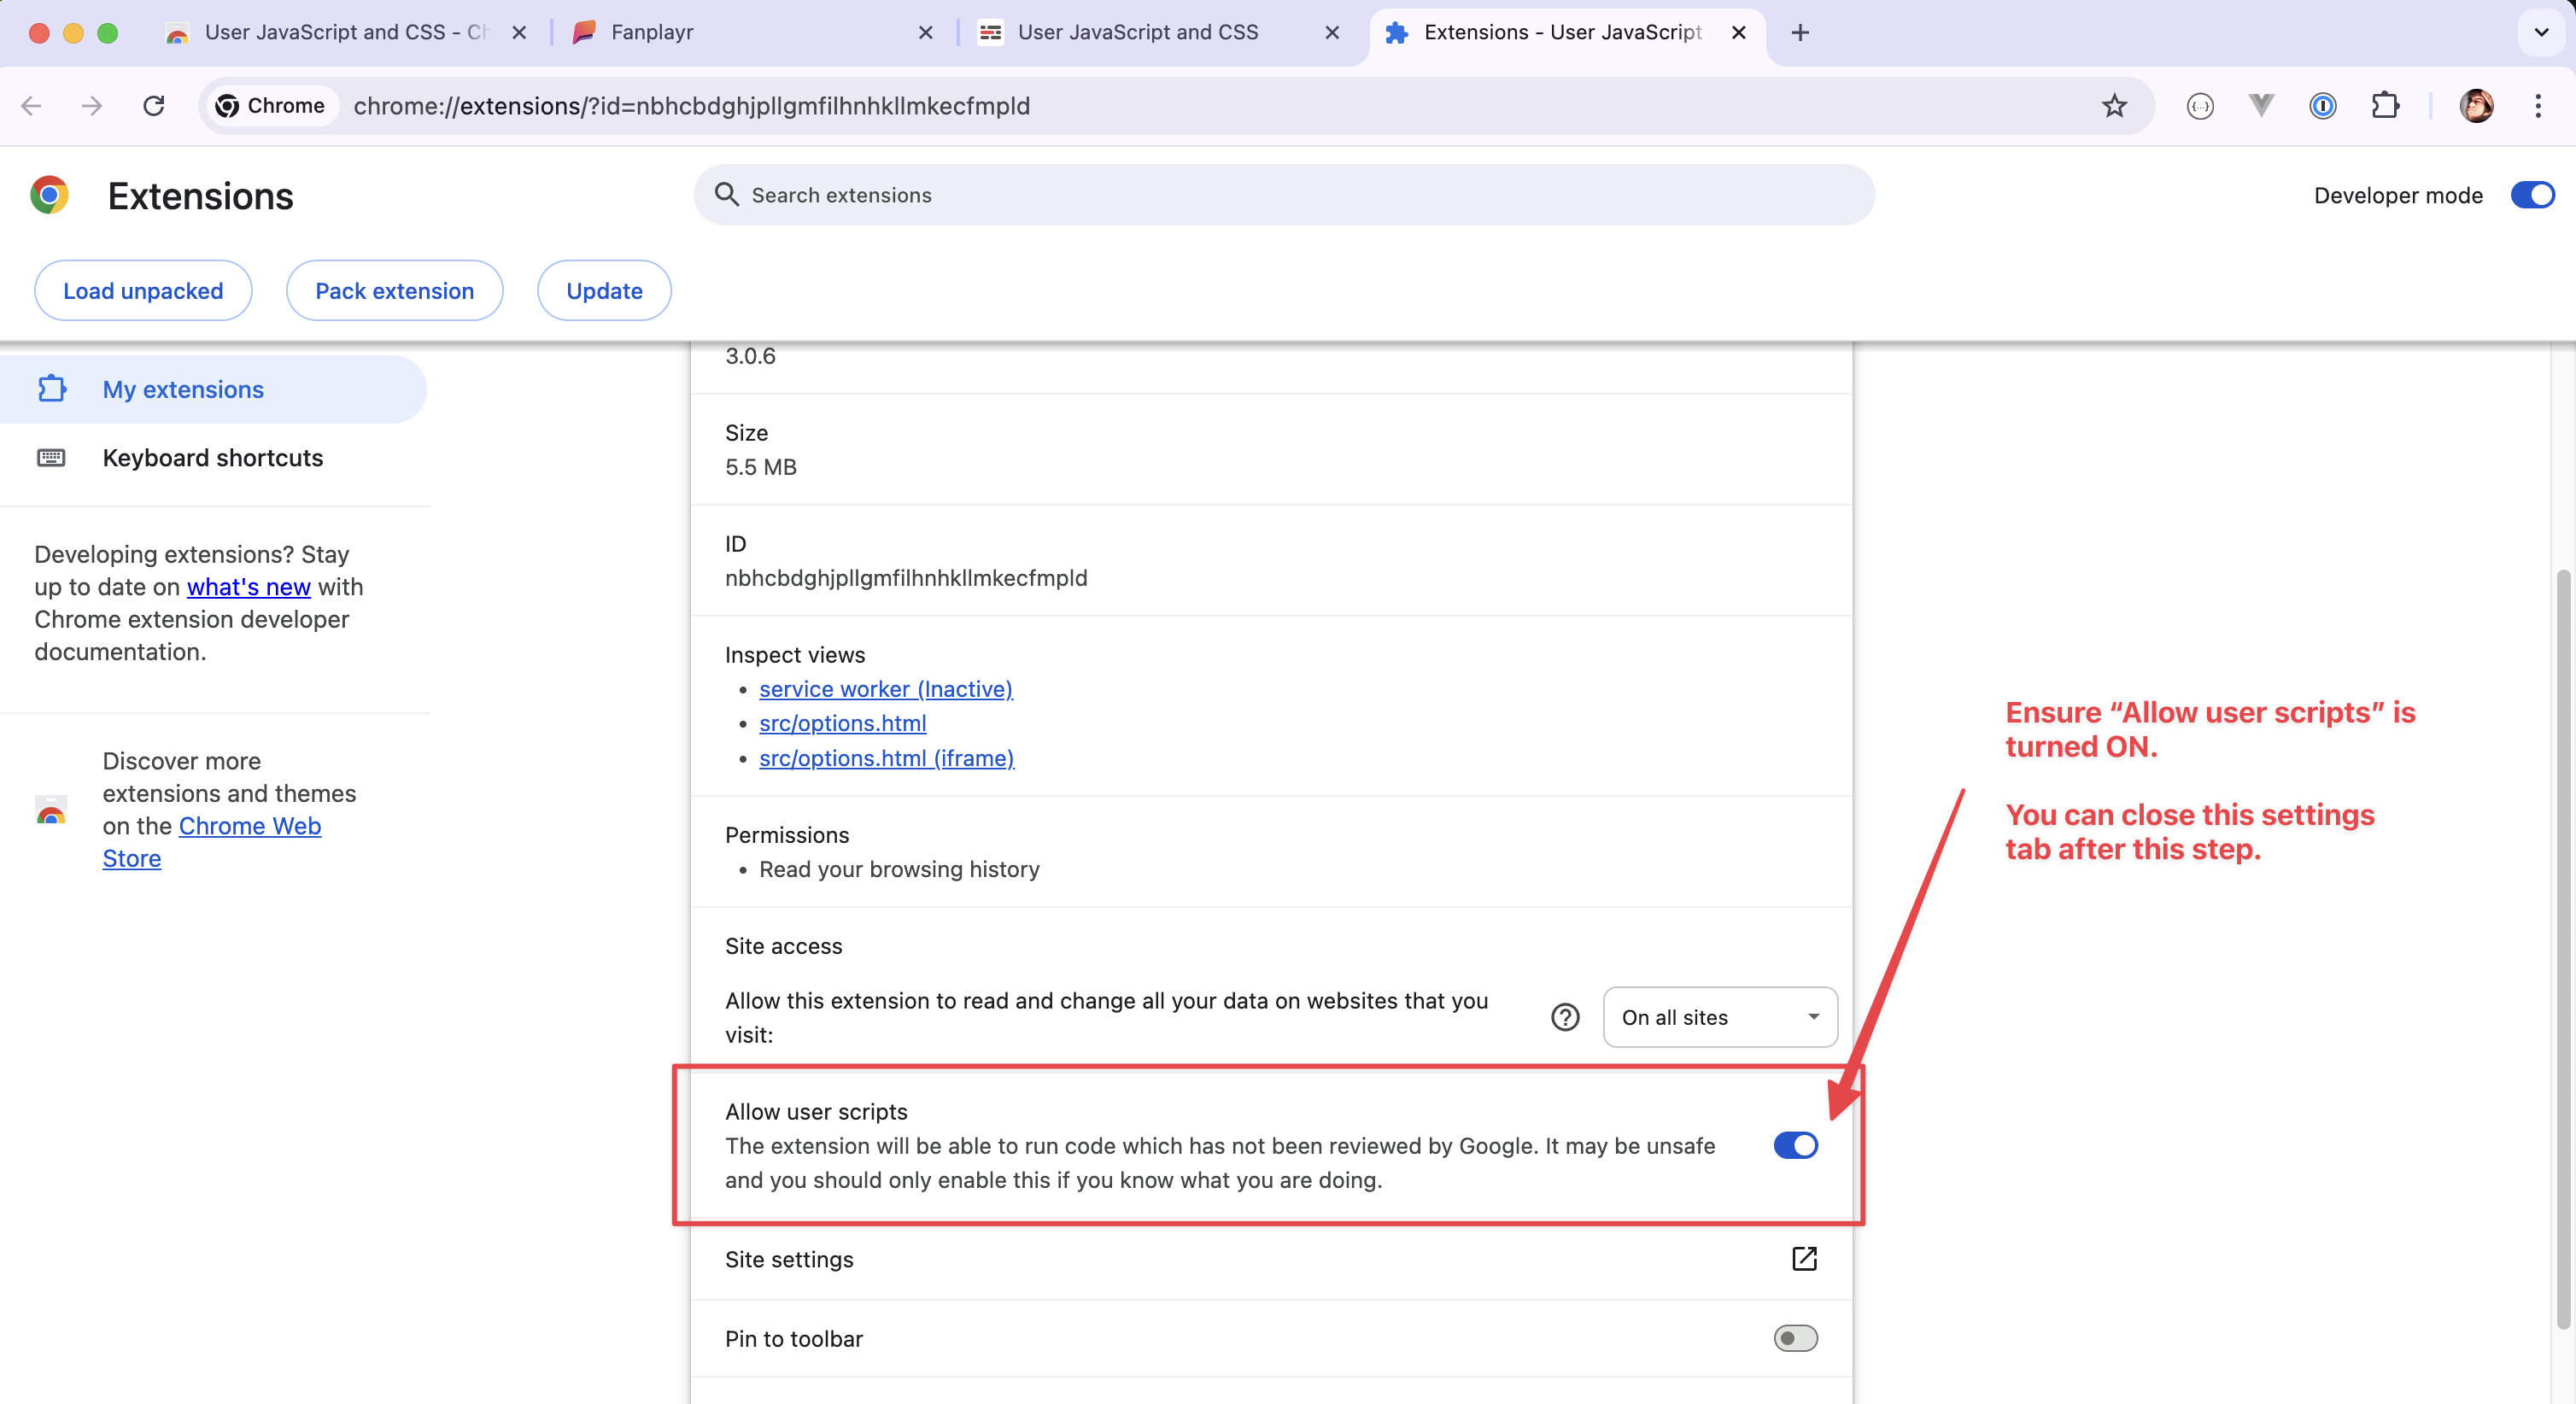 Ensuring the "Allow user scripts" setting is turned on for the extension.
Step 2: Access the Extension
Navigate to the website where you want to test your JavaScript tag. For example, https://fanplayr.com.
Click on the User JavaScript and CSS extension icon in your Chrome toolbar (you may need to click the puzzle piece icon to see it).
 Clicking the extension icon in the Chrome toolbar.
The extension panel will open, showing an option to define a new rule for the website.
Click the "New Rule" button. This will open a new tab to define a rule where you can specify the JavaScript tag to inject for the website.
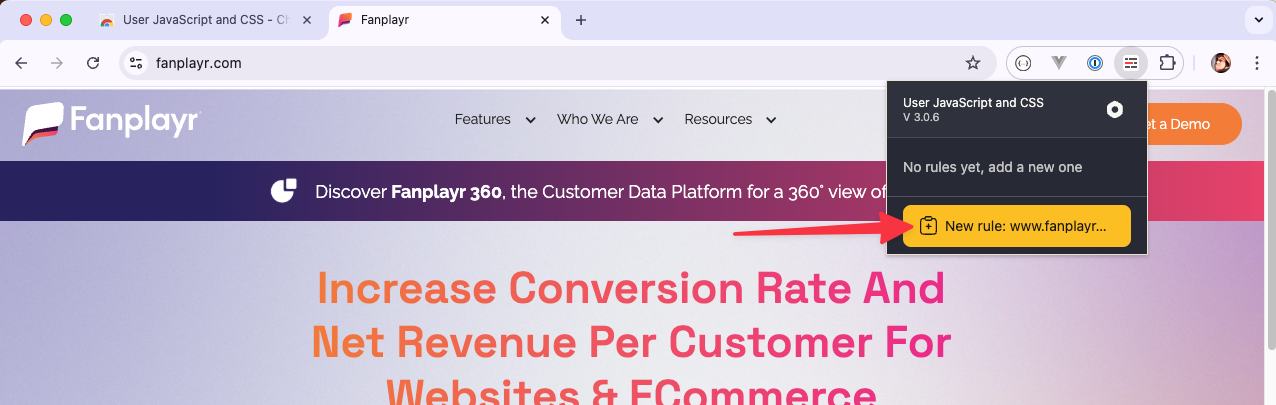 Clicking the "New Rule" button in the extension panel.
Step 3: Add Your JavaScript Tag
Example JavaScript tag format
<script>
  (function (w, d, s) {
    var js = d.createElement(s);
    js.async = true;
    js.src = 'https://cdn.fanplayr.com/....../adaptor.js';
    var fjs = d.getElementsByTagName(s)[0];
    fjs.parentNode.insertBefore(js, fjs);
  })(window, document, 'script');
</script>TIP
Make sure you only copy the JavaScript code between the <script> and </script> HTML tags into the extension (lines 2-8 in the example above).
With the extension options open, you'll see a text area where you can input JavaScript code.
 Area to paste JavaScript code.
Paste your JavaScript tag code into this area. Make sure to only include JavaScript code, removing any starting
<script>and ending</script>if present.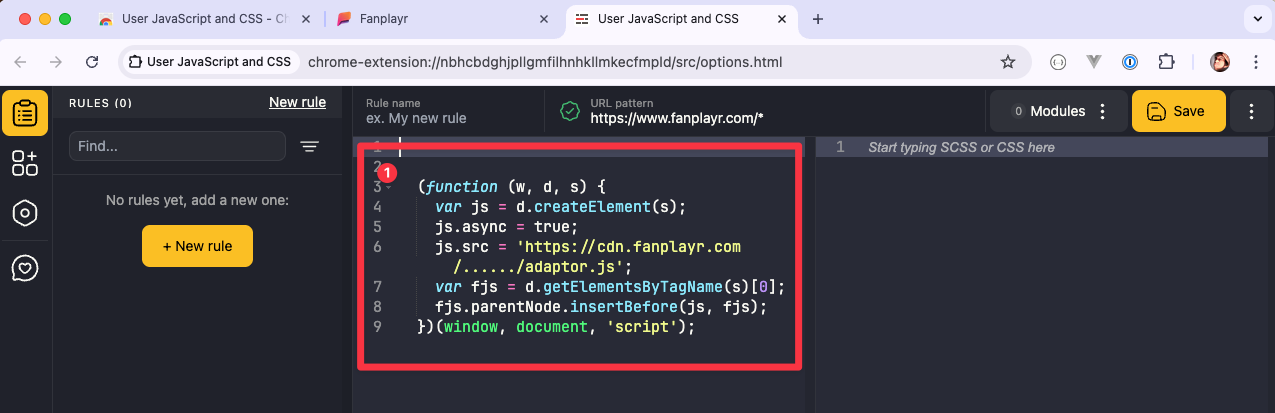 Pasting JavaScript tag code into the rule.
Click the "Save" button.
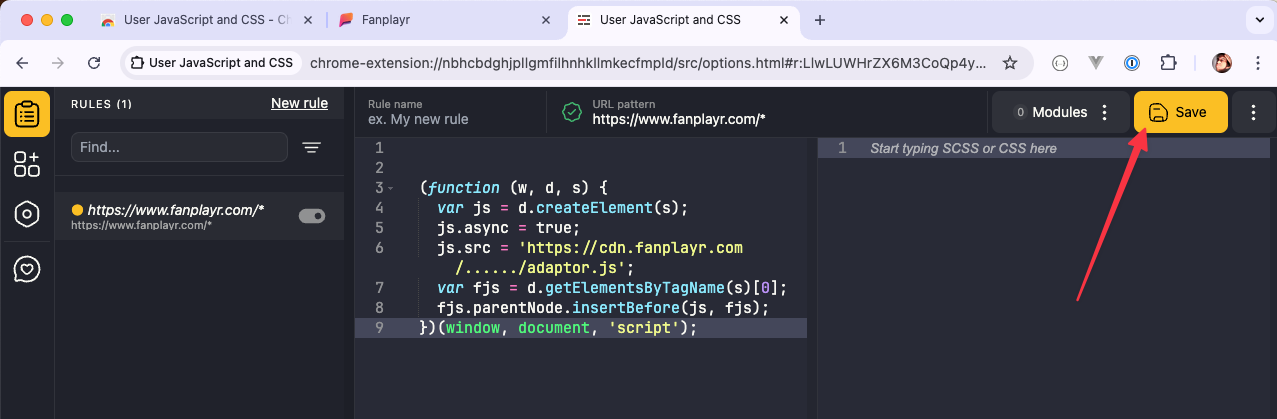 Clicking the "Save" button.
Step 4: Testing the JavaScript tag
Refresh the website where you want to test your JavaScript tag.
The JavaScript code should be executed.