Sync High Value Users to Facebook Custom Audience
This tutorial will describe the process of creating an Audience to synchronize your high value users with a Facebook Custom Audience.
Prerequisites
This guide assumes that you have an account with Facebook Ads and are capable of creating and managing Facebook Custom Audiences.
Step 1: Create Facebook Destination
The first step is to create a Facebook Custom Audience "Sync user with a specific custom audience" Destination in Fanplayr 360. Go to the Integration Catalog and find the "Facebook Custom Audience" integration. Click this to see all Source and Destination integration capabilities supported for Facebook. For this tutorial, select the "Sync user with a specific custom audience" capability by clicking "Add".
You will see a screen that looks like the image below in Figure 1.
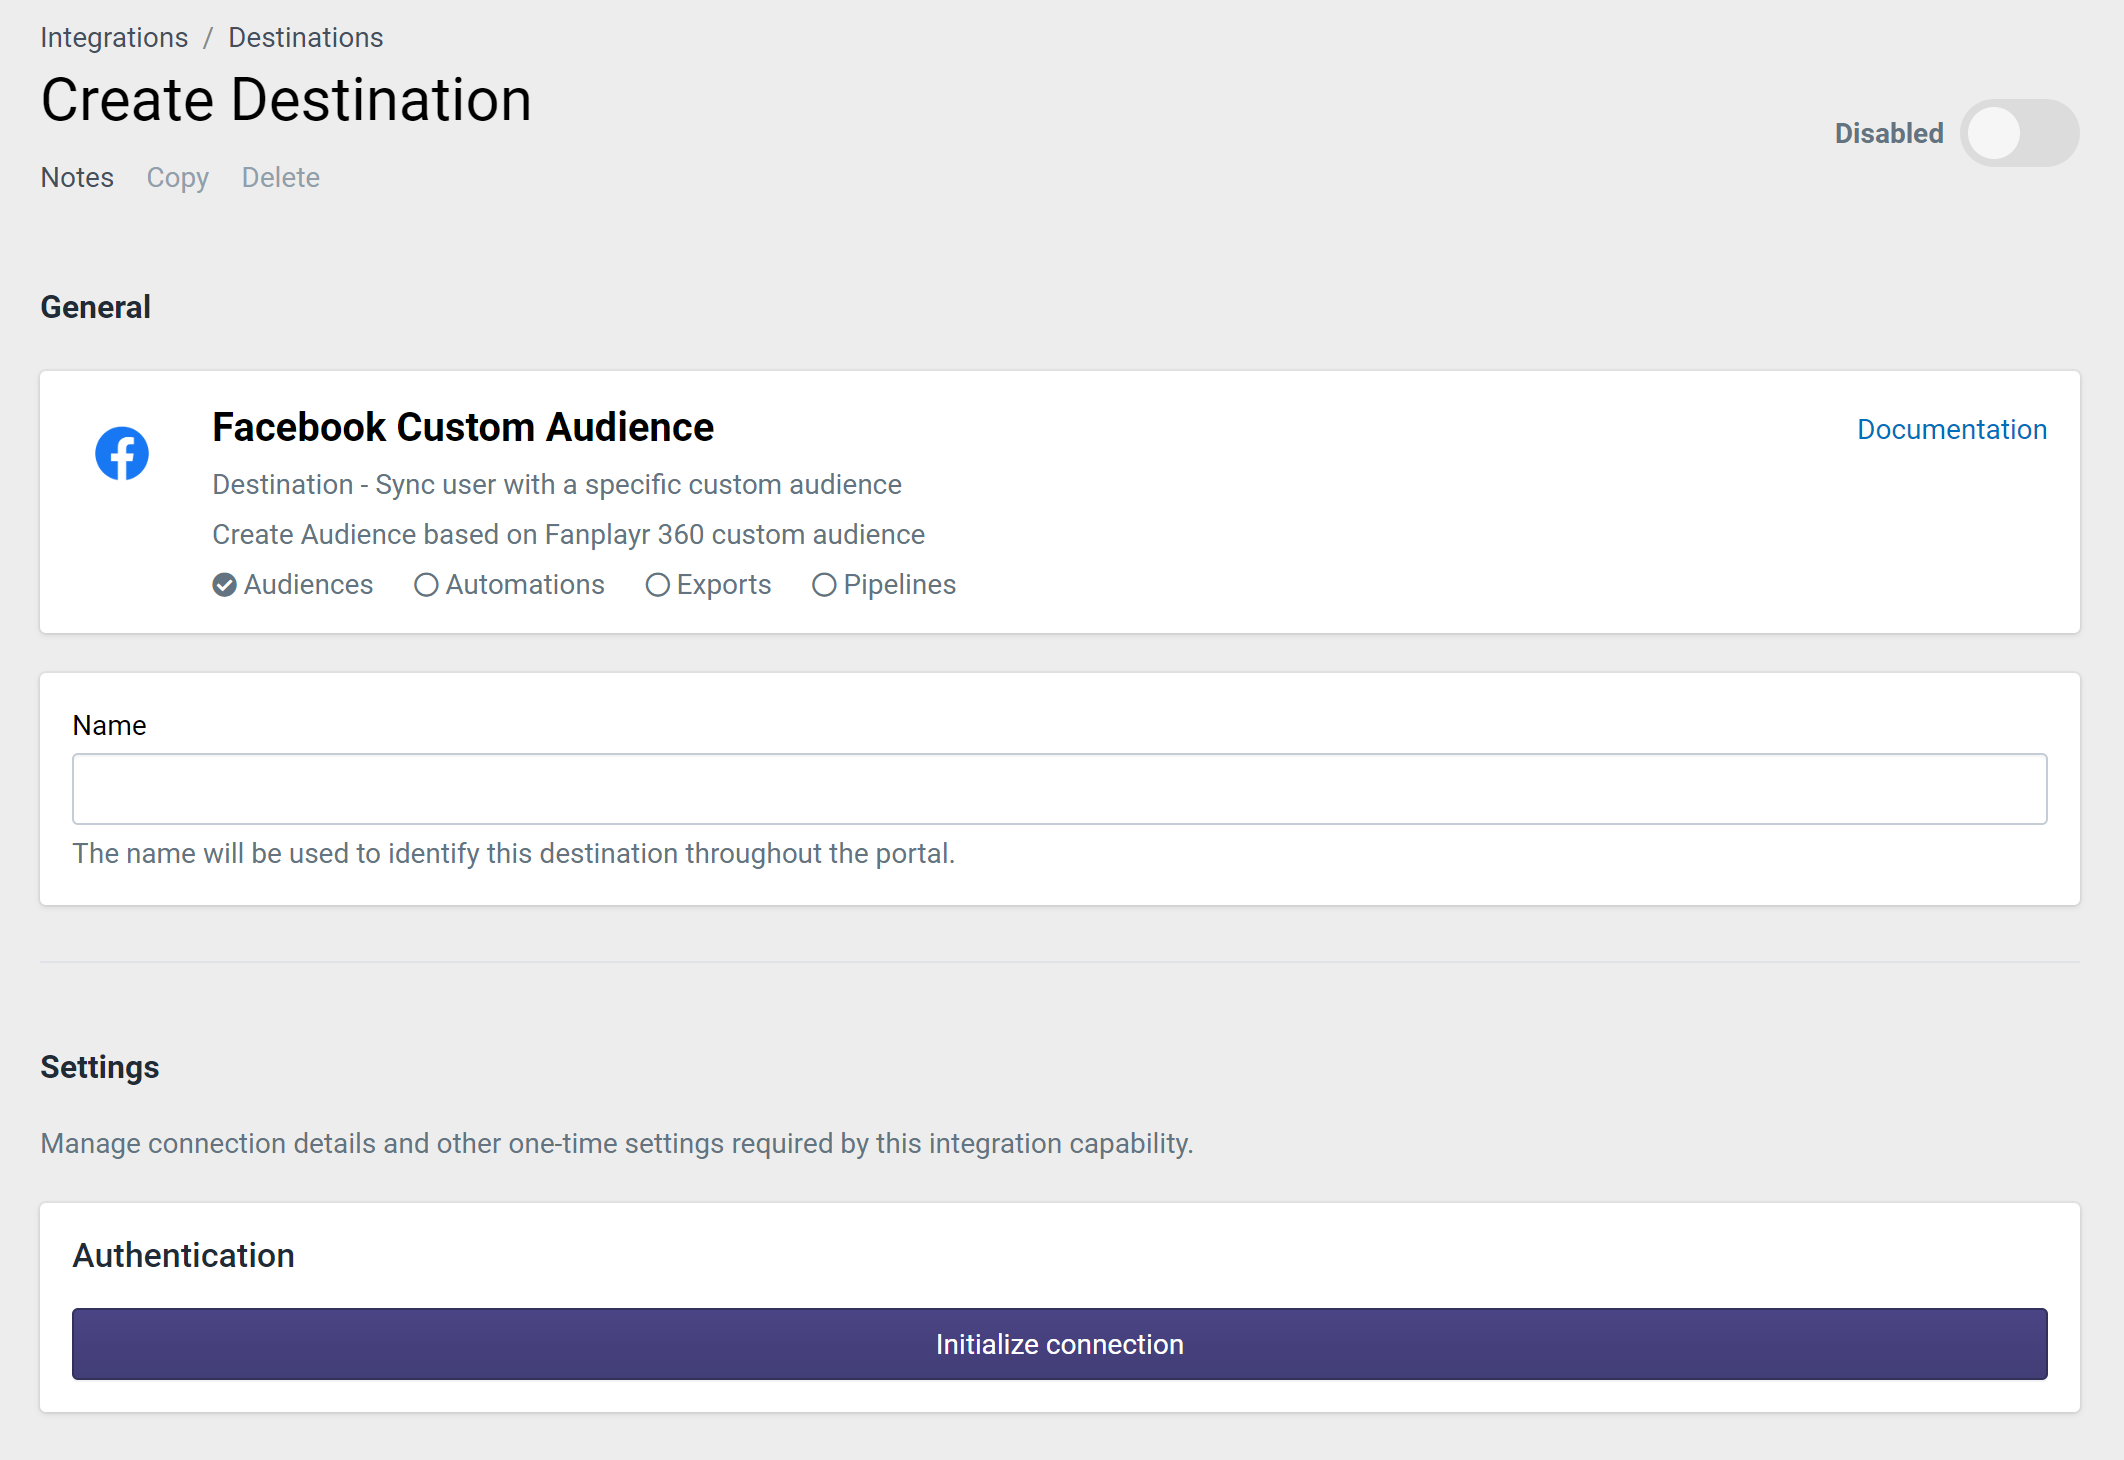
Figure 1: Destination Creation
Get started by entering a unique name for this Destination. For this example, we will refer to this Destination as "Facebook Audience Sync". Next, click "Initialize Connection". This will bring up a modal that instructs you to login to Facebook and give Fanplayr 360 the necessary access to modify your audiences. Click "Confirm" in the modal after you are complete.
After confirming, you will see the rest of the settings for this Destination (Figure 2).
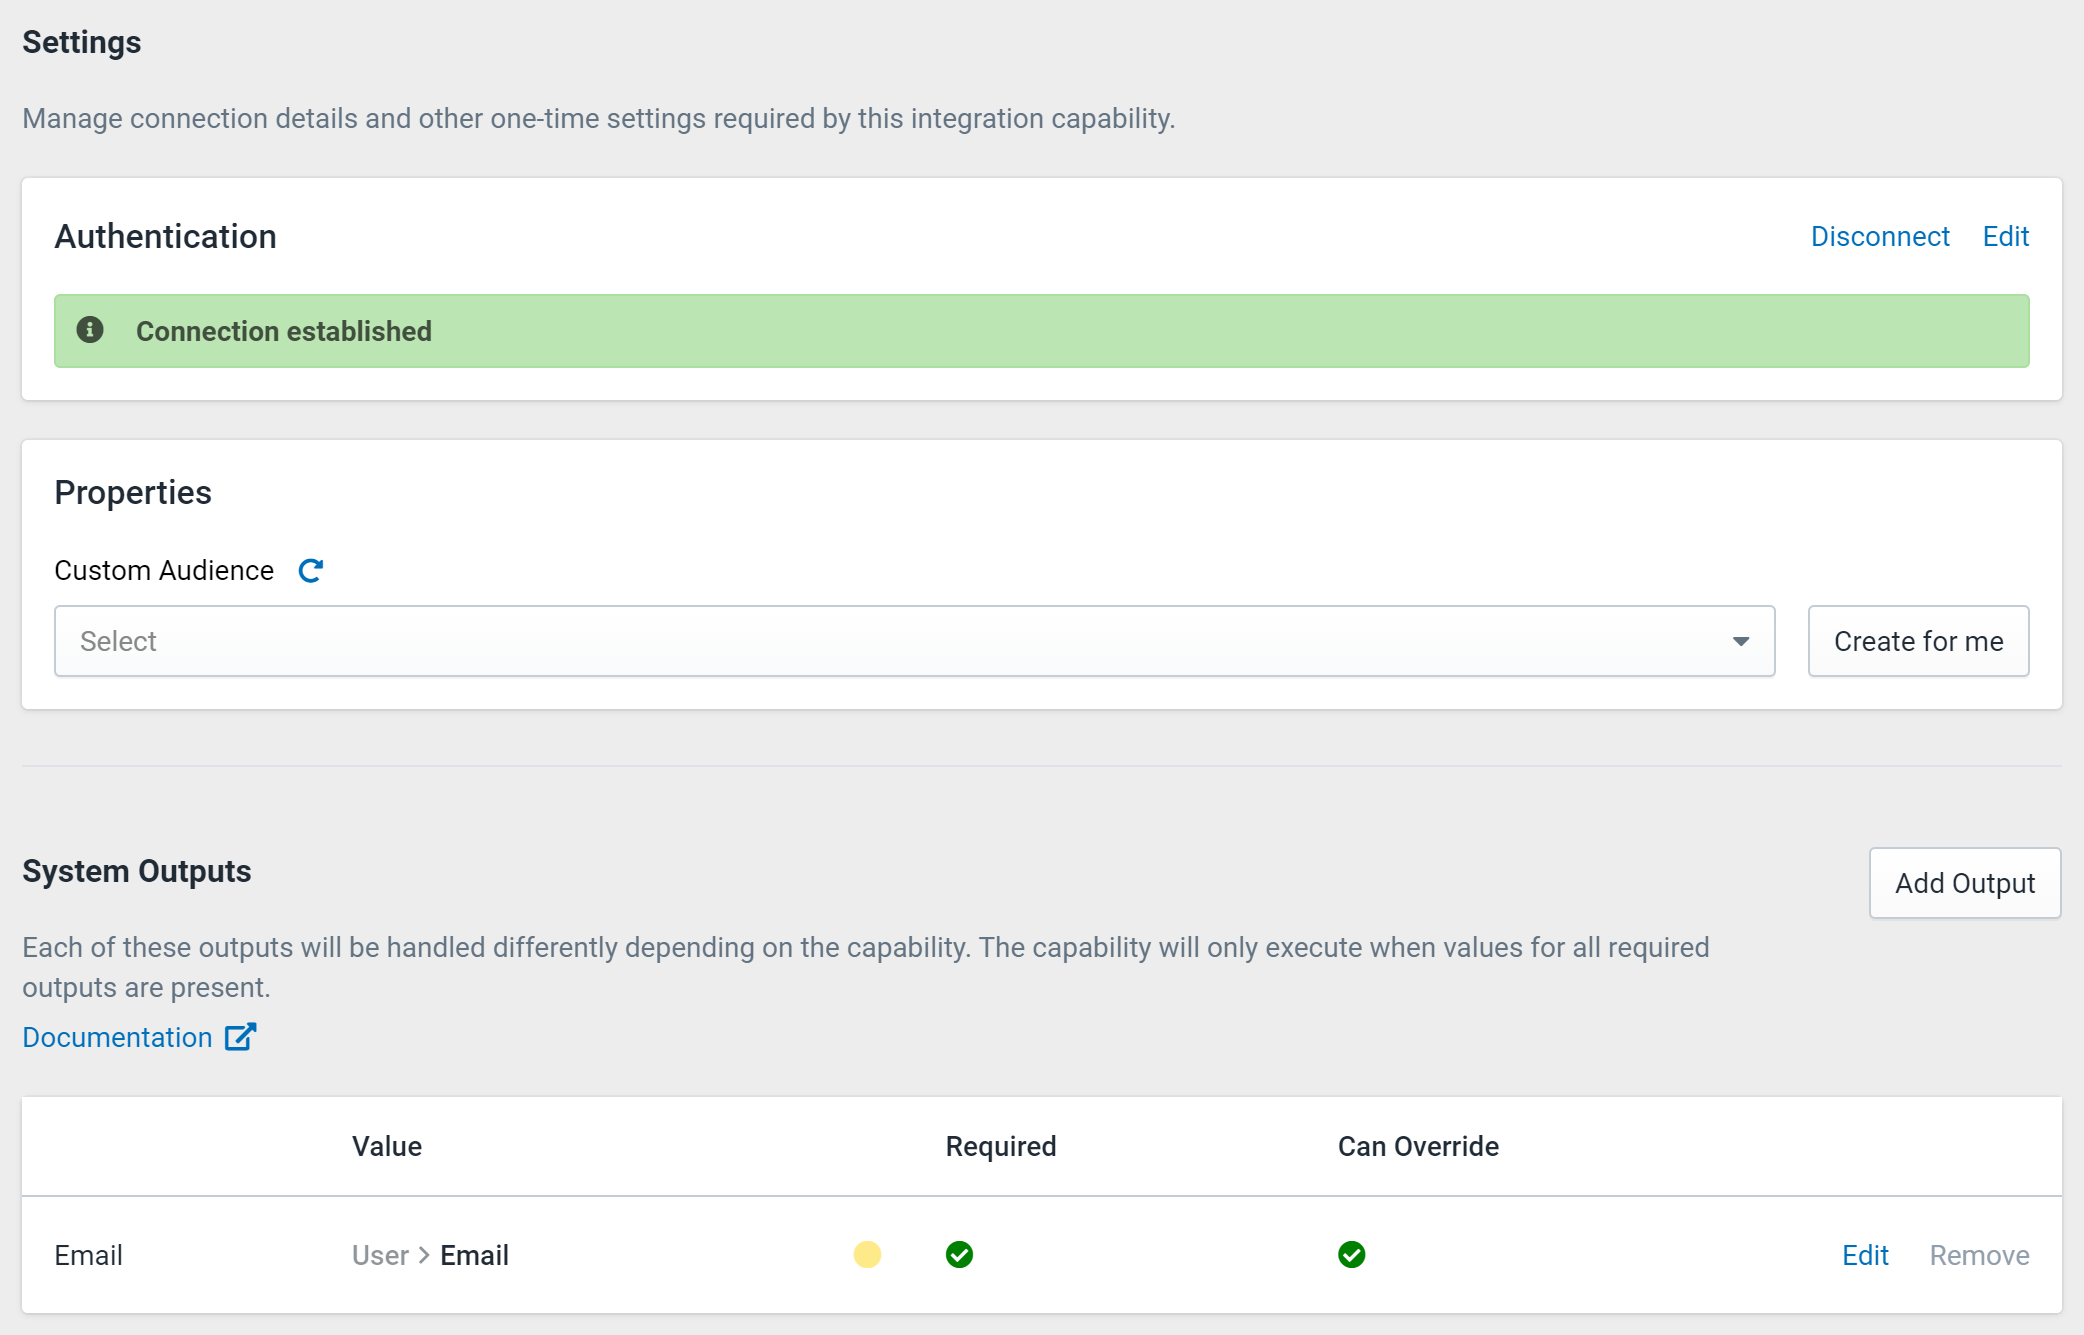
Figure 2: Destination Settings
There are two elements of these settings that are important for this Destination:
- Properties: These are required settings that are dependent on the Integration provider and specific capability. In this case, you have only one setting:
- Custom Audience: This is the Facebook Audience to connect to.
- Outputs: This section determines what attribute in Fanplayr 360 will be exported to Facebook. For the purposes of this tutorial, we will not change this from the default.
As for selecting a "Custom Audience" to sync to, you are able to choose an existing Facebook audience, but we recommend using the "Create for me" button to create a new Facebook audience here.
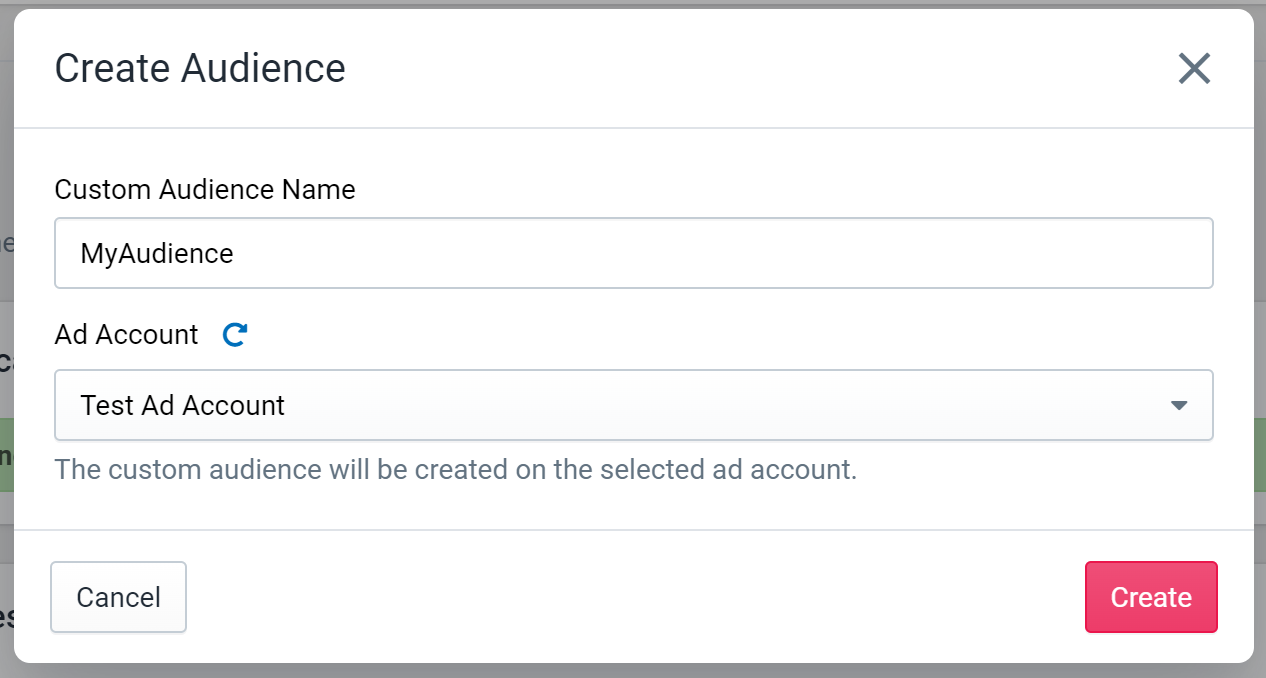
Figure 3: Create External Audience
After clicking "Create for me", you will see a modal with a few setup settings. Enter a name and specify a Facebook Ad Account. After clicking "Create", our system will invoke the Facebook API to automatically create an audience on your Facebook Ads account. Upon creation, the UI will automatically select the new audience in the "Custom Audience" property here.
Toggle the Destination to "Enabled", click "Save" at the top of the screen and move on to the next step.
Step 2: Determine High Value Filters
The next step in the process is to determine which type of users you would like to capture in your Audience. This research can be done directly in the Audience creation screen, but there are other places to see the users that would make up your Audience.
- Insights: Use the filters and graphs to gather high-level information regarding your subset of users
There are many ways to determine which users should be considered high value. Feel free to apply whatever filters you would like going forward, but we will use the following filter:
- Sum of Order > Revenue by User greater than 100
- Apply on events from last 365 days
In order to select the sum of order revenue by user, select "Order > Revenue" and click the top aggregation dropdown and change it to "Sum of revenue by user".
Once you are happy with your filters, move to the next step.
Step 3: Create Audience
The next step is to create your Audience and set the filters and Destination from the above steps. You can click "New Audience" from the Audience list or use the Audience creation link in Profiles/Insights. Set up your Audience to look like the screenshot below:
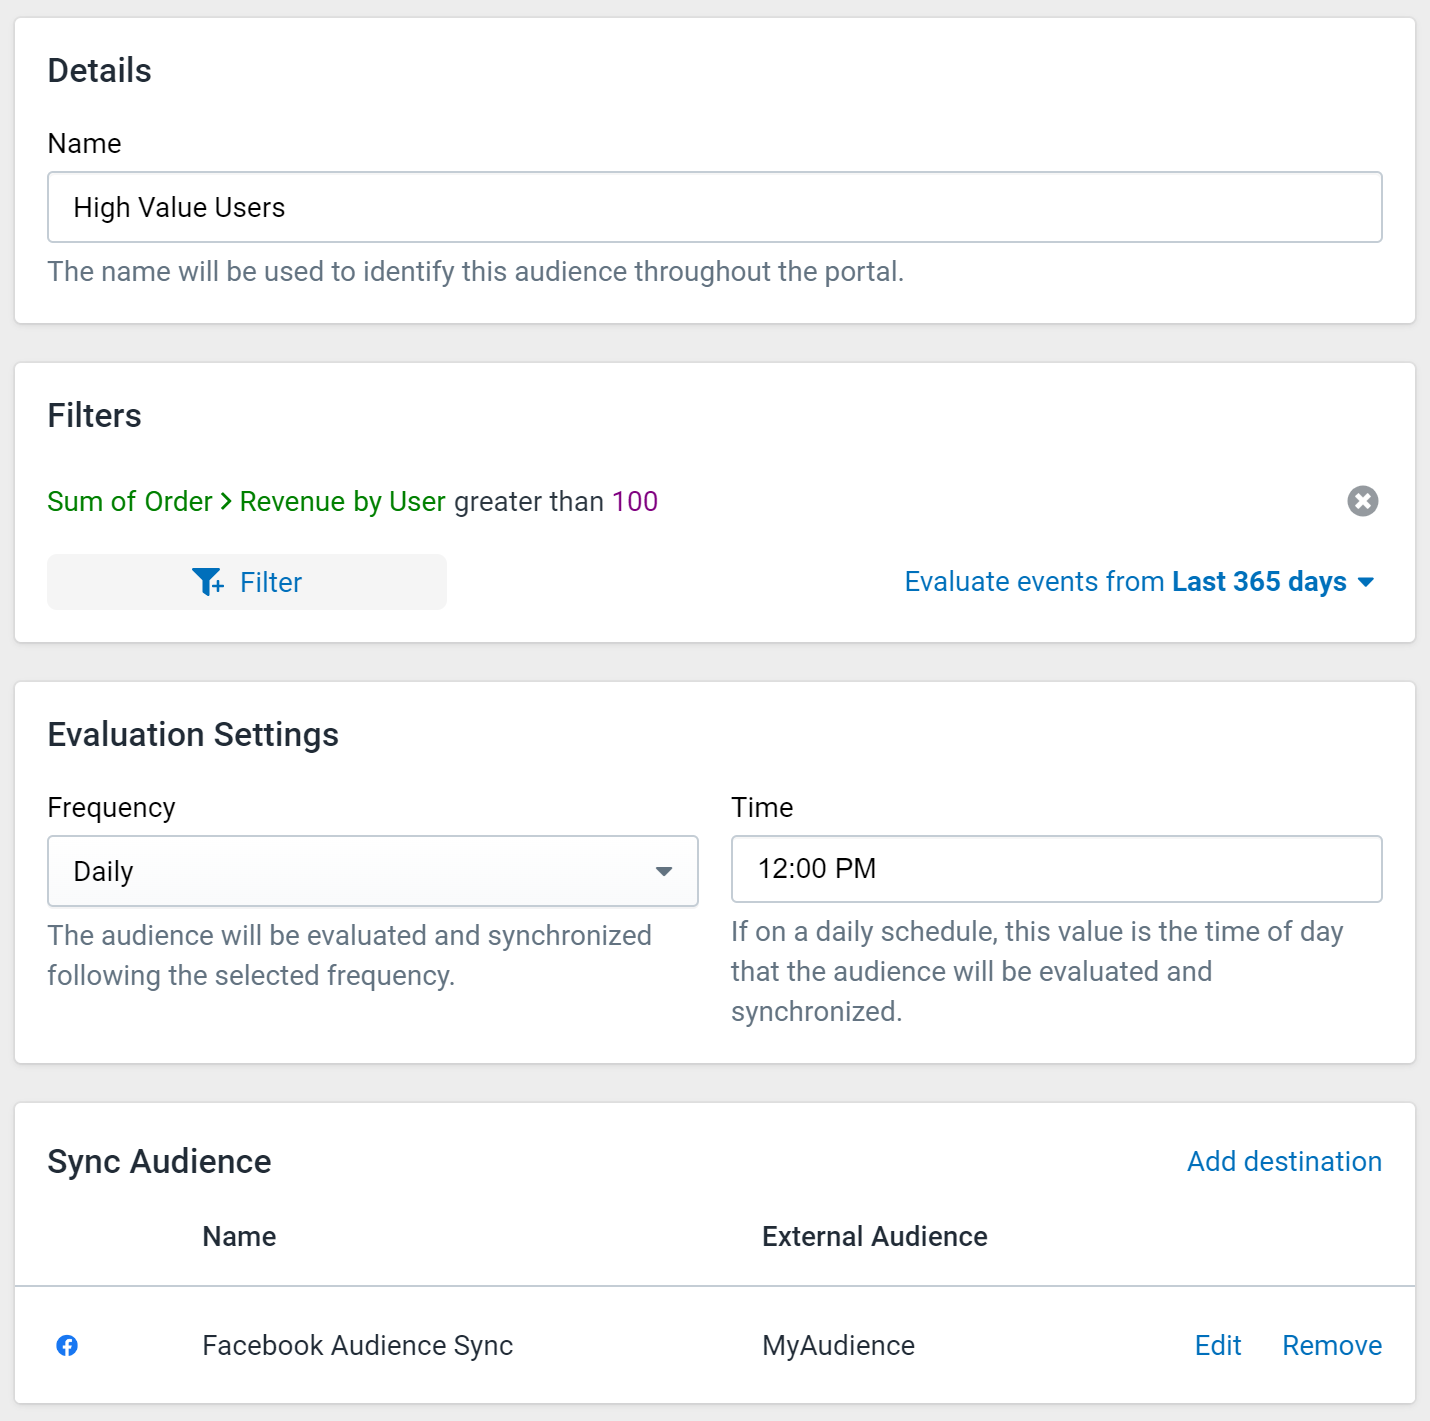
Figure 4: Audience Creation
There are four parts of Audience creation:
- Name: Assign the Audience a unique name.
- Filters: Assign the filters as determined in Step 2.
- Evaluation Settings: Decide how often you want the Audience to be re-evaluated and synced with Facebook (daily at noon by default).
- Sync Audience: Choose "Add Destination" to add the Destination and External Audience you created in Step 1 to this specific Fanplayr Audience. You can also create a new Facebook Custom Audience here, but we will use the one we created before as the External Audience.
Click "Save" at the top of the screen to finalize your Audience. Make sure the status toggle is set to "Enabled".
Step 4: Test
Once the Audience is created, the best way to ensure it is working properly is to manually trigger an evaluation.
Click on the Audience in the Audience list to view the editor. On the top-right side of the screen, you should see an "Evaluate now" button. Click this to trigger a manual evaluation of the Audience. After clicking, it may take a few minutes for your API to finish syncing users to Facebook. It could take up to 24 hours for Facebook to process all the user data (though this time could vary and is often shorter). Keep in mind that only users who have emails set in Fanplayr 360 will be synced with the Destination.
View the Audience documentation for more detailed information.