Editing
The Destination editor is where you customize the settings of a specific Destination. The editor can look very different depending on the integration provider or capability selected. The documentation here is based on a typical integration capability (Facebook Custom Audience). Generally, the editor is split into three sections: General, Settings, and Output.
Many of the same actions available in the Destinations list are available in the editor as well, like copying and enabling/disabling. View the list documentation for more information.
Enabling + Disabling
When you create a new Destination, it is initialized as disabled. To enable a Destination click the toggle switch at the top-right of the screen. You can enable or disable a Destination at any time.
Disabled Destinations will not appear as selectable options in Automations, Audiences, and Exports.
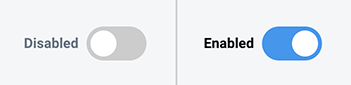
Figure 1: Status Toggle
INFO
If a disabled Destination is still referenced by an Automation, Audience, or Export, the Destination will not be invoked. For example, if an Export is scheduled to send data to a disabled Destination, the data will not be sent.
General
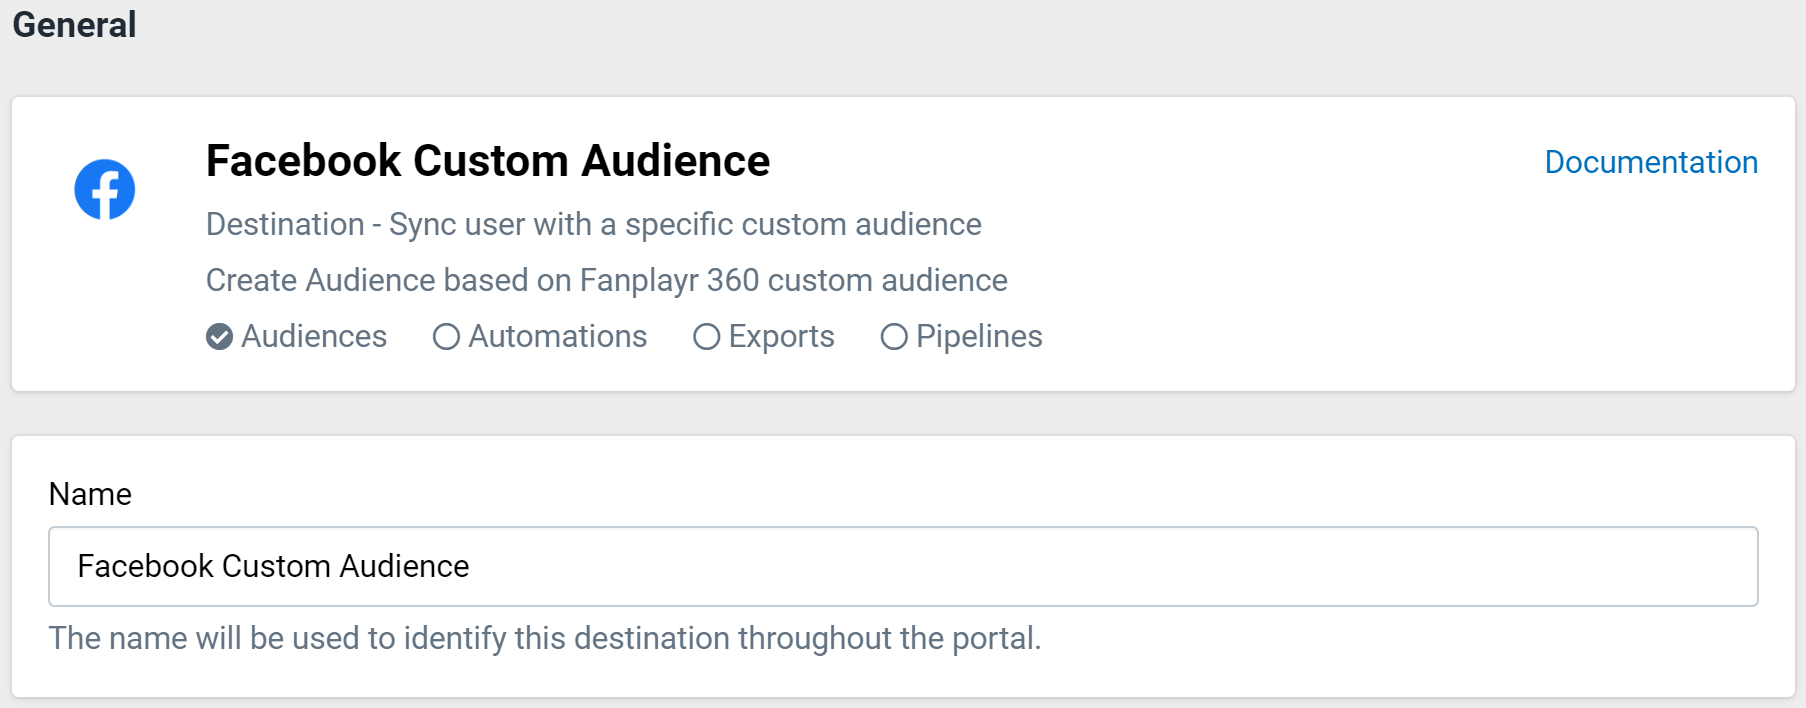
Figure 2: General Section
The "General" section of the editor shows some simple information about the integration provider and capability of the Destination. Additionally, it displays the Fanplayr 360 features that can use this Destination (depending on the capability / integration).
As with the other features, the name chosen uniquely identifies the Destination throughout the portal.
Settings
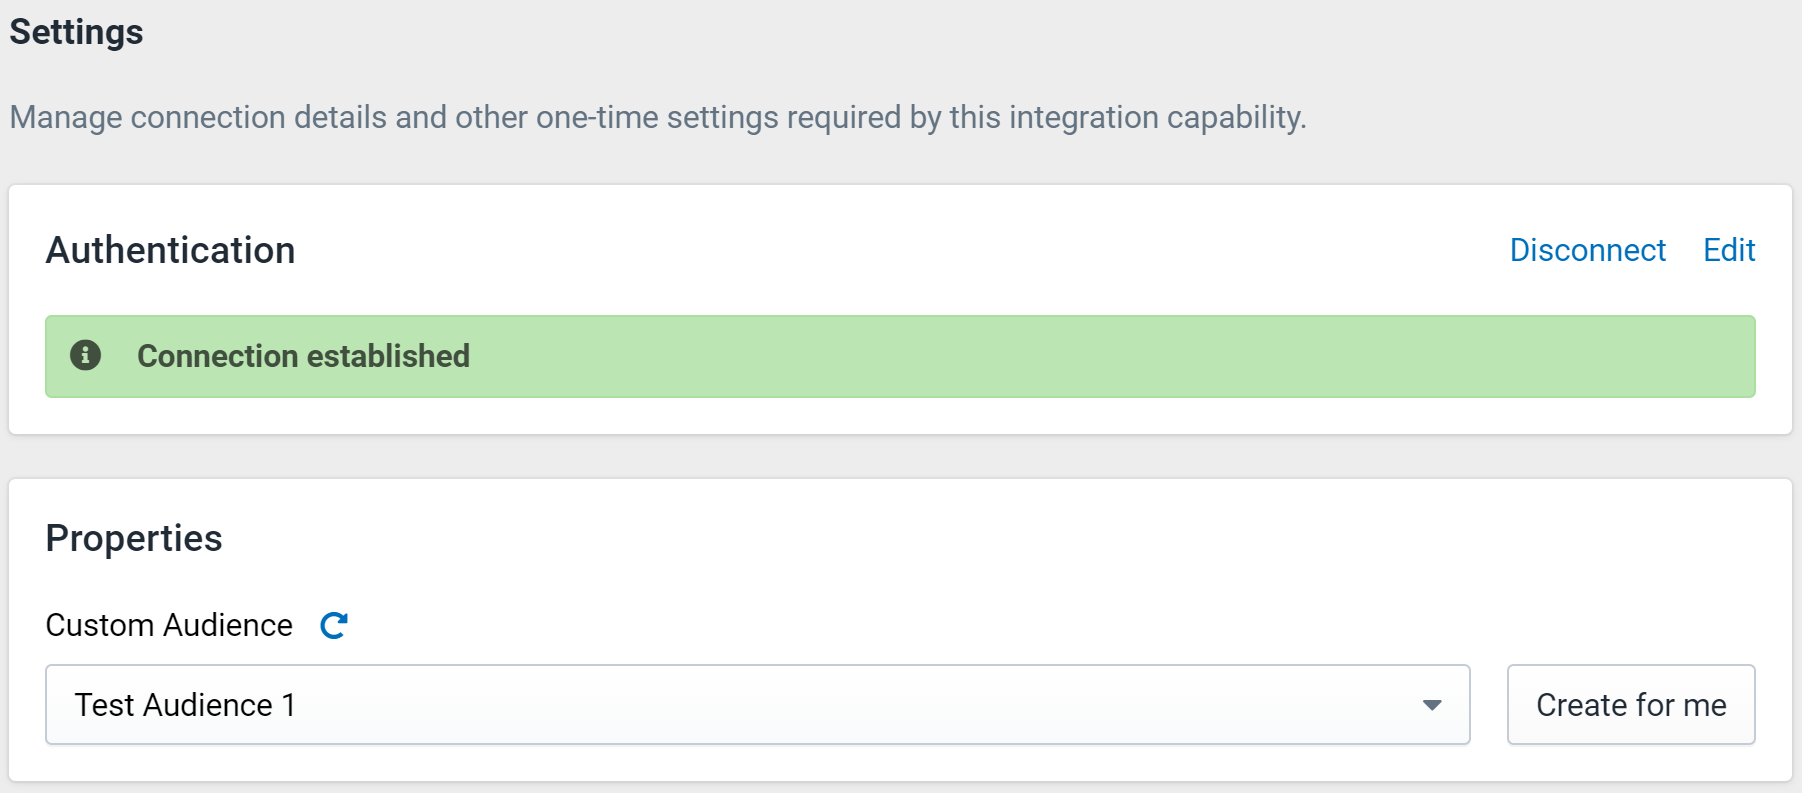
Figure 3: Settings Section
This section is reserved for specific settings that relate to connecting with and using the integration provider's capability. In the example in Figure 3, this capability requires connecting to Facebook via an OAuth2 authentication process.
The "Disconnect" button is available for saved destinations. When clicking "Disconnect", Fanplayr 360 will completely remove all of your authentication settings for this destination from our system. The destination will also be disabled and cannot be re-enabled until the connection is re-established.
Since the example above involves sending data to a Custom Audience, you must also select an Audience from Facebook in the "Properties" sub-section. This area generally contains settings specific to the integration provider. Some integrations also support the ability to add "Custom Properties", these properties are simply key/value pairs that are passed to the third-party system with every invocation. These custom properties are static and are always interpreted as string values.
Editing Authentication
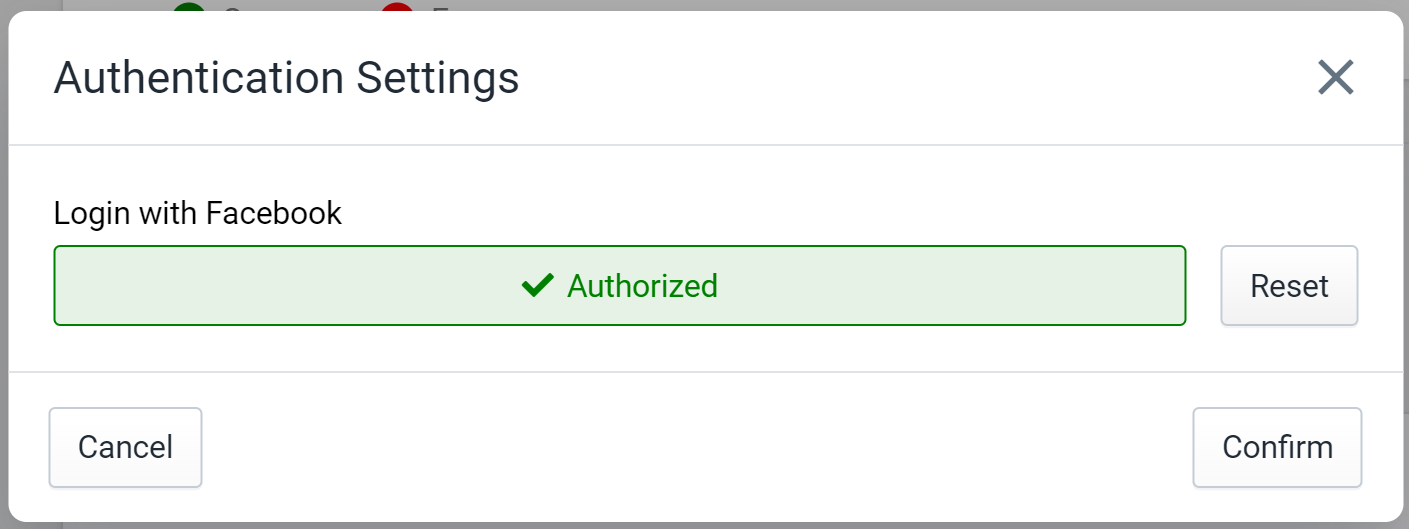
Figure 4: Editing Authentication Settings
When editing or creating authentication settings on a Destination, you will see a popup similar to Figure 4. This is where the OAuth2 flow is completed, API keys are entered, or other details are configured. Upon clicking "Confirm", the system will validate the settings.
Outputs
Outputs are broken into two sections: System Outputs and Custom Outputs.
- System Outputs: These are pre-defined outputs that the integration understands implicitly and often handles in a special way that may be unique to that integration. System Outputs often include outputs like "User ID", "Event Time", or other basic properties.
- Custom Outputs: These are generic integration outputs, in which you have to choice to output any arbitrary event or user attributes. Not all integrations support Custom Outputs. For example, you may want to send cart information to the third party system upon each invocation.
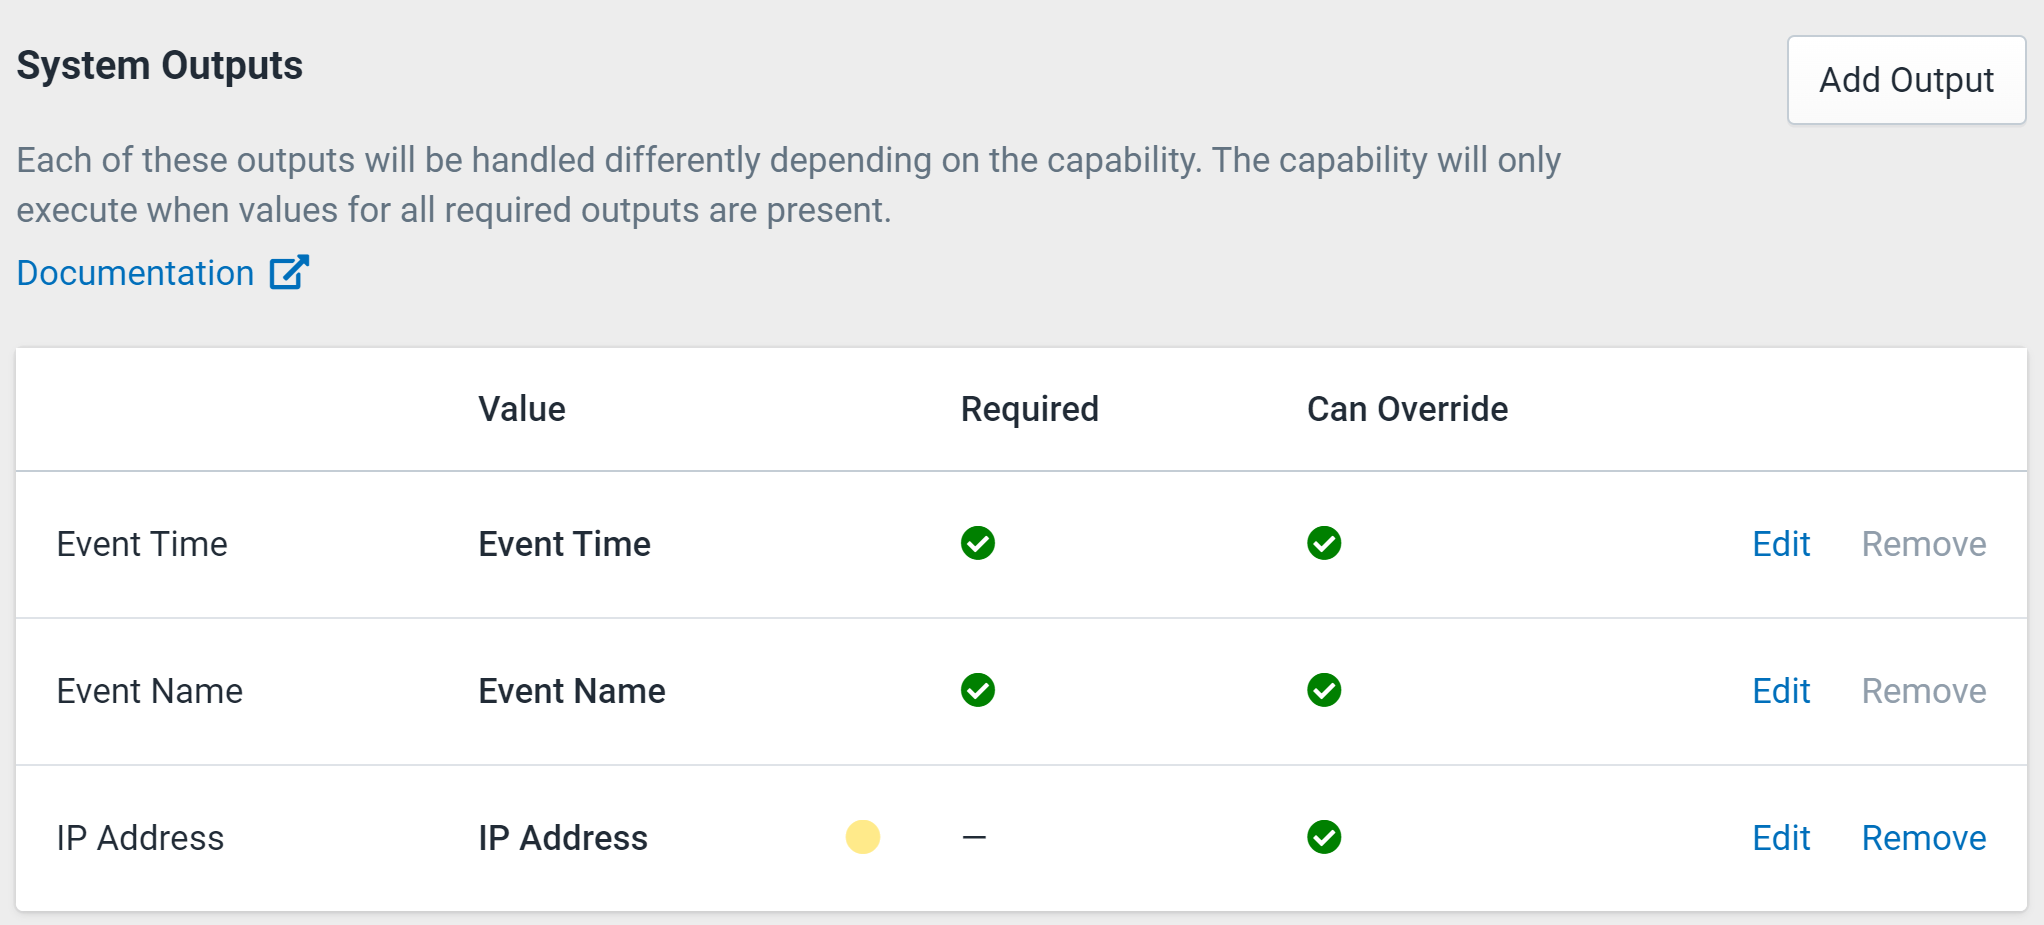
Figure 5: Outputs Section
Figure 5 shows an example of System Outputs for the Amplitude destination integration. From the list, you are able to add an output via "Add Output", remove an output via "Remove", and edit an output's settings via "Edit". Clicking "Edit" will bring up the editor shown in Figure 6.
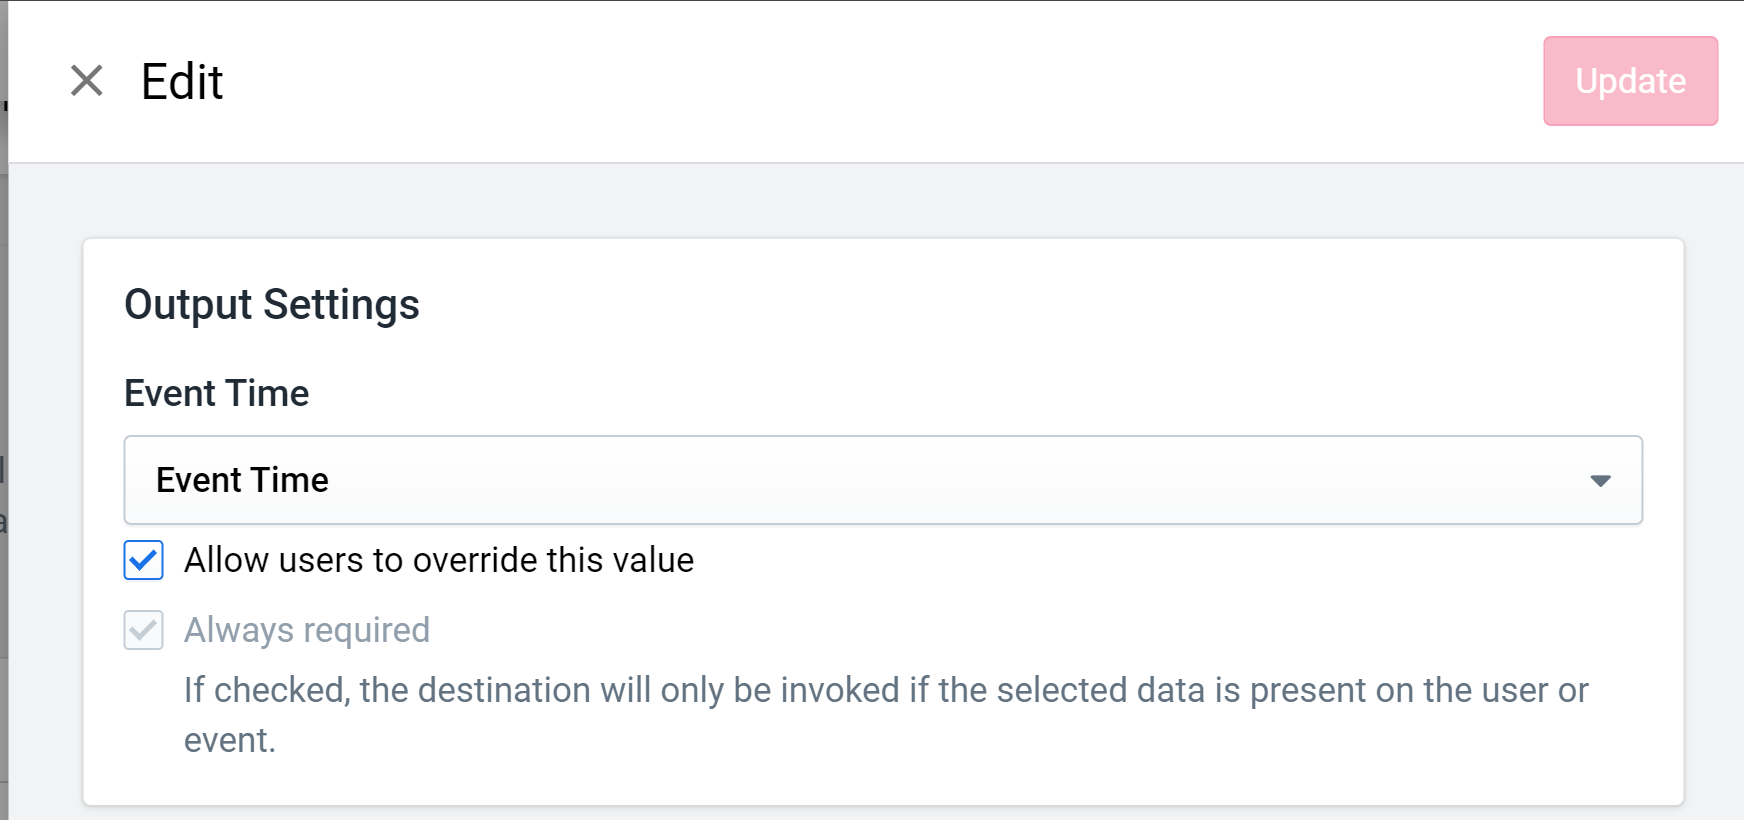
Figure 6: Editing Output
Output supports the following settings:
- Variable Name: This is the key or alias used for the output. For System Outputs, this value cannot be changed, and therefore is only applicable for Custom Outputs.
- Fanplayr 360 Attribute: This is the dropdown where you can select which Fanplayr 360 attribute to use as the value for the variable when the Destination is invoked. This value is editable using a similar attribute select as in Insights. For both System Outputs and Custom Outputs, the value selected here can be a Semantic Object like "Product" or "Order".
- Remove Button: This is how you remove the variable from the list of outputs. This action is disabled if the output is required in order for the integration to work.
- "Allow users to override this value": If this box is checked, then the user attribute selected for the attribute can be overridden when used in an Automation. This means that the same destination can be used in multiple places, but the exact attribute used can be different depending on the specific use case.
- "Required": If this box is checked, the output is marked as required. When this Destination is invoked and the selected user attribute value is missing, no data will be sent to the destination integration for that user. This tells Fanplayr 360 that specific outputs are imperative to the Destination's function, and there is no point invoking if these are not present. Default outputs, like
Event Timein Figure 5, will be marked as "Always Required" in this part.
Consent
Most selectable output attributes refer to exact user attributes, like email and name. However, it can be useful to output values that the user has provided explicit consent using the Consent API.
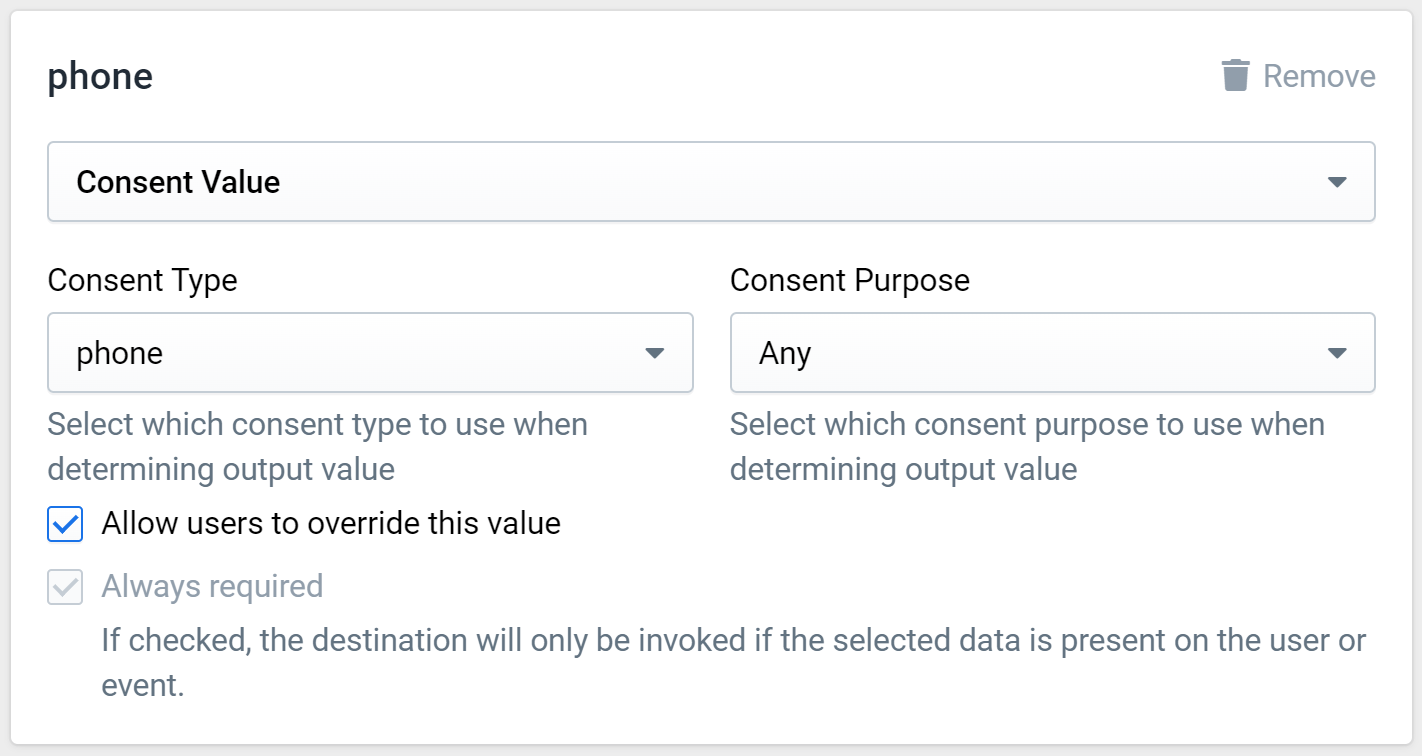
Figure 7: Consent Value Output
If you selected "Consent Value" in the output selection field, you will be met with two additional fields to select "Consent Type" and "Consent Purpose". When evaluating the output value in Figure 5, the system would look for any consented value with the type "phone" and any (or no) purpose/topic.
This is in contrast to selecting simply "User -> Phone" in the output as that would not apply any consent determination logic to the destination.
If you would like to ensure that the value sent to the destination has received explicit consent, use the "Consent Value" output. This is perhaps most useful for SMS and email destinations.
Destination References
Destinations can be used in Automations, Audiences, Exports, and Pipelines. It is important to know how changes to an active Destination affects any of the entities that reference the Destination.
Audiences / Exports
Audiences and Exports both use the latest Destination details when evaluated. In other words, any changes to a Destination will immediately impact the next evaluation of an Audience or Export.
Automations / Pipelines
Automations and Pipelines reference destinations in a slightly different way in comparison to Audiences and Exports. When using a Destination as an Automation action, the state of the Destination at the time of the node's creation is saved on the Automation. Similarly, when a Destination is used in a Pipeline, the state of the Destination at the time of the Pipeline's creation is saved on the Pipeline. This is primarily because Automations and Pipelines allow for certain Destination settings to be overridden (if allowed in the Destination).
This means that changes to a Destination will not be propagated to your Automations or Pipelines automatically, except for changes to the connection settings. Since connection settings are not editable in a Pipelines or Automation node, the connection settings at runtime are determined by the current state of the Destination.
Learn more about Automations and Pipelines.