Filtering Data
Filtering allows you to zero in on exactly the data you need to analyze. In Insights, you can apply filters at both the query level (via the Playground) and the dashboard level, depending on your workflow.
Overview of Filters
Filters can be added to refine datasets based on specific field values or conditions. This helps you isolate user behavior patterns, segment data, or exclude noise for more meaningful analysis.
How to Add a Filter
 Editing Filter
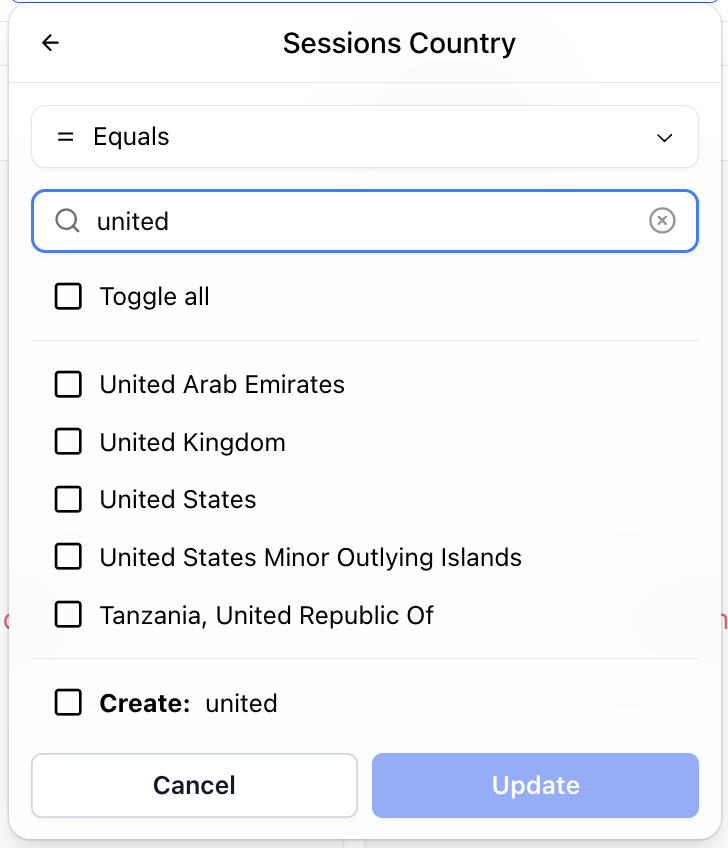
To add a filter:
Click the "Add Filter" button (or filter icon).
Select the dimension or field you want to filter.
Choose an operator (e.g., equals, contains, greater than).
Provide a value to filter by, either by selecting from a suggested list or typing it manually.
TIP
If your desired value doesn’t appear in the list of suggestions, try typing it into the search bar. If it still doesn’t appear, you may have the option to create a new value to filter against, depending on the field type.
Grouped Value Selector
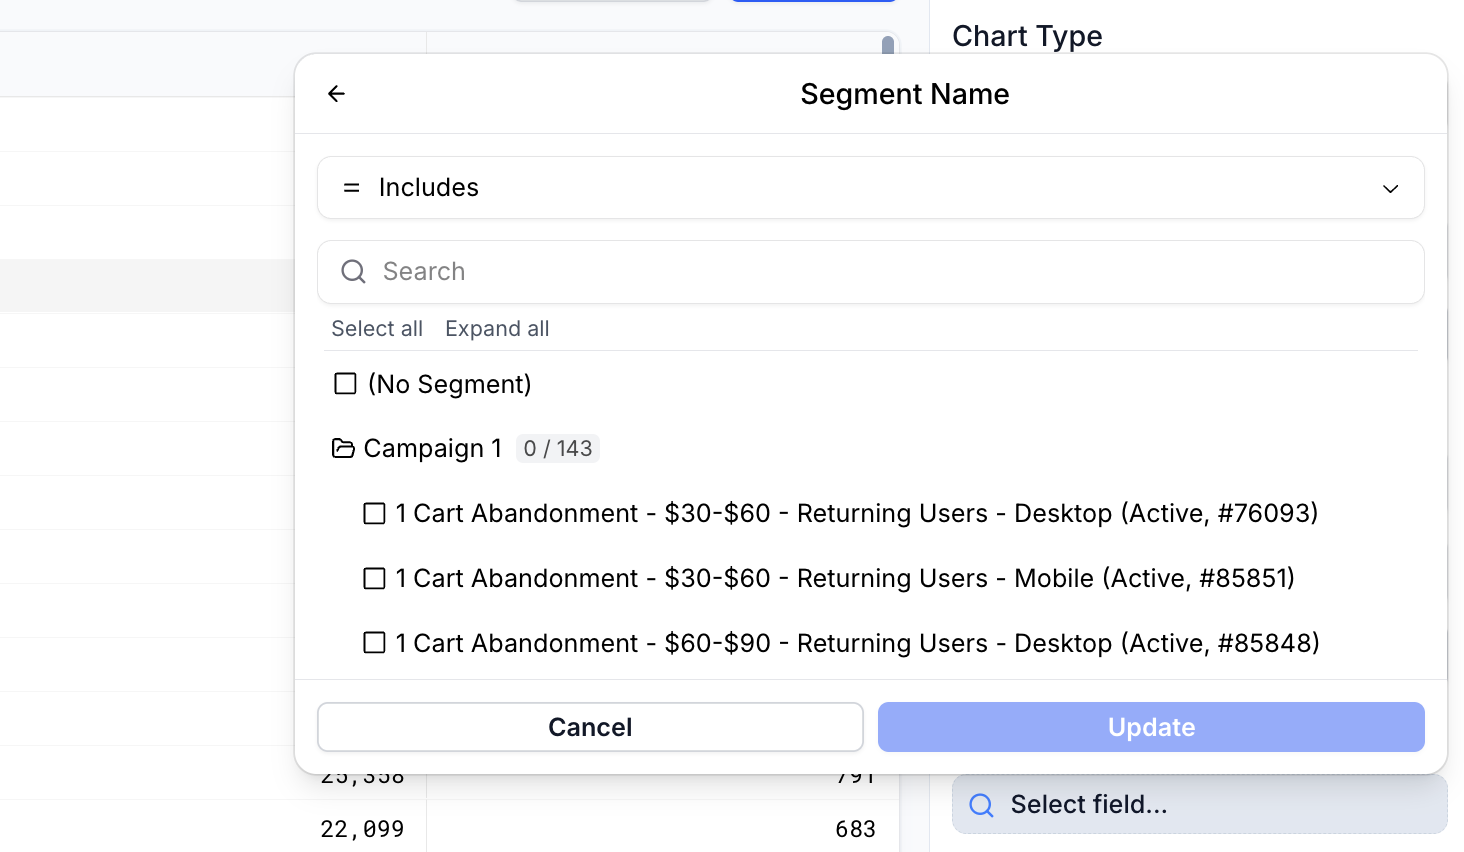 Grouped Value Selector
Some filter values will be grouped for ease of selection. Generally, this is done for campaign items like "Segments" and "Offers" which can have duplicate names across campaigns.
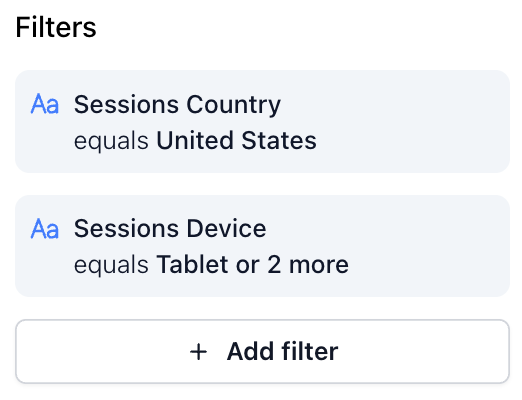
Filter Logic
Multiple values for a single filter (e.g., Country equals Mexico or Canada) are treated with an "OR" condition. This means the data will match any of the selected values.
Multiple filters across different fields (e.g., Country = Canada AND Device = Mobile) are combined using an "AND" condition. This means a row must meet all filter criteria to be included.
Date Range
Any filters are combined with the dashboard / query date range to achieve the final results. You can select a relative date range (last 30 days) or an exact date range (Dec 1 - Dec 20). Date ranges are always inclusive of the first and last days of the range, meaning that a range of Dec 1 to Dec 20 would include data on December 1st and December 20th.
When using a relative date range (last 30 days), the range does not include today's data (ends with yesterday). This is due to the fact that today's today is incomplete and could skew daily data analysis.
The selected date range is applied to your data using the session's end time. This means that only data from sessions within the data range will be returned. A byproduct of this is that certain data that occurred outside the date range can be included in the result set if its linked session occurred within the range. Examples include orders, widget information, web push statistics, and more.
See Playground: Comparision Period for information on how you can compare date periods.
Filtering in the Playground
 Playground Filters
The Playground provides a flexible space to explore data with custom filters.
Use the right sidebar to add filters to your query. This functionality is supported for most chart types.
Use the date range editor at the top of the screen to define the time period for your query.
Filters and date ranges set in the Playground are saved with the query, whether it's a saved standalone query or part of a dashboard.
See Interaction with Query Filters for how these interact with dashboard-level filters.
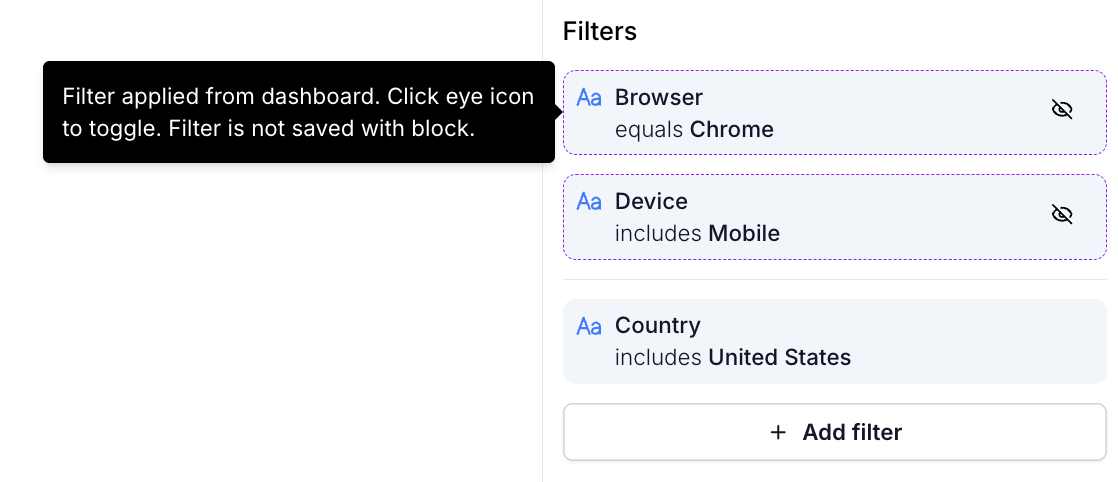
Dashboard Filter Inheritance
After you click on a block in a dashboard to edit, the playground will automatically inherit the date range and filters applied to its parent dashboard. This is done so that the data in the playground will match what you were just viewing in the dashboard. The filters will be shown slightly different than typical block filters and are not saved to the underlying block.
The date range from the dashboard, however, will be applied to the block in this case and does change the underlying block's date range, meaning that saving the block will update the block's default date range.
 Dashboard Filter Inheritance
Filtering in Dashboard
 Dashboard Filters
Dashboards allow for filters that apply globally to all queries and visualizations within them.
Use the dashboard filter editor at the top of the dashboard to define shared filters.
Similarly, set a global date range for the dashboard using the date range editor.
INFO
Filters applied at the dashboard level are not saved when the dashboard is saved.
Interaction with Query Filters
Understanding how query-level and dashboard-level filters work together is key to building accurate dashboards.
Date Range
- If a non-default date range is set at the dashboard level, it will override any date range defined in individual queries within that dashboard.
Filters
Dashboard-level filters are combined with query-level filters using an "AND" condition.
This means the data shown must meet both the filters defined in the individual query and any global dashboard filters.
Saved Views
Saved Views let you quickly switch between different filtering and date configurations on a dashboard — ideal for recurring use cases, segmented audiences, or role-specific reporting needs.
 Saved View
What is a Saved View?
A Saved View captures the current dashboard-level filters and date period settings. Think of it as a snapshot of your current filtering context that you can return to at any time without altering the underlying dashboard structure.
This is especially helpful when:
You regularly analyze the same dashboard for different segments (e.g., regions, product lines, user cohorts).
You want to create a reusable view tailored to a specific time range or business scenario.
You’re collaborating with teammates who need access to consistent, pre-defined perspectives on the data.
Accessing and Managing Saved Views
Saved Views are available via the dropdown menu on the left side of the dashboard filter bar.
Use this menu to:
Switch between existing saved views.
Reset to the default dashboard view.
Create a new view based on your current filter and date configuration.
Update an existing view.
Creating or Updating a View
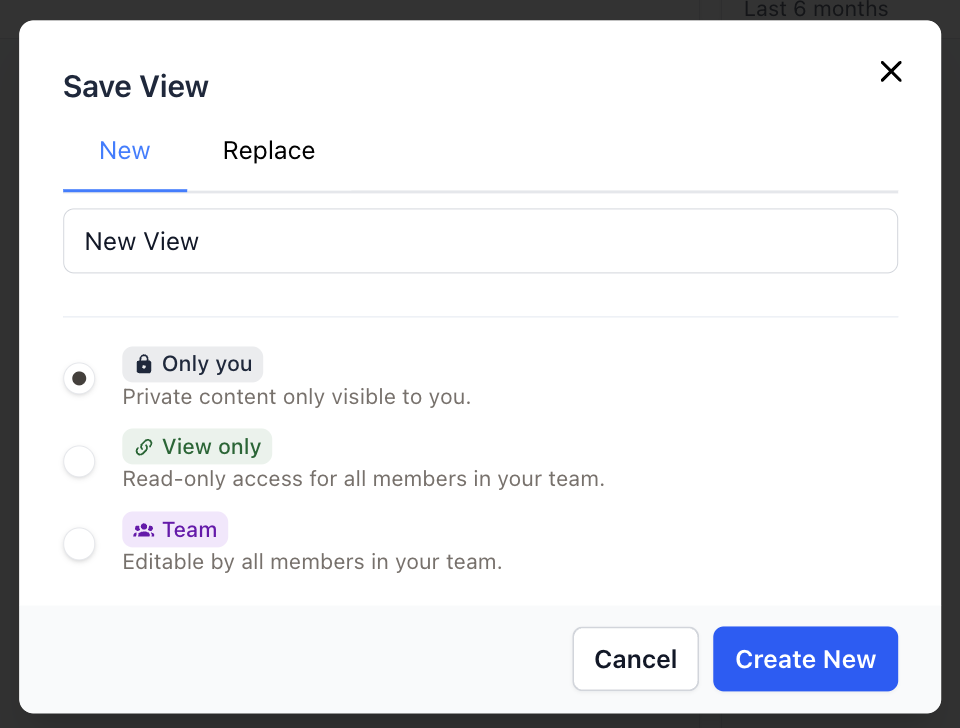 Creating New Saved View
After you've made changes to filters or the date period:
Click "Save" at the end of the filter list.
Choose to either:
Replace the current view (if you're modifying an existing one), or
Save as a new view (to preserve your current view and create a new one).
Choose the access level of the view
View Access
Like dashboards and queries, Saved Views support access controls:
- Account - All members of your account can use and edit the view.
- View only - All members of your account can see and use your view (but not edit).
- Only you - View is only visible and editable by you.
INFO
The view's access level can only be edited by the creator of the saved view.